As the temperature drops, there's nothing more comforting than wrapping up in a cozy scarf you’ve made yourself. Whether you’re strolling through chilly streets or adding a stylish touch to your winter outfit, a free crochet scarf pattern offers the perfect chance to create something both practical and fashionable.
With endless options for textures and colors, you can effortlessly match your scarf to any wardrobe or occasion, think layered over a coat for warmth or draped casually indoors for style. Beyond its versatility, crocheting your own scarf is a relaxing and satisfying way to pass time while honing your skills.
Vibrant Crochet Scarf Pattern to Refresh Your Winter Wardrobe
Skill Level
Intermediate – This pattern involves relief stitches, working with double crochets, forming a braid pattern, and sewing a folded pocket.
Materials
- Yarn:
- Gazzal Baby Wool XL (used in this design).
- Weight: DK/light worsted.
- Composition: 40% Lana Merino wool, 20% cashmere-like polyamide, 40% acrylic.
- Length: 50g per skein, 100m.
- Color: Any preferred shade.
- Required quantity: 3 skeins.
- Hook:
- Size 4 mm (US G/6 crochet hook).
- Other Supplies:
- Scissors.
- Tapestry needle (for weaving in ends).
- Optional tag (for personalization).
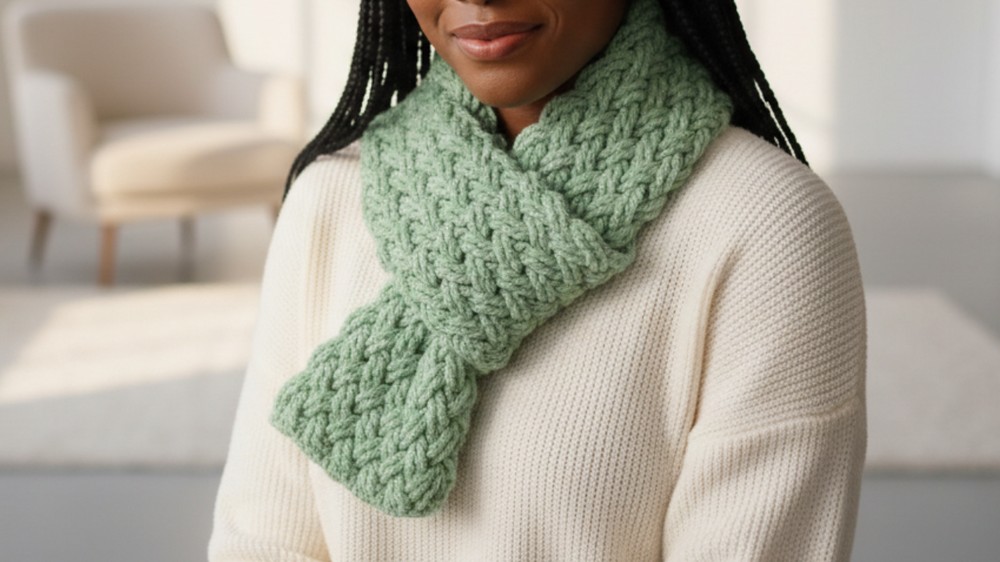
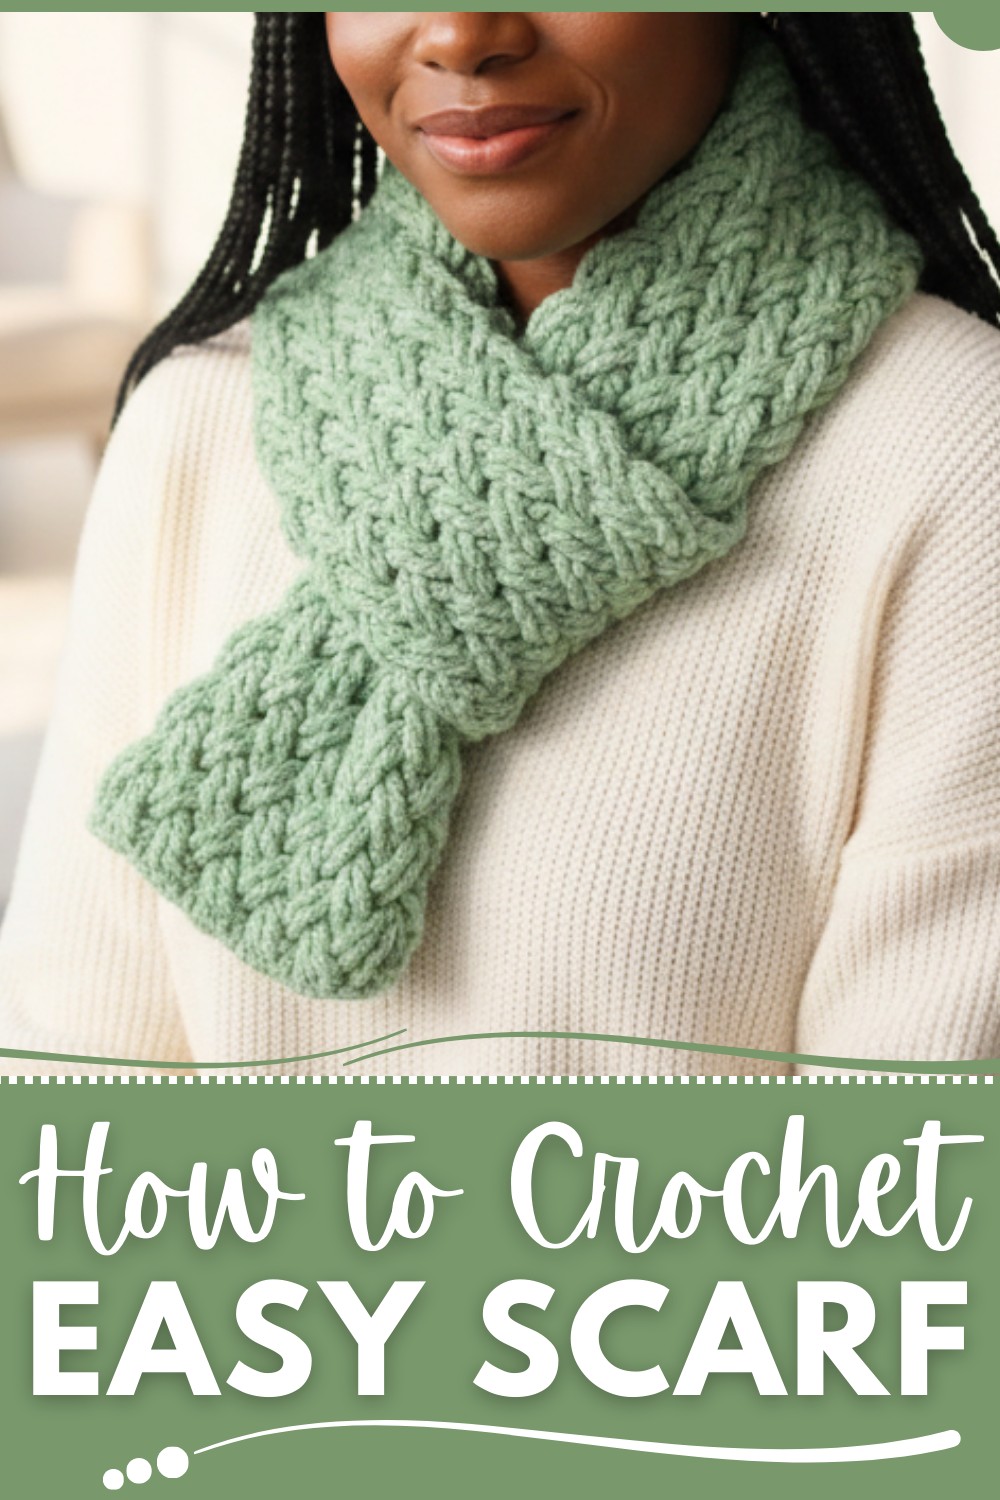
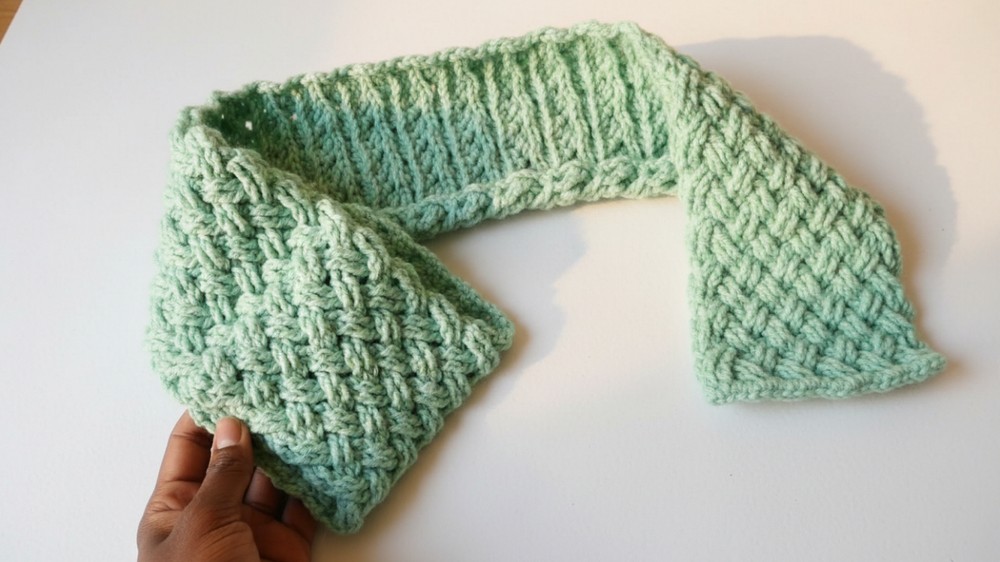
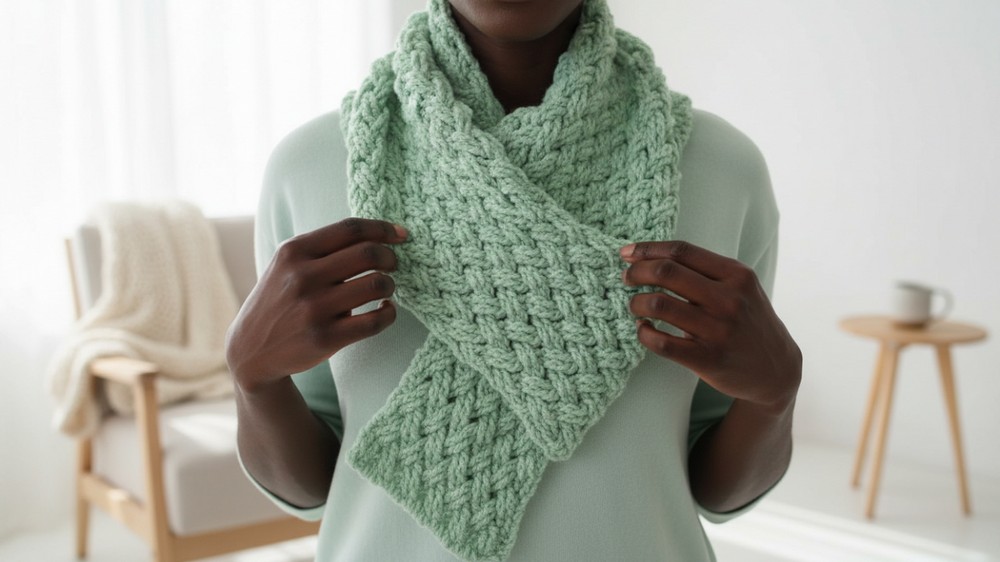
Child’s Braid Crochet Scarf Pattern
This cozy and stylish scarf features a braided texture with a clever built-in pocket to hold the scarf’s tail. The scarf is designed with structure and warmth in mind and is perfect for keeping little ones cozy on chilly days.
Gauge
- 16 stitches x 12 rows = 4 inches in double crochet.
(Gauge is not critical for this project as it is primarily based on desired dimensions.)
Finished Size
- Width: 12 cm (4.7 inches).
- Length: 67 cm (26.37 inches).
- Pocket length: 12 cm (4.7 inches).
Abbreviations (US Terminology)
- CH: Chain
- DC: Double Crochet
- SC: Single Crochet
- FPDC: Front Post Double Crochet
- BPDC: Back Post Double Crochet
- ST: Stitch
Special Techniques and Notes
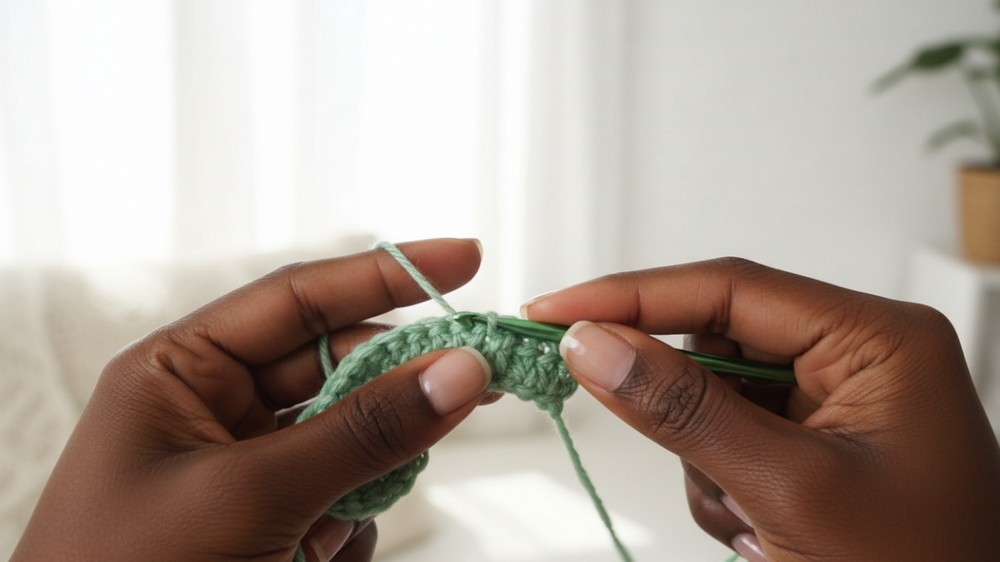
- Relief/Braid Pattern: The pattern creates a braided texture by crossing double crochet stitches. Four double crochets are worked in a specific order: stitches 3 and 4 are worked first, followed by stitches 1 and 2. Alternating front-post and back-post relief stitches maintain the same texture on both sides.
- Custom Adjustments:
- You can alter the width by increasing or decreasing the foundation chain in multiples of 4.
- To lengthen the scarf, simply continue with the braid pattern until you reach your desired length.
- Add fringe or embellishments like pompoms or tassels for extra style.
- Pocket Construction: The pocket is made by folding the end of the scarf and attaching it to allow the other tail to thread through for a clean, polished look.
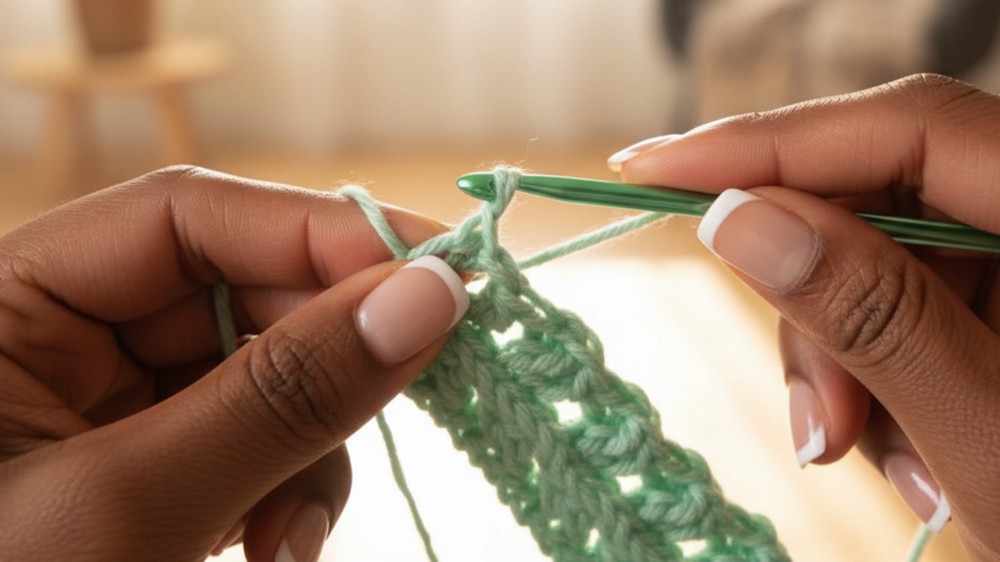
Pattern Instructions
Foundation Chain and Base Row
- Foundation Chain:
- CH 23 + 3 (for turning, counts as the first DC).
- Row 1 (Base Row):
- DC into the 4th CH from the hook and each remaining CH across.
- (Total of 24 DC, including the starting CH 3.)
Main Braid Pattern
This pattern is worked over 4 stitches at a time. Each front row (right side) will cross stitches 3 and 4 before stitches 1 and 2. On the wrong side (back row), relief stitches are worked behind the loops for consistency.
Row 2 (Right Side):
- CH 3 (counts as the first DC).
- Start the Relief Braid Pattern:
- Step 1: Make 2 yarn overs (for a double crochet).
- Working with 4 stitches:
- Skip the first 2 DCs and work into the 3rd DC with FPDC.
- FPDC into the 4th DC.
- Return to the skipped stitches: FPDC into the 1st DC, then FPDC into the 2nd DC.
- This creates a crossing braid with 2 + 2 structure.
- Repeat this braid relief pattern across the row until you near the edge.
- Finish with DC into the last stitch (edge stitch).
Row 3 (Wrong Side):
- CH 3 (counts as the first DC).
- Braid Relief on Wrong Side:
- Start with 2 yarn overs.
- For every 4 stitches, work BPDC instead of FPDC:
- Skip first 2 stitches; BPDC into 3rd and 4th stitches.
- Go back to the skipped stitches and make BPDC into stitch 1 and then stitch 2.
- This keeps the texture uniform across both sides.
- Repeat the braid relief pattern to the row's end.
- End with DC into last stitch.
Repeat Rows 2 and 3:
- Alternate between rows 2 and 3 to create the braided effect.
- Work until the scarf measures 67 cm (26.37 inches) or your desired length.
Pocket Construction
- Creating the Pocket Fabric:
- Begin the pocket at the end of your scarf.
- After completing the final wrong-side braid row, switch to standard DC rows.
- Work 10 Rows of DC:
- CH 3 at the start of each row (counts as first DC).
- DC into every stitch across.
- Maintain a total of 24 DC per row.
- Folding the Pocket:
- Fold the fabric backward to form a pocket where the other end of the scarf can be threaded through.
- Attaching the Edges:
- Align the edges of the pocket.
- Use SC or a tapestry needle to sew the pocket edges together.
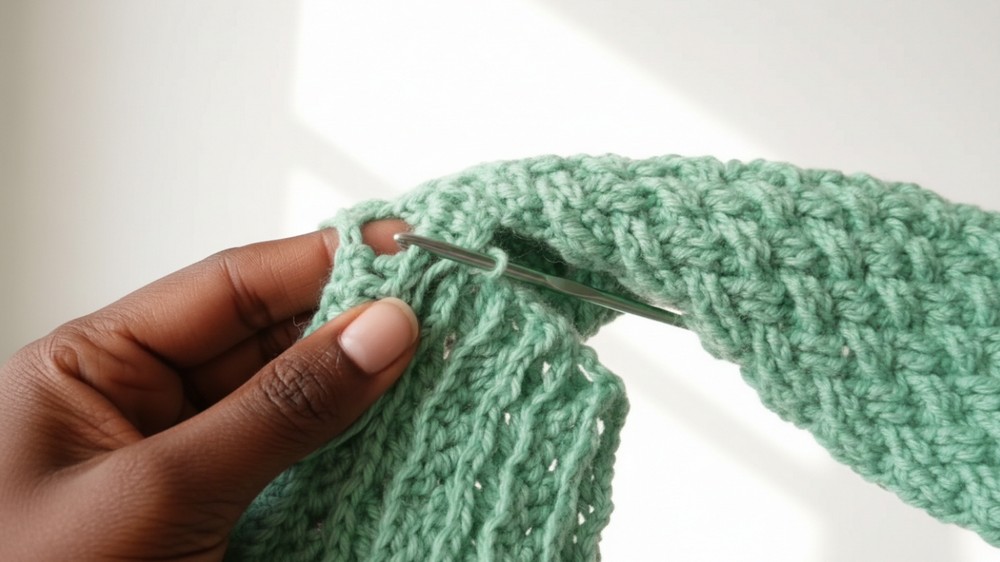
- Insert your hook or needle through the textured lines on the back of the fabric for an invisible seam and consistent look.
Finishing
- Secure the Ends:
- Weave in yarn tails using a tapestry needle.
- Personal Touches:
- Add a fabric tag or label to the pocket for a professional finish.
- Optional: Add a small tassel or pompom to the tail end of the scarf for extra flair.
Tips for Success
- Gauge Consistency: Use consistent tension to maintain an even texture.
- Marker Use: Mark the first stitch of each row to easily track rows when working in relief patterns.
- Blocking: Gently block the finished scarf to relax the edges and emphasize the braid texture.
Optional Add-Ons
- Color Variations: Use color blocking by working each section of the scarf in a different pastel or bold shade.
- Fringe: Add fringes to the bottom edge for a playful twist.
- Larger Size: For an adult-sized scarf, use bulkier yarn and a larger hook, and proportionally adjust the foundation chain and row counts.
Conclusion
The Child’s Braid Pattern Scarf combines both functionality and style in its clever braided texture and thoughtful pocket design. Perfect for little ones, this scarf will keep them warm while looking fashionable. The dense braided pattern ensures that it is both warm and durable. With easy customization options, you can adjust the pattern to suit various sizes and personal styles.