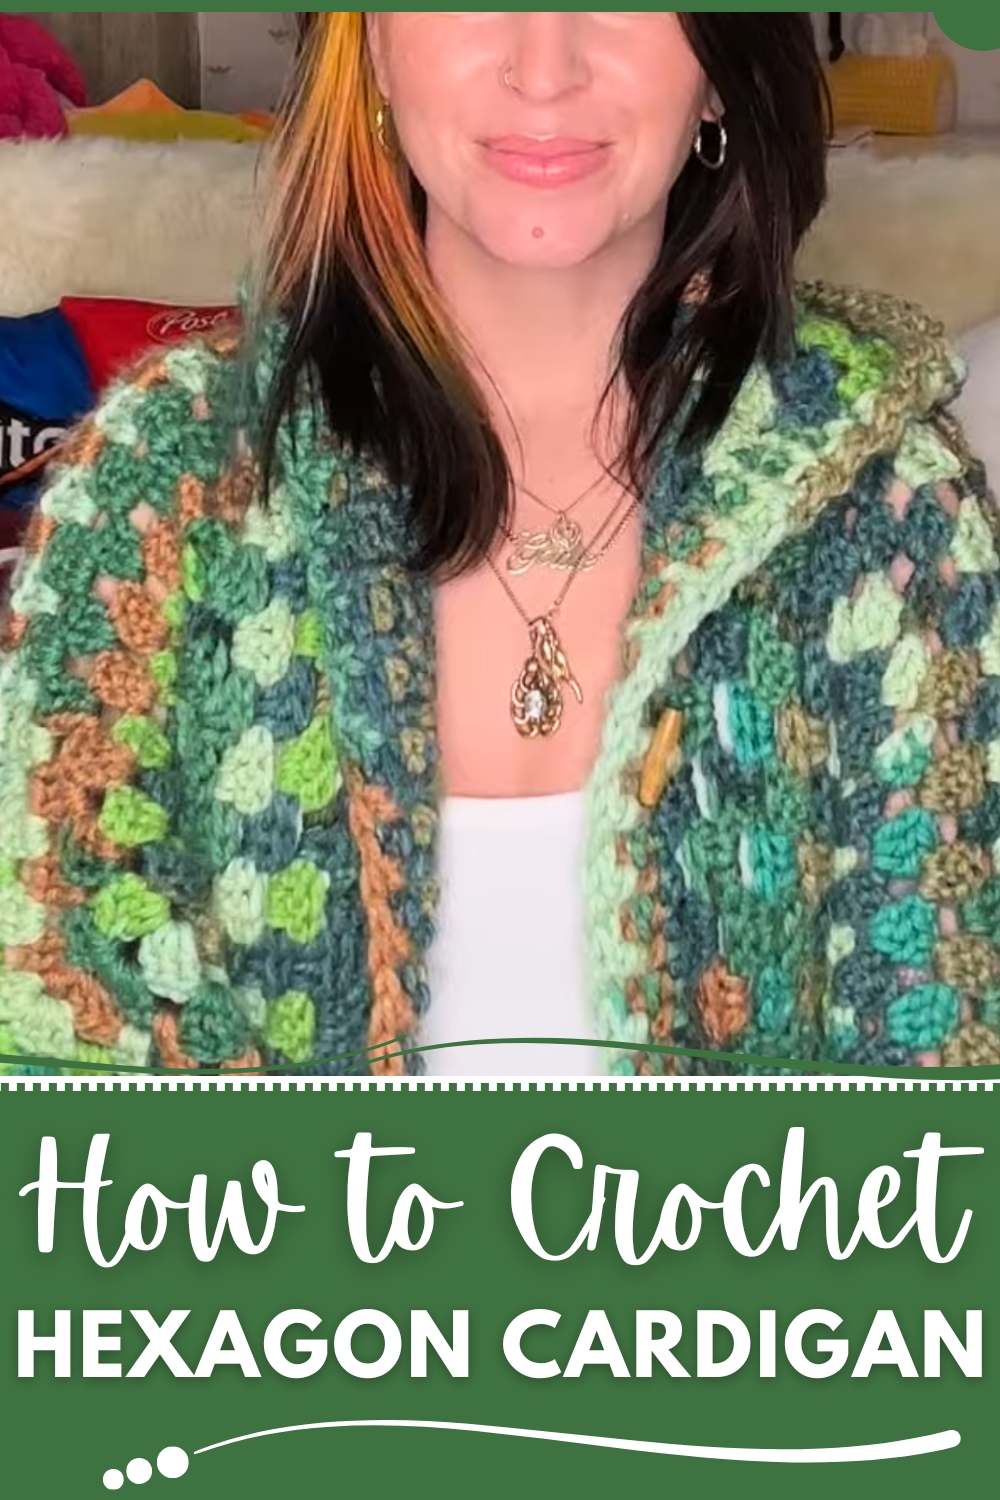
Exuding unique style this Free Crochet Hexagon Cardigan Pattern provides a comfortable fashionable layer perfect for casual wear cozy evenings and everyday outfits
Layered garments have always offered both comfort and style, providing warmth while reflecting personal taste. The Free Crochet Hexagon Cardigan pattern takes inspiration from geometric elegance, turning a simple concept into a wearable statement piece. Its structure combines interlocking hexagonal motifs that form a flexible, airy fabric, allowing the cardigan to drape gracefully over different body shapes. The instructions guide through connecting each hexagon seamlessly, shaping sleeves, and finishing edges for a polished look, making the process approachable for a range of skill levels.
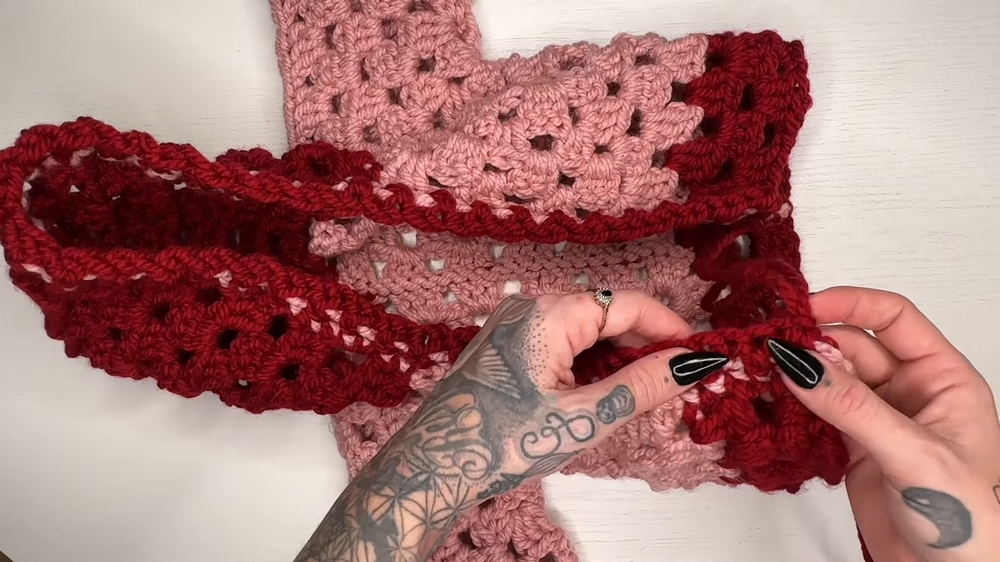
Crochet Hexagon Cardigan with Cheerful Spring Colors
Lightweight yet cozy, this cardigan works well for transitional seasons, layering over casual outfits or adding charm to a slightly dressier ensemble. Its unique texture allows for a subtle interplay of colors, whether using a monochromatic scheme for sophistication or varied hues for a playful statement. Beyond its visual appeal, the garment offers practical benefits, including ease of movement and breathability, ensuring comfort without sacrificing style.
Perfect as a thoughtful handmade gift or a personal wardrobe staple, the cardigan brings versatility to daily wear. Each completed piece not only highlights the skill and patience invested but also provides lasting warmth and elegance, turning a simple crochet project into a functional and fashionable accessory that enriches any closet.

Special Features
- Versatile Design:
- Fully customizable—add a hood, ribbing, or longer sleeves as desired.
- Works for all sizes, from babies to adults.
- Classic Granny Stitch:
- Creates a textured, timeless design that's beginner-friendly.
- Seamless Extension and Adjustments:
- Extensions on sleeves and body are simple, allowing you to create the perfect fit.
- Options for Ribbing:
- The ribbing around the front opening adds stability and a polished look to the cardigan.
- Tapered Sleeves Tutorial:
- Learn how to decrease rows for a tailored, tapered sleeve look and extend or shorten sleeve length.
Level of Difficulty
The level of difficulty is beginner to intermediate. Anyone familiar with basic crochet stitches—such as magic rings, slip stitches, chains, and double crochets—will be able to follow this tutorial. While beginners may take time to familiarize themselves with the hexagon folding and sewing techniques, clear instructions make this accessible and rewarding for most skill levels.
Tutor’s Suggestions
- Use Stitch Markers for Organization:
- Especially when working on corners of the hexagons or assembling the cardigan, stitch markers can help prevent confusion.
- Choose Any Yarn Weight:
- The cardigan can work with any yarn weight and hook size. Adjust for your preferences and intended size.
- Magic Ring for Neat Center:
- The tutor recommends starting with a magic ring for a clean and adjustable center to the hexagons.
- Tension Check:
- Consistency in tension ensures even granny clusters and overall uniformity in the garment.
- Test the Fit:
- Regularly try on the hexagon folds or use stitch markers to adjust and confirm the fit before sewing panels together.
Materials Needed
- Yarn: Any weight and color of your choosing. (Multiple colors can be used for added design effects!)
- Crochet Hook: Choose the hook size appropriate for your yarn.
- Stitch Markers (6 recommended)
- Scissors
- Tapestry Needle: For weaving in loose ends and sewing the panels together.
Step-by-Step Instructions
Step 1: Making the Hexagons
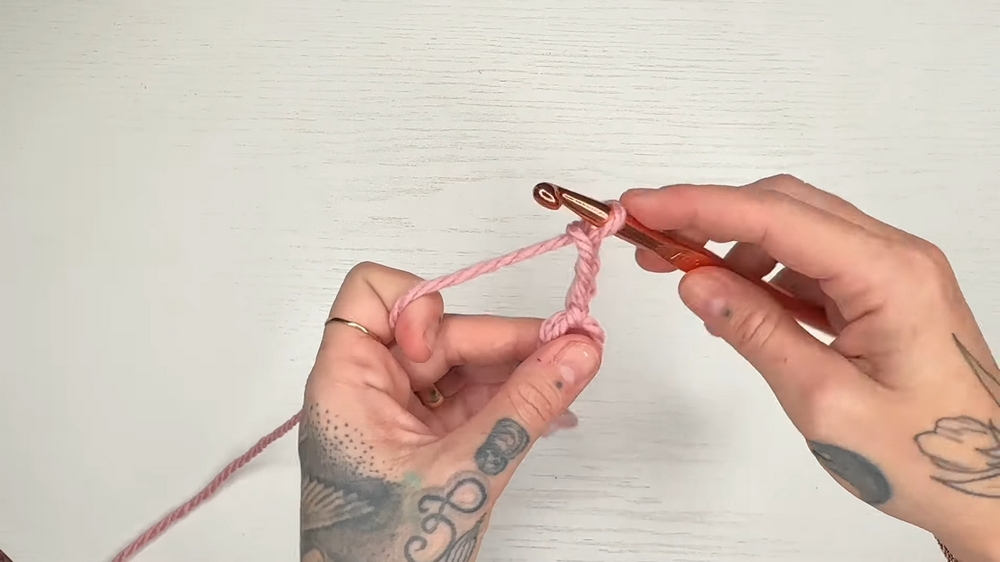
- Begin with a Magic Ring:
- Chain 3 (counts as your first double crochet). Work two more double crochets into the ring to complete your first granny cluster.
- Chain 2 (corner space), then work another granny cluster (three double crochets) into the ring.
- Continue until you have 6 granny clusters with 6 chain spaces (corners).
- Slip stitch into the top of the chain 3 to close the round. Pull the magic ring tightly closed.
- Build out Hexagon Rows:
- For the following rows, chain 3 and turn the piece.
- Work granny clusters into the chain spaces, ensuring corner spaces are made with granny clusters, chain 2, and granny clusters in the same space.
- Add one chain between corner granny clusters.
- Each new row will have an additional granny cluster along the edges between corner stitches.
- Continue Expanding:
- Repeat the row pattern until the hexagon grows to the size needed to cover one-half of your body (from front to back).
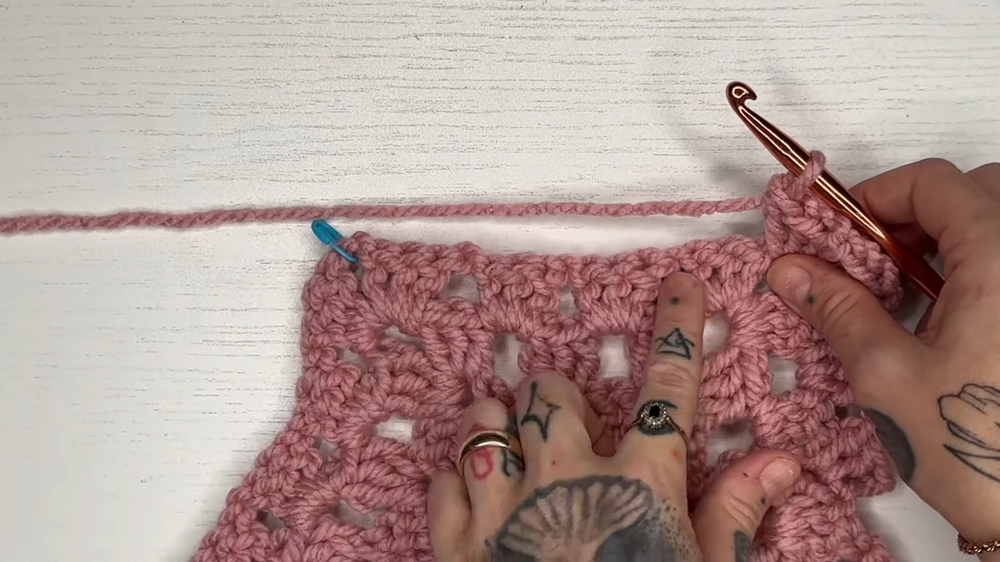
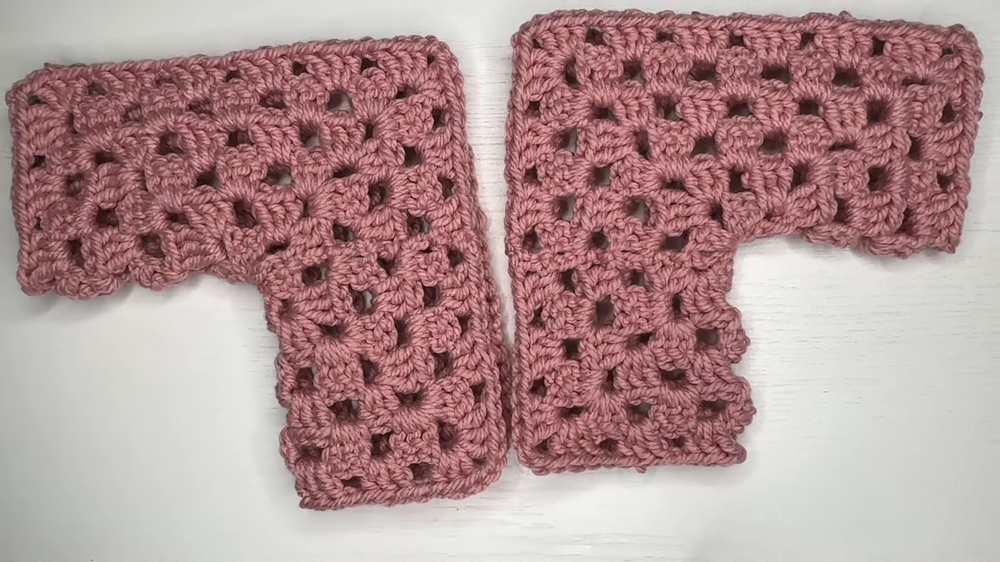
Step 2: Folding the Hexagons
- Identify the Correct Fold:
- Fold each hexagon in half by aligning two of the corners. This creates the body and sleeve sections.
- Use stitch markers to hold the fold in place.
- Create Two Identical Hexagons:
- Both hexagons should be the same size and folded the same way to match the cardigan construction.
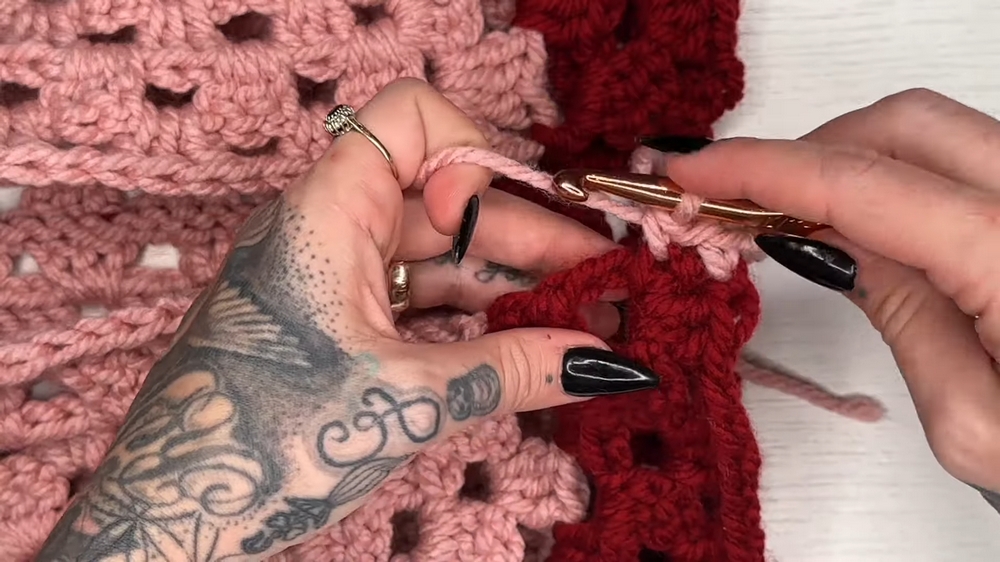
Step 3: Assembling the Cardigan
- Attach the Hexagons:
- Match the back corners and connect them using your preferred method (mattress stitch, slip stitch, or granny stitch).
- Sew or connect the top sleeve edges while keeping the front open.
- Test Fit the Panels:
- Try on the half-assembled cardigan to confirm the fit. Make adjustments as needed before finalizing the stitches.
Step 4: Adding Extensions
- Lengthening the Body:
- Attach a new yarn to the bottom corners and chain 4.
- Work granny clusters across each row, chaining 1 between clusters, and adding rows until you reach your desired length.
- Extending the Sleeves:
- Add granny clusters along the sleeve edges, using decreases per row for a tapered look (optional).
- For a straight sleeve, omit the decreases and work evenly.
Step 5: Adding a Hood (Optional)
- Attach Yarn to Front Top Edge:
- Work granny clusters along the edge, adding a granny stripe at the back neck using a granny stitch decrease.
- Continue rows until the hood reaches the desired height.
- Close the Top Edge:
- Use slip stitches, mattress stitch, or sew the top of the hood together. Add decreases if a rounded hood is preferred.
Step 6: Ribbing
- Add Single Crochet Around the Edges:
- Work a single crochet foundation row evenly spaced around the front edge, ensuring neatness on raw edges.
- Work Front Post and Back Post Stitches:
- Alternate front post and back post half-double crochets to create a ribbed effect. Work 2-3 rows of this pattern for a finished edge.
Step 7: Finishing Touches
- Weave in Ends:
- Secure all yarn tails with a tapestry needle.
- Optional Additions:
- Add ribbing to sleeve cuffs or even pockets for extra functionality.
Uses of the Hexagon Cardigan
- Wearable Fashion: A versatile, stylish cardigan for any age group.
- Customization: Adjust length, sleeves, and added features like hoods or pockets to suit the wearer’s preference.
- Gift Idea: Handmade and personalized, the cardigan makes for a perfect, thoughtful gift.
- Applications: Lightweight for spring/summer or thicker for colder weather, depending on yarn choice.
Conclusion
The hexagon cardigan is a beautifully customizable crochet project that combines classic granny stitches with modern design elements. This engaging tutorial demonstrates how you can create a cardigan that fits any size, use any yarn, and customize it with extensions, ribbing, or hoods to suit your style. A perfect project for crocheters looking to create functional, fashionable, and personalized pieces!
Bonus Tip
When working with larger panels, keep your corners marked with stitch markers to avoid losing track of your hexagon's shape. This will prevent errors and ensure your cardigan folds and assembles properly.