If you like creating things with your hands, you'll love making a crochet teddy bear Amigurumi. This small, soft teddy bear can be a friendly project for both beginners and those more experienced with crocheting.
Crochet Teddy Bear Amigurumi Pattern

Made using your yarn and hook to create a little bear friend that can sit by your side or become a cherished gift for someone special. There’s something magical about seeing a bundle of yarn come to life, stitch by stitch, into a huggable buddy. It’s a fun way to spend your time and maybe even pick up a new skill along the way.
Materials Needed:
- Acrylic yarn in preferred colors for the body, snout, and shirt
- Crochet hook (size will depend on the yarn, but often a 3mm)
- Yarn needle
- Stitch marker
- Polyester fiberfill for stuffing
- Safety eyes (about 15mm) or embroidered eyes for a child-safe option
- Black embroidery thread for facial features
- Scissors
- Optional: Embellishments for the shirt
Abbreviations:
- MR: Magic ring
- SC: Single crochet
- INC: Increase (2 SC in the same stitch)
- DEC: Invisible decrease
- BLO: Back loop only
- DC: Double crochet
Bear Pattern:

Head:
- Start with a color that matches the bear's head.
- Create a MR with 6 SC.
- INC in each stitch around.
- SC 1, INC; repeat around.
- SC 2, INC; repeat around.
- Continue increasing in the round until you have a flat circle large enough for the head, then start working straight down to form the shape.
Body:
- With the body color, form the base by working a flat circle similarly to the head. Once the circle is the desired size, work straight to form the sides.
- When the body is the right length, DEC to start closing the shape off, remembering to stuff with fiberfill before it's completely closed.

Limbs (Arms and Legs):
- Start with a MR for each limb and INC around.
- Continue working in rounds to the desired length.
- For the legs, you may want to create a flattened foot by increasing on one side.
- For the arms, keep a simple cylinder shape.
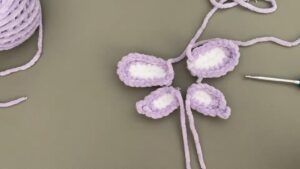
Ears (make two):
- Small flat circles that are folded and sewn onto the top of the head.

Snout:
- Usually a small flat oval or circle in a contrasting color, then sewn onto the face.
Assembly:
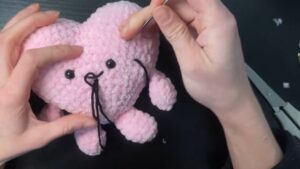
- Sew the safety eyes onto the head.
- Embroider the nose and mouth below the eyes using a yarn needle and black yarn.
- Attach the ears on top of the head.
- Sew the head to the body.
- Attach the arms and legs.
- Use additional yarn or fabric to create a small simple shirt and sew or slip it onto the bear.

Shirt:
- Chain a length that wraps around the bear's body.
- Work in rows using DC stitches; join with a slip stitch to form a tube, then work a couple of rows to build up the height of the shirt.
- BLO can be used for additional textural detail.
- Add straps over the shoulders if desired.