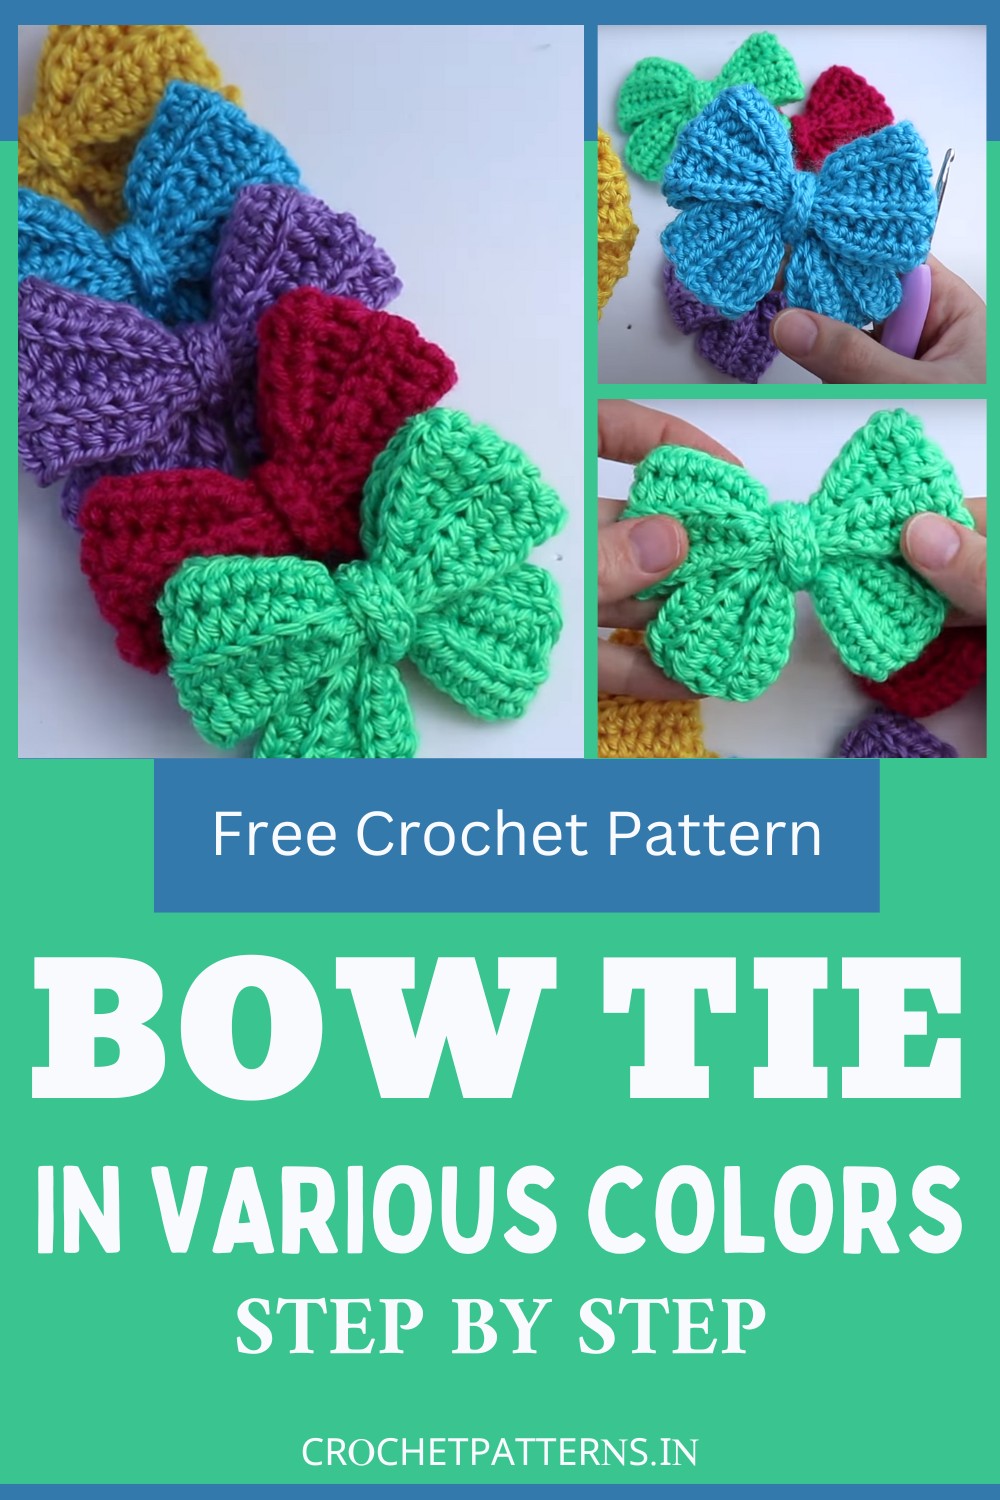
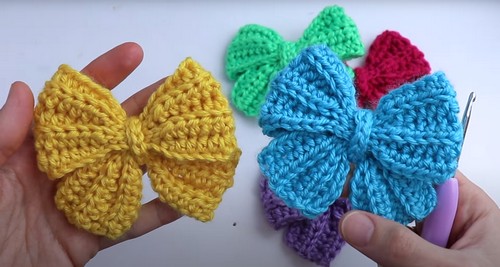
A Crochet bow tie adds a dash of handmade charm to any outfit. They're neat crochet accessories you can make with yarn and a hook. Following a pattern, you create a rectangle, then pinch it in the middle to shape the bow. You can use them to decorate your Christmas tree, making it look extra special. They are also perfect for adding a personal touch to crochet Christmas gifts. These bows can make baby clothes look even cuter, such as on hats or sweaters. They're easy to make and can brighten up anything you add them to, bringing a handmade, cosy feel wherever they're used.
Making Your Crochet Bow Tie
Materials Needed:
- 3.5mm crochet hook
- Medium worsted weight yarn (leftovers can be used)
Step by step Pattern (Summary)
Starting the Bow
Step 1: Make a Slip Knot and Chain 55
Start with a slip knot, then chain 55 stitches.
Step 2: Work into the Back Ridge
Working in the back ridge, begin your stitches, starting from the second chain from the hook.
Proceed with the Pattern
Row 1
Make Half Double Crochet (HDC): In the second chain from the hook, make the first half of the double crochet. Add five more half-double crochet into the next five chains for six half-double crochet.
Make Slip Stitch (SL ST): Now, perform a slip stitch six times.
More HDC and SL ST: Continue the pattern by performing 12 half double crochet followed by six slip stitches. Repeat this one more time.
Ending of First Row: Finish the first row off with six more half double crochet, then chain one and turn.
Row 2
Note, from here onwards, for each row; you will crochet through the back loop only unless stated otherwise.
HDC in Back Loop: Start with six half double crochet in the back loops.
SL ST in Back Loop: Perform six slip stitches in the back loops.
HDC and SL ST Repeats: Like before, alternate with 12 half double crochet and six slip stitches. Repeat this sequence.
Ending of Second Row: End the row with six half double crochet. On the last stitch, crochet under normal loops for a finished look. Chain one and turn.
Repeat Row 2
Repeat the pattern in Row 2 for two or three more turns, depending on your yarn. The video tutorial demonstrated four rows for a pink bow and five rows for a blue bow.
Finishing the Bow
Step 1: Fasten Off and Weave Ends
Cut your yarn leaving tails once you've reached the desired number of rows. Then, weave in the ends and secure it with a knot.
Step 2: Fold the Crochet Piece
Fold the piece inwards to form the bow shape, ensuring the tails are at the center.
Step 3: Secure the Center
Wrap the tail yarn around the center of the bow, securing it tightly with a knot.
Step 4: Create the Center
Optionally, you can create a small strip for the center of the bow. Start by chaining 10, and then do nine slip stitches. Cut the yarn, leaving a tail for sewing. Use this strip to wrap around the center of the bow.