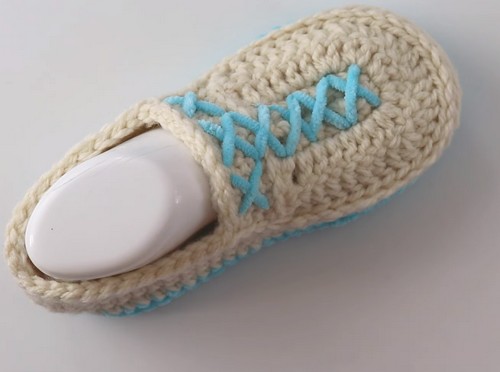
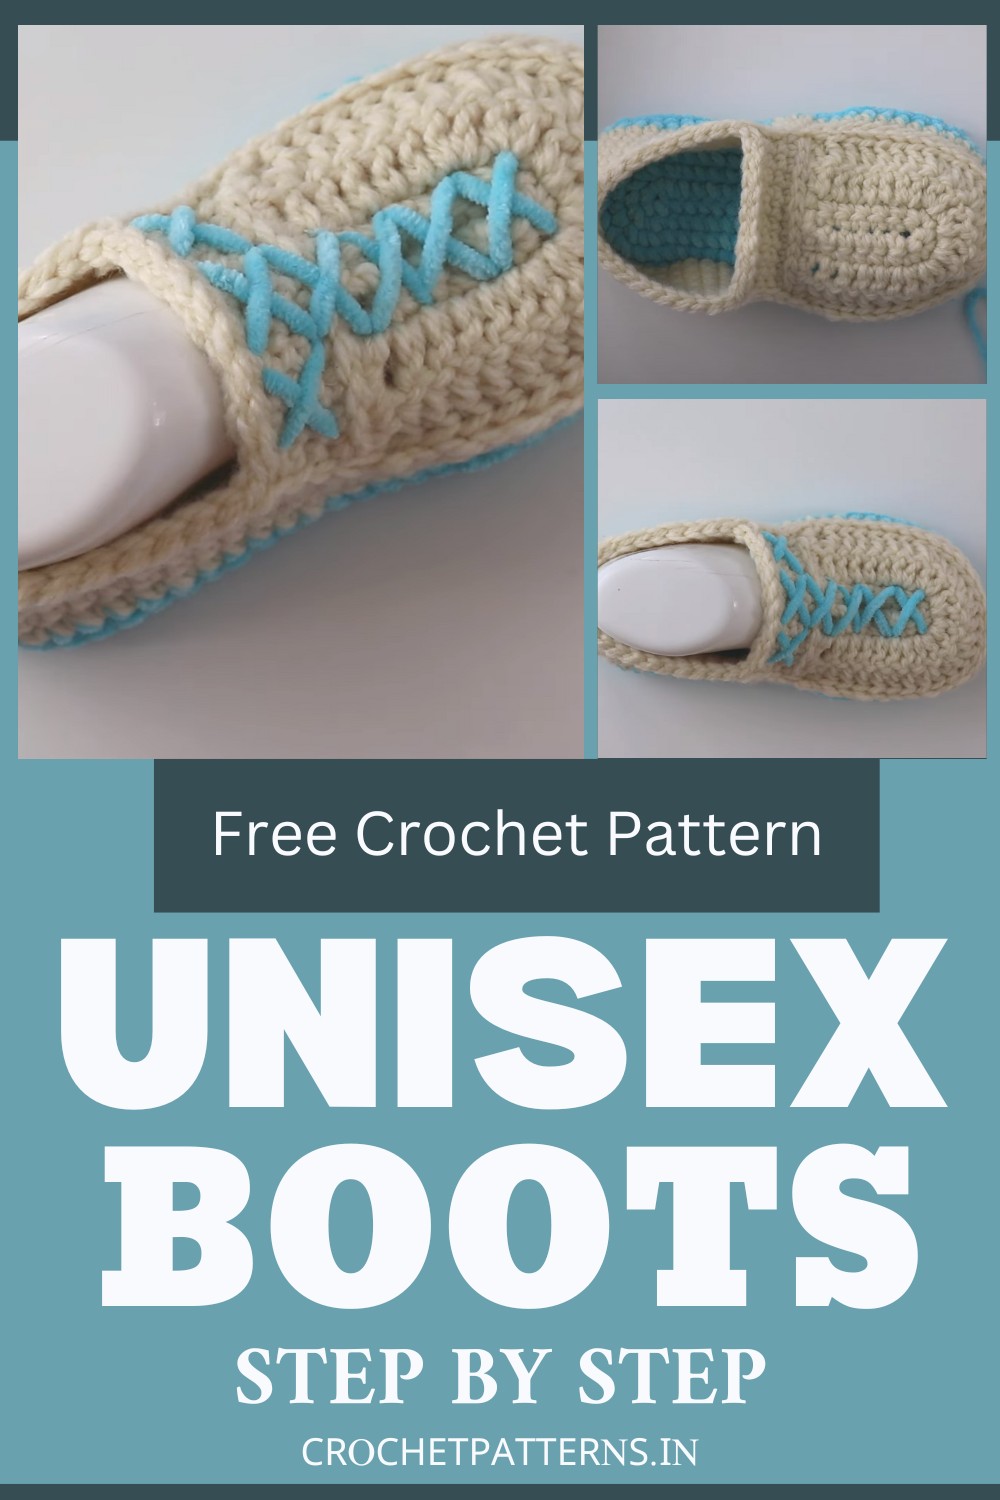
Crochet boots are a cozy blend of warmth, comfort, and chic style, perfect for adding a handmade touch to any outfit. They keep our feet snug during colder months and offer a unique look that stands out. Crochet boots are a delightful choice for those who appreciate fashion with ultimate comfort, whether at home or out and about. To relish this comfort and style, we bring Crochet Boots Pattern, which is quite easy and stylish. The cross design on the front and the soft, plush texture are shown; they are made with velvet and mega yarns. They're designed with a durable, thicker sole for comfort. Finishing the design, a ribbed ankle cuff extends upwards, ensuring a snug fit while adding an elegant, cozy touch.
Making Your Crochet Boots
Materials:
- Bulky (Category 6) Yarn
- Crochet Hook (sizes 6mm to 9mm)
- Sole Fabric
- Sole Material (for some designs)
- Stitch Markers
- Yarn Needle
- Scissors
Step by step Pattern
Preparing the Sole
- Start with the Sole:
- Begin by creating two soles for each slipper. The tutorial walks through creating one additional sole to pair with a previously made one, aiming for a slightly thicker sole.
- Chaining:
- Start with 19 chains (18 + 1 for turning). Adjust the number of chains to increase or decrease the size, explaining that the increased areas remain crucial.
- First Row:
- Skip the first chain and start making single crochets into the next. The first and last chains will have increases (more than one single crochet) to shape the toe and heel.
- Joining and Increasing:
- Upon completing the base chain single crochets, continue around the other side, matching the stitch numbers and incorporating strategic increases for the toe box and heel.
- Further Rounds:
- Continue adding rounds, following the instructions for increases at certain points to shape the sole properly. It ends with joining both soles together for durability.
See Aso:
Crocheting the Upper
- Starting the Upper:
- With the joined sole as the base, begin working up to create the boot's upper part. Start by attaching a new color (if desired) and single crochet around the sole’s edge.
- Shaping the Upper:
- Proceed by crocheting rows up the sides of the boot, incorporating decreases (for tapering towards the ankle) and color changes as desired. The tutorial specifies where to place these decreases for a snug fit.
- Creating the Front Part:
- Detail on how to crochet the front part of the slipper, focusing on matching the increase pattern to ensure symmetry with the rest of the boot.
- Joining Front to Upper:
- Instructions are for attaching the front part to the rest of the upper to ensure a clean and secure join.
Finishing Touches
- Final Rows:
- Conclude by crocheting around the boot's opening for a finished edge and a snug fit around the ankle.
- Decorative Edging:
- Optional steps for adding a decorative slip stitch or crab stitch around the edge for aesthetic purposes.
- Weaving in Ends:
- Secure and cleanly weave in all loose ends from the yarn to ensure durability and a neat appearance.
Conclusion
- The creator encourages making the slippers a comfortable and impressive project, suitable for all levels of crochet enthusiasts.
- The end includes encouraging them to subscribe to their channel for more tutorials.
This pattern overview captures the key elements mentioned in the video description for crocheting practical and appealing slipper boots.
Designer: @SirinsCrochet