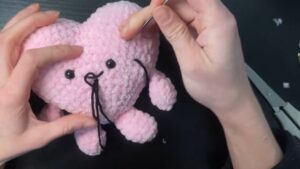
Meet the adorable crochet bear, a no-sew amigurumi friend that's a joy to make! Using soft yarn and a simple hook, you can bring this cuddly bear to life with nothing more than a series of loops and knots. Its round, squishy body and sweet little face are all made in one piece, which means you don't have to worry about sewing on arms, legs, or ears.
Crochet Bear No Sew Amigurumi

Perfect for giving as a gift or keeping as a cozy companion, this charming bear is a delightful project that warms hearts with its handcrafted charm. Whether you're new to crochet or a seasoned pro, you'll find joy in watching each stitch help your bear take shape.
Materials Needed:
- 4 mm crochet hook
- Stitch marker
- Tapestry needle
- Scissors
- Polyfill
- Yarn in your choice of colors (The example uses Butterscotch by Premier Yarn Basics for the bear, and black and blue for details.)
Body and Head Pattern:

Round 1:
- Create a magic circle.
- Work 6 single crochets (sc) into the magic circle. Alternatively, chain 3 or 4, join, and then work 6 sc into the circle.
Round 2 (Increase Round):
- Work 2 sc into each stitch around.
- Total of 12 stitches.
For the tail end: Tie it in a knot twice, close, and cut it off.

Round 3 (Working into the Back Loop Only):
- Single crochet (sc) back loop only into the next 3 stitches.
- Puff stitch back loop only into the next stitch. (Yarn over, insert the hook into the back loop only, yarn over, pull up a loop, yarn over, pull through two loops) repeat three more times, then yarn over and pull through all five loops on the hook.
- Continue with 3 sc in the back loop only.
- Complete another puff stitch.
- End the round with 4 sc back loop only in the last four stitches.
For Rounds 4-5:

- Simply work a single crochet into each stitch all the way around for two rounds.
Round 6 (Arms):
- Sc in the next two stitches.
- Work a puff stitch.
- Five stitches between the arms.
- Complete the other puff stitch on the other side.
Round 7 (Begin Decrease):
- Begin shaping the head with decrease rounds. Start with a sc decrease in the front loops only.

For Round 8 (Increase for the Head):
- Work two sc in each stitch around.
Round 9 (Further Increases):
- Work one sc and then a sc increase in the next stitch around to expand the head size.
Rounds 10-13:
- Continue with sc in each stitch around.
For Round 14 (Creating Ears Placement):

- Work single crochets around but work into the back loop only for two stitches to create loops for ears.
- Continue with the pattern specified for creating the ears shape and placement.
Finishing the Body:
Continue with stuffing as you create the structure, ensuring you have a solid base before moving on to the ears and detailed features such as the snout, eyes, and eyebrows.
Creating Ears and Finishing Touches:
- Attach the yarn to one of the loops created for the ear.
- Work a series of stitches (sc, hdc, dc, hdc, sc) to form the ear shape.
- Sew in the tail ends to secure the ears in place.
- For facial features, use black for the snout, and blue or another color of your choice for the eyes.
- Add white for eye highlights and black for eyebrows at your discretion.


