Enhance your wardrobe with this Free Crochet Lace Cardigan Pattern, creating delicate, layering pieces that add elegance and charm effortlessly.
A gentle spring breeze carried a hint of warmth through a quiet park, where layers of clothing were shifting from heavy to light. Among the soft textures and flowing fabrics, a delicate piece caught attention, offering comfort without weight, and elegance without stiffness. The Free Crochet Lace Cardigan pattern brings this ideal balance to life, combining airy sophistication with practical wearability.
Free Crochet Lace Cardigan Pattern with Modern Details
Perfect for layering over casual outfits or draping gracefully over evening attire, this cardigan provides both warmth and breathability, making it suitable for varied climates and occasions. The intricate lace detailing adds subtle charm, transforming simple clothing into a statement of refined taste. Lightweight yet durable, it allows freedom of movement while maintaining a polished appearance, whether worn at a garden gathering, a relaxed brunch, or a quiet afternoon stroll.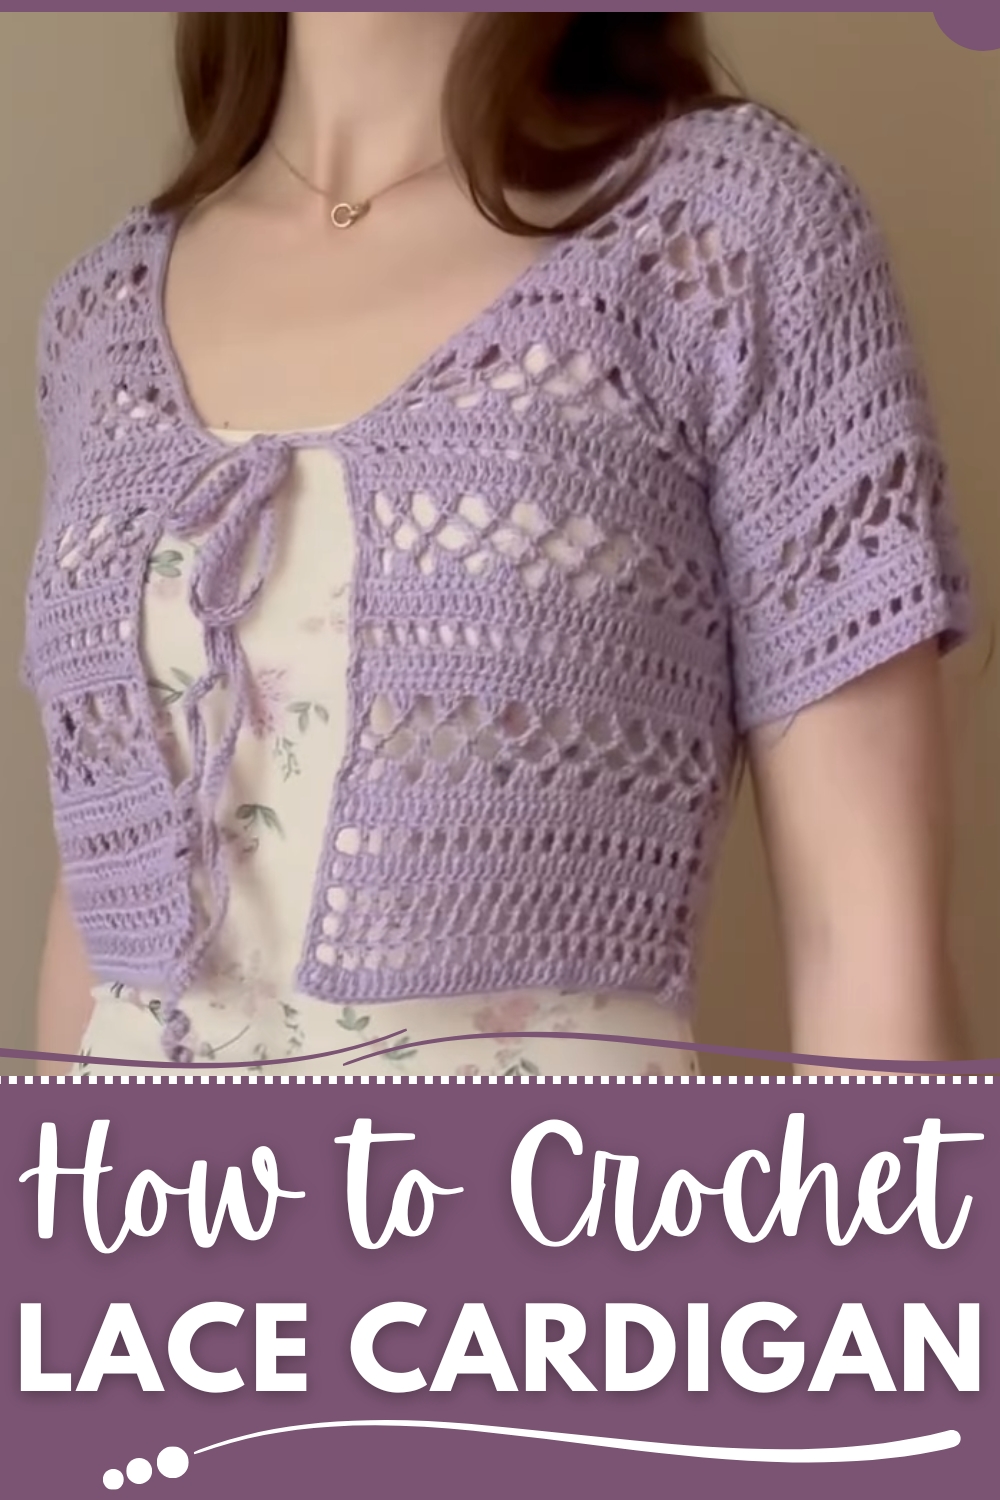
Handmade with care, the cardigan encourages personalization in length, sleeve style, and fit, ensuring a piece that suits individual preferences. Beyond its aesthetic appeal, the process of creating this lace cardigan fosters patience, focus, and a sense of accomplishment. The Free Crochet Lace Cardigan pattern offers a harmonious combination of style, comfort, and versatility, becoming a timeless addition to any wardrobe and a functional, graceful accessory for daily wear.
Step-by-Step Process
Materials Needed
- Yarn: Cotton yarn (Drops brand used in the tutorial; more details in the video description).
- Crochet Hook: 3 mm crochet hook (recommended with the yarn being used).
- Other Tools:
- Measuring tape
- Scissors
- Stitch markers
Step 1: Creating the Front Panels
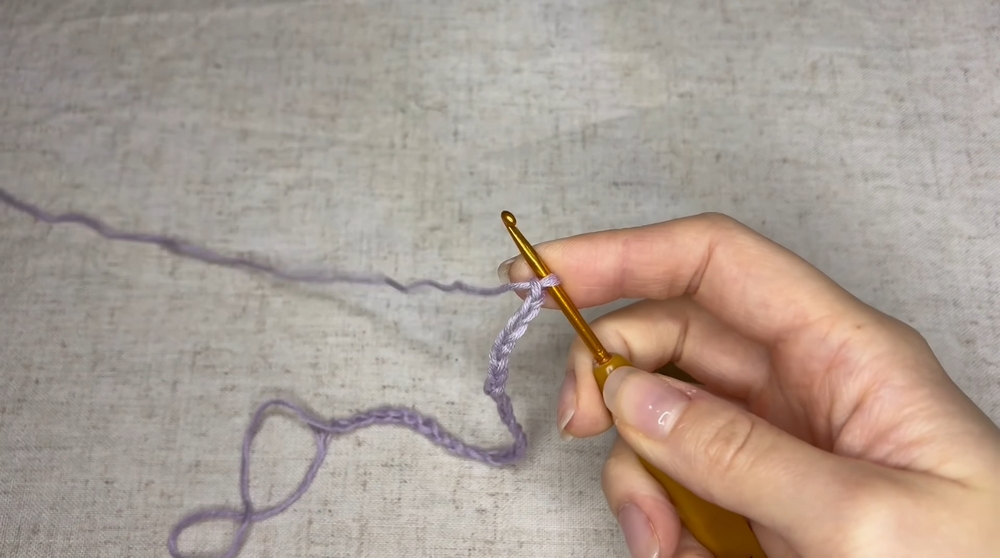
- Foundation Chain:
- Start with a slip knot.
- Create 24 chains (or adjust based on the measurement from your collarbone to your shoulder). Ensure the chain is a multiple of 4, then add 3 extra chains for turning.
- First Row (Double Crochet):
- Double crochet in the 4th chain from the hook and in each chain across (24 double crochets).
- This row will measure approximately 12 cm.
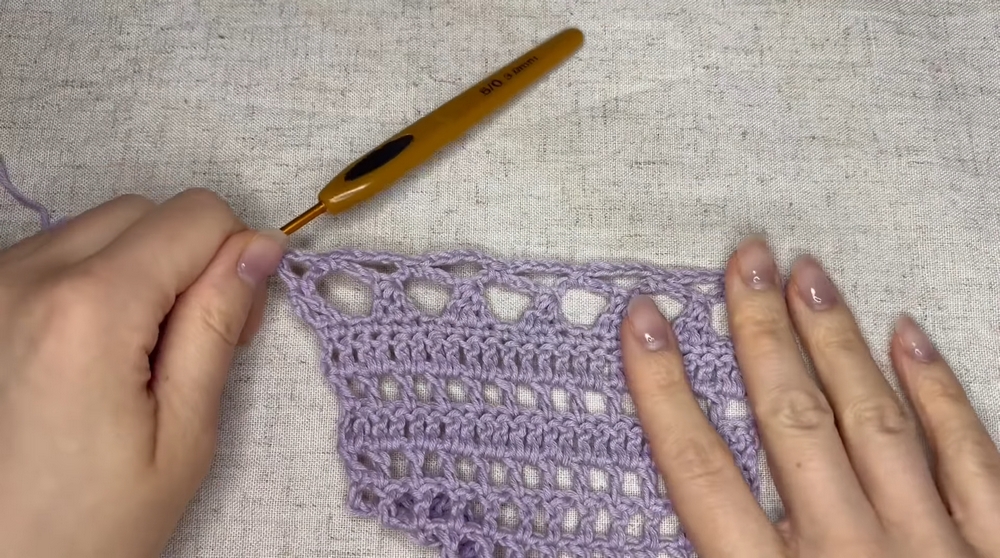
- Second Row (Small Squares):
- Chain 4, turn your work.
- Skip the next stitch, then make a double crochet into the following stitch.
- Chain 1, skip the next stitch, and continue with this pattern.
- Third and Fourth Rows (Repeat Squares):
- Continue the "small squares" pattern. Start each row with a chain of 4 and mirror the previous row.
- Fifth Row (Double Crochet):
- Resume double crochet stitches, ensuring 24 stitches in total.
- Sixth and Seventh Rows:
- Alternate between squares (row 6) and double crochets (row 7).
- Eighth Row (Single Crochet with Increase):
- Chain 1 and work single crochets, adding 1 additional stitch at the end (25 single crochets in total).
Step 2: Creating the Main Pattern
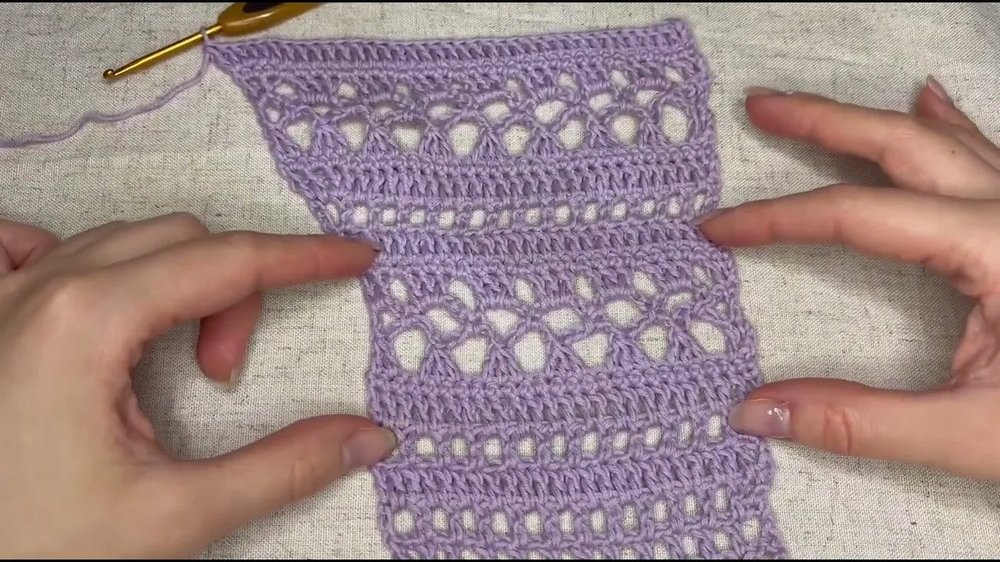
- First Row of Semicircles:
- Chain 3, turn your work.
- Skip 1 stitch, double crochet into the next, chain 5, and work 3 double crochets together (cluster stitch).
- Continue this pattern across the row, ending with 2 double crochets together in the last 2 stitches.
- Second Row:
- Chain 5, turn your work.
- Single crochet into the next chain-5 space. Repeat this pattern, ending with a double crochet at the last stitch.
- Third Row:
- Chain 3, double crochet, then chain 1 and make 3 double crochets into each chain-5 space.
- End with 2 double crochets to match the beginning of the row.
- Single Crochet Transition Row:
- Work single crochets across the row, maintaining the total stitch count.

Step 3: Completing the Front Panels
- Continue alternating the patterns as described, repeating rows 9, 10, and 11.
- Add increases as instructed at specific rows to shape the panel.
- Front panels consist of 43 rows. Secure the yarn at the end of each panel, leaving extra yarn for ties and borders.
Step 4: Creating the Back Panel
- Foundation Chain:
- Make a slip knot and chain 95 stitches (based on a 40 cm width). Adjust the number based on your shoulder-to-shoulder measurement.
- Make sure the total stitch count is a multiple of 4, plus 3 extra for turning.
- Rows:
- Follow the same steps as the front panels, but without any increases.
- Work a simple rectangle for the back panel, maintaining 43 rows to match the front panels.
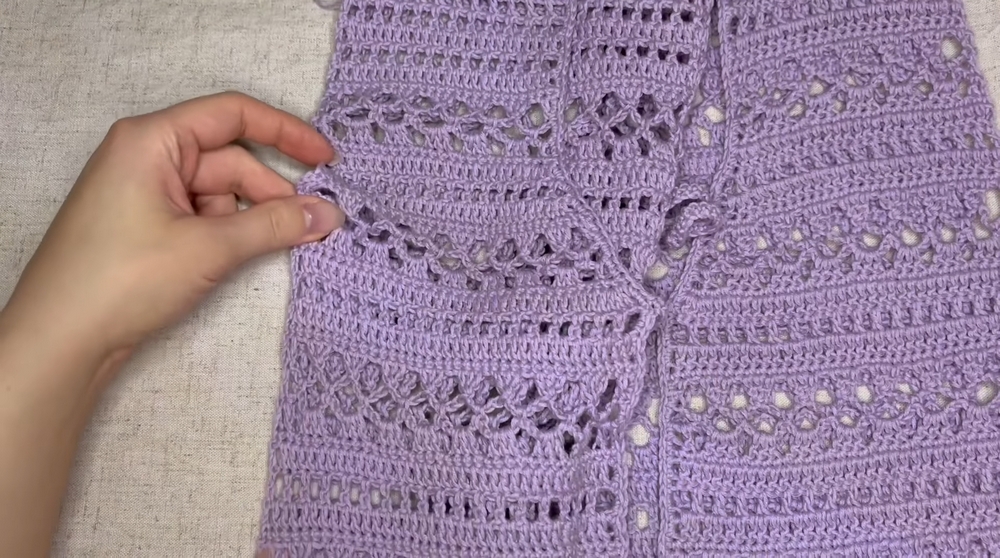
Step 5: Joining the Panels
- Shoulder Assembly:
- Align the front panels to the back and use stitch markers to ensure alignment.
- Attach panels with slip stitches, working across the shoulder seams.
- Side Joining:
- Try the cardigan on to mark the appropriate measurements under the arms.
- Use stitch markers and attach the panels with single crochet stitches to form the sides.
Step 6: Adding the Borders and Ties
- Single Crochet Border:
- Add a single crochet border around the front panels, beginning at the bottom and working up.
- Create Ties:
- At the middle of each front panel, chain 100 stitches and single crochet across the chain to form ties.
- Finish the Border:
- Continue single crocheting along the panels to complete the borders.
Step 7: Making the Sleeves
- Attach Sleeves:
- Start under the armpit and work in a round, turning at the end of each row.
- Row Pattern:
- Repeat the same patterns as used on the panels (double crochets, squares, semicircles, etc.).
- Adjust the sleeve length to your preference:
- Long Sleeve: Repeat the pattern 5 times for 50 cm length.
- Short Sleeve: Repeat the pattern once.
- Finishing the Sleeves:
- Slip stitch to join the final row and weave in ends.
Special Features
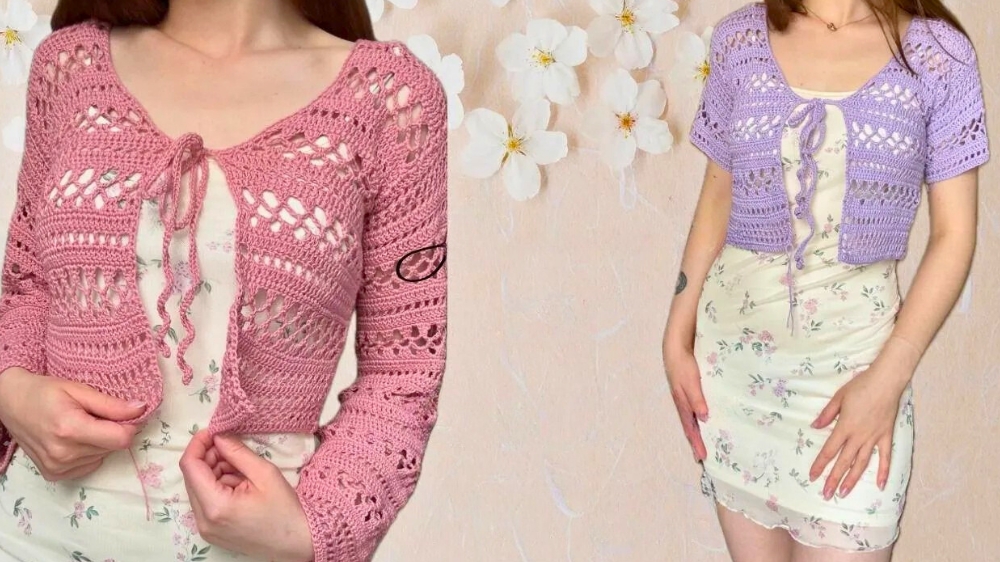
- Customizable Design: Offers the option of short-sleeved or long-sleeved variations.
- Top-Down Construction: Allows for better control of shaping and fit.
- Unique Pattern: Features semicircles and squares, creating an intricate texture.
Level of Difficulty
Intermediate: While the pattern is repetitive, it involves more intricate techniques, like three double crochet clusters, stitch increases, and consistent tension.
Tutor’s Suggestions
- Adjust Chain Lengths: Use a measuring tape to personalize the foundation chains for a better fit.
- Use Markers: Place stitch markers to ensure alignment during joining.
- Maintain Consistent Tension: Smooth tension ensures even stitches and a clean, polished look.
Uses
- Versatile layering piece for casual or semi-formal occasions.
- Ideal for spring and summer due to its lightweight and breathable texture.
- Great as a gift or for wardrobe customization.
Tip: Always Block Your Finished Cardigan
Blocking your cardigan after completing it will help even out the stitches, soften the fabric, and give it a more professional finish.
Conclusion
This crochet cotton cardigan is an excellent project for intermediate crocheters looking to create something both functional and stylish. The detailed tutorial covers everything from creating panels to assembling and finishing, and its customizable design ensures you can tailor it to your own preferences.