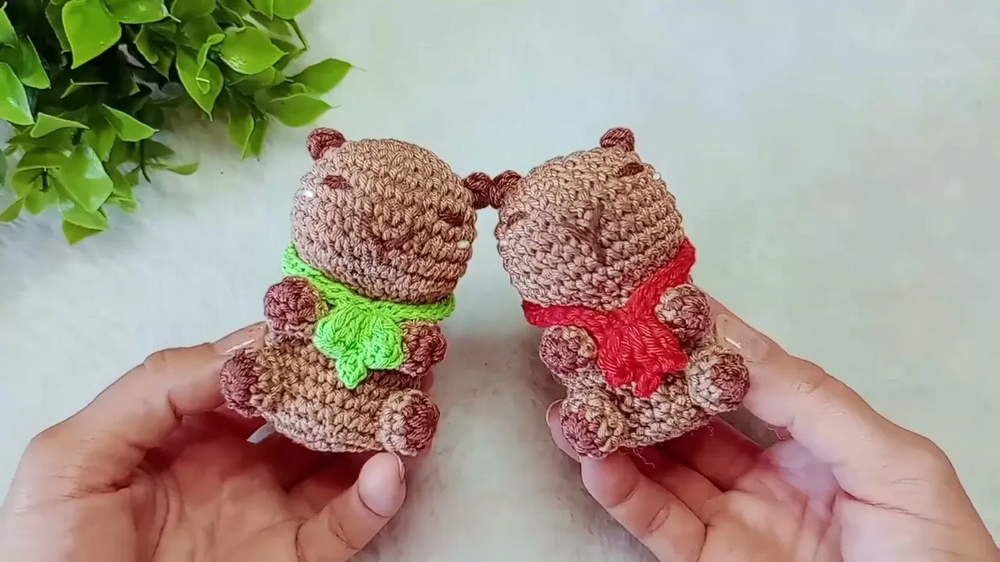
Bring adorable charm with this Crochet Capybara pattern, adding cozy character, soft texture, and a touch of warmth to your collection.
Gentle animals often leave the deepest impressions, and few embody calmness as much as the capybara, known for its easygoing nature and quiet charm. This soothing presence is mirrored through a crochet pattern that captures its rounded body, tiny ears, and expressive features in soft form. The result is more than just a toy or ornament—it becomes a small symbol of peace and companionship that can brighten both homes and hearts.
Playful Crochet Capybara for Kids’ Rooms
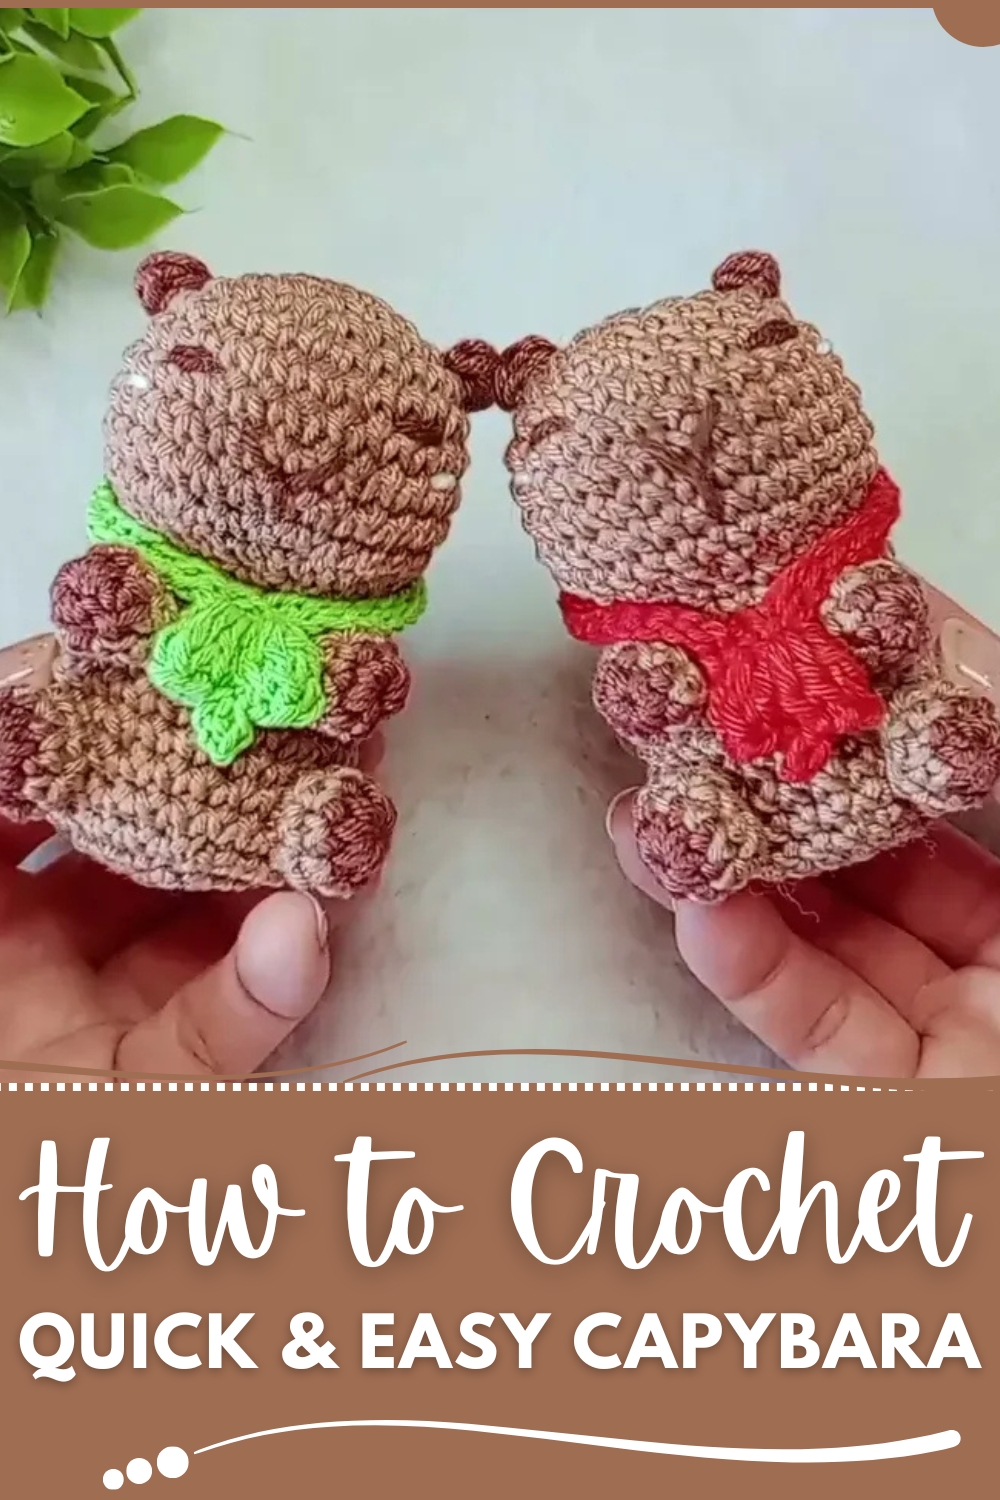
The process begins with a circular base worked in continuous rounds, gradually shaping a firm yet smooth body. Smaller details follow, including short legs, a petite tail, and rounded ears that add character. Eyes and a subtle nose bring warmth to its face, giving the finished piece a lifelike yet adorable appearance. While natural shades of brown and beige enhance authenticity, playful colors can be introduced for a whimsical touch, making it adaptable for various uses.
Its charm extends beyond appearance. As a handmade keepsake, it is practical for display, gifting, or even as a comfort toy for children. The simplicity of the stitches makes it approachable for beginners, while the end result feels rewarding for any maker. Calm, durable, and full of personality, this little capybara carries quiet beauty in every stitch.
Materials Needed
To complete this project, you’ll require the following:
- Yarn: Amigurumi yarn in Cocoa (brown color), red, and "Brigadeiro" color. The tutorial also uses white Anne thread for added detailing.
- Crochet Hook: 2.5mm crochet hook.
- Tools: Tapestry needle, stitch marker, scissors, and a little bit of stuffing.
- Optional Supplies: Fabric glue for attaching smaller pieces (alternatively, pieces can be sewn together).
Step-by-Step Instructions
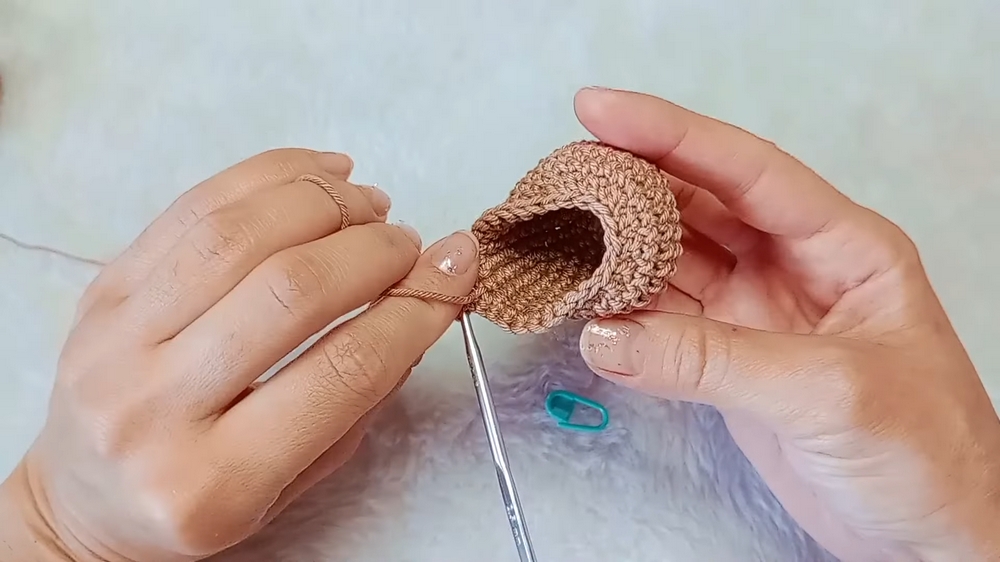
1. Body of the Capybara
- Start with a magic ring and crochet six stitches into it.
- Round 2: Make six increases (total of 12 stitches).
- Round 3: Alternate one single crochet and one increase six times (18 stitches).
- Round 4: Alternate two single crochets and one increase six times (24 stitches).
- Round 5: Alternate three single crochets and one increase six times (30 stitches).
- Rounds 6–10: Crochet 30 single stitches per round.
- Round 11: Work one stitch and one increase for three repetitions, followed by nine decreases. Then again, one stitch and one increase for three repetitions (27 stitches).
- Rounds 12–20: Crochet 27 stitches in each round to maintain shape.
- Round 21: Crochet seven single stitches, then one decrease. Repeat this three times (24 stitches).
- Round 22: Alternate two single crochets and one decrease six times (18 stitches).
- Round 23 (Final Round): Alternate one single crochet and one decrease six times (12 stitches). Close the stitch and secure the body.
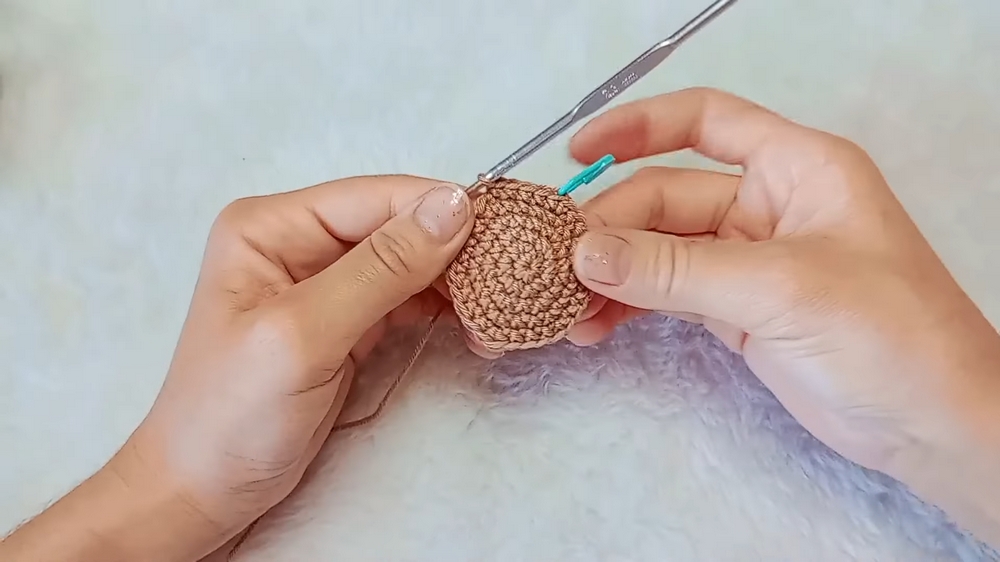
2. Ears
- To position the ears, count up three rows from the magic ring at the front of the body.
- Starting on the fourth row, attach the Cocoa-colored yarn and make the ear:
- Chain 1.
- Crochet one single crochet, two half double crochets, and end with one single crochet.
- Tie off the yarn and use a tapestry needle to hide the loose ends.
- Repeat the same process on the other side for the second ear.
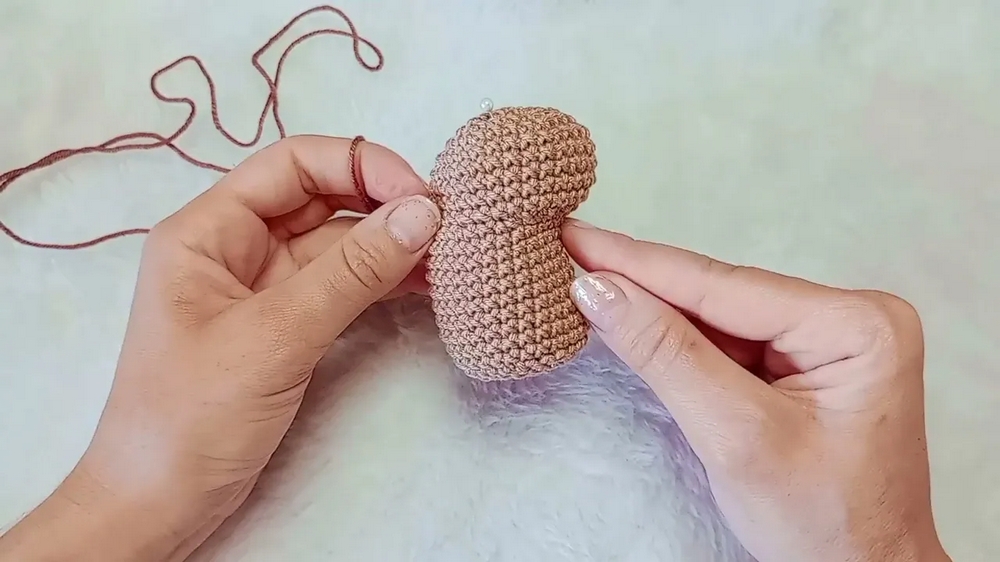
3. Arms and Legs
- Legs: Create a magic ring with eight stitches using Cocoa yarn. Add two rows of eight single crochets using the same color as the body. After stuffing lightly (using leftover thread), glue or sew the legs onto the body.
- Arms: Create a magic ring with six stitches and add two rows of six single crochets. Similarly, stuff the arms lightly and attach them to the body using glue or by sewing.
4. Embroidering the Face (Eyes and Nose)
- Use your tapestry needle to embroider the facial features with white or black thread. Focus on adding small, precise stitches for the eyes.
- Add a nose that appropriately matches the size and proportion of the capybara’s face.
5. Decorative Details (Optional)
- Make a chain of 35 stitches with the white thread to create a cord. Close the chain into a circle using a slip stitch.
- Create popcorn stitches by inserting multiple double crochets and closing them into a group. These stitches add texture and resemble a crown or additional embellishment to the keychain. Secure and trim the threads when completed.
- For added cuteness, apply a bit of brown blush to the middle of the capybara’s face, giving it a soft and warm look.
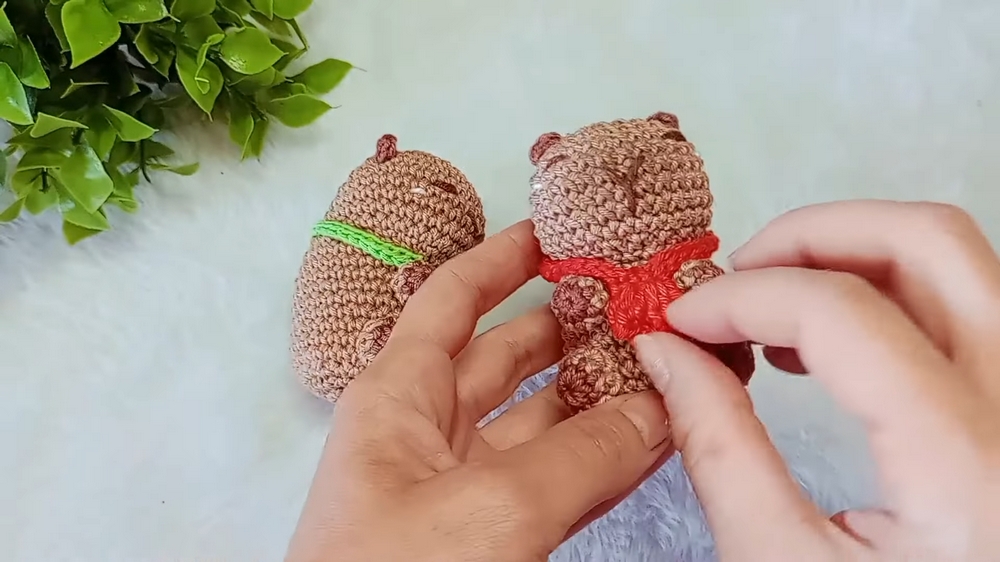
Special Features
- Compact and Elegant: The capybara’s small size makes it ideal for a keychain while still being intricately detailed.
- Decorative Touches: The additional popcorn stitches and blush coloring add personality and uniqueness to the design.
- Functional Gift: This mini capybara can be used as a keychain or hung as a decorative charm.
Tutor’s Suggestions
- If you prefer a cleaner finish, use glue to attach the small details like arms and legs, as these can be challenging to sew given their tiny size. However, sewing is still an option if you want a sturdier attachment.
- Take your time positioning the ears and facial embroidery to maintain symmetry, as these aspects define the capybara's character.
- Use leftover thread for stuffing the smaller limbs, making the most of your materials.
Level of Difficulty
This crochet project is suitable for beginner to intermediate crocheters. The techniques used are straightforward, including the magic ring, single crochet, and basic increases and decreases. However, the small size of the workpieces may require some patience.
Uses of the Mini Capybara Keychain
- Keychain Accessory: A functional and eye-catching addition to your keys.
- Gifts for Friends and Family: A handmade token of love that’s both charming and practical.
- Decorative Element: Use the capybara as a bag charm or a cute desk ornament.
Tip for Best Results
When attaching smaller pieces like ears, arms, and legs, position them with pins first to ensure proper symmetry before sewing or gluing. This step saves time and ensures the capybara looks balanced and cohesive.
Conclusion
The mini capybara keychain is a delightful crochet project combining simplicity and creativity. With careful attention to detail and the use of basic crochet techniques, you can crochet a tiny but charming piece that’s perfect as a keepsake, gift, or accessory. Whether it’s for personal use or to surprise someone special, this amigurumi project promises to bring a smile to everyone who sees it.