There’s something special about crafting the perfect accessory that adds warmth and personality to your outfit. A crochet hat pattern is your ultimate go-to for creating stylish, functional headwear—whether it’s a cozy beanie to beat the winter chill or a lightweight slouchy hat for a breezy autumn day. These patterns allow you to customize size, color, and design, perfectly matching your mood and wardrobe.

You can style your handmade hat with casual jeans and a sweater, or even layer it over a messy bun for an effortless chic look. Beyond style, crocheting a hat is a relaxing, rewarding project that saves money and makes meaningful gifts. step into the endless possibilities of crafting your own signature hat with ease.
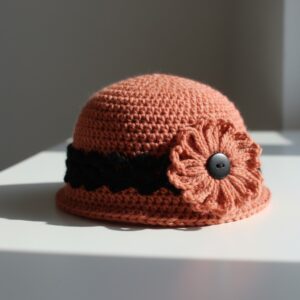
Chic Crochet Hat Pattern That’s So Fun to Make
Materials Needed
- Yarn/Wool: Medium weight yarn (Size 4) in your preferred color.
- Crochet Hook: 4 mm (use a hook slightly thicker than the yarn for better elasticity).
- Scissors
- Yarn Needle/Wool Needle
- Optional: A pompom maker (or use your hand).

Crochet Baby Hat with Pompom Pattern
This guide provides a detailed step-by-step pattern to create a beautiful crochet baby hat with a fold and pompom. The pattern is suitable for 0-3 months of age, but customization guidance is included for various sizes. The design features slip stitches and is beginner-friendly.
Let's get started!
Finished Size
- Circumference: Approximately 35 cm (or custom size, depending on measurement)
- Height: 12 cm (plus an additional 5 cm for the fold, for a total height of 17 cm)
Gauge
- Slip Stitches Rows: 10 rows = approximately 5 cm.
- Check your gauge by crocheting a small swatch of slip stitches to ensure the ideal tension for desired measurements.
Special Techniques
- Slip Stitch Crochet: The hat is made entirely using slip-stitches. You'll work into the back loops for stretch and texture.
- Pompom Creation: Follow step-by-step instructions to create a fluffy pompom.
Pattern Instructions
Follow these steps carefully to crochet your baby hat with a pompom.
Step 1: Start with the Foundation Chain
- Begin with a foundation chain that matches the desired height of the hat (including the fold). For the size 0-3 months hat with a fold:
- Chain 35 (approximately 17 cm in length).
- Check your chain's length with a measuring tape for accuracy. Adjust accordingly for a larger or smaller hat.

Step 2: First Row of Slip Stitches
- Add 1 more chain after your foundation chain to begin the first row.
- Insert your hook into the second chain from the hook.
- Work a Slip Stitch: Yarn over and pull through both loops.
- Continue working Slip Stitches into every chain across the row.

Step 3: Second Row (Back Loop Only)
- At the end of the first row, chain 1 and turn your work.
- Insert the hook into the back loop only of the first stitch.
- Work a Slip Stitch in the back loop. Continue across the row, working each stitch in the back loop only.
Step 4: Repeat Slip Stitch Rows
- Repeat Step 3 (working slip stitches in the back loop) until your rectangle measures the total circumference of the baby’s head (for a size 0-3 months hat, this is 35 cm).
- Keep your stitches loose and even to ensure the hat remains stretchy and fits comfortably.
Step 5: Finishing the Rectangle
- Once the rectangle reaches 35 cm in width, cut the yarn and leave a long tail for sewing.
- Thread the tail onto a yarn needle.
Step 6: Seam the Edges Together
- Align the rectangle edges, ensuring the foundation row matches the ending row.
- Close the seam with a whipstitch or mattress stitch:
- Work by inserting the needle into the half of a chain stitch from each side.
- Repeat across the entire length, forming a tube. Secure the seam with a knot at the end.
Step 7: Gather the Top of the Hat
- Using the same yarn needle and tail, weave the needle around the open top edge of the tube:
- Pick up a stitch from every single chain around the top circumference.
- Pull the yarn tightly to gather and close the top of the hat.
- Secure the gathered edge by knotting the yarn and weaving in small stitches until the top is tightly sealed.

Step 8: Create the Pompom
You can make the pompom with a pompom maker or your hand.
Option A: Pompom Maker
- Wrap yarn evenly around the pompom tool until it’s fluffy and dense.
- Secure the center with a strong knot and slide it off the tool.
- Trim the edges to achieve a round shape.
Option B: Hand Method
- Wrap the yarn around three fingers (or four fingers, for a bigger pompom) approximately 40–50 times.
- Slide the yarn off your hand and tie it tightly in the middle with another piece of yarn.
- Cut through the loops on both sides and trim to shape into a neat pompom.
Step 9: Attach the Pompom
- Thread the pompom's tails through the top center of the hat using a crochet hook.
- Pull the threads to the inside of the hat and secure with tight knots.
- Trim any excess thread inside the hat after securing.

Step 10: Fold the Brim
- Fold the lower edge of the hat up by 5 cm to create a cozy and stylish brim.
Customization Ideas
- Colors: Use variegated yarns or alternate colors for stripes.
- Tassels: Swap the pompom with tassels for a fun twist.
- Appliqué: Add small crocheted motifs, such as flowers or animals, for decoration.
- Size Adjustments:
- For larger sizes, measure the head circumference and adjust the foundation chain and rows.

Tips for Better Results
- Keep your slip stitches loose for a more elastic and comfortable fit.
- Use a soft baby-friendly yarn to avoid irritation.
- Ensure you measure frequently to match the required size for the hat.
- If you're a beginner, practice slip stitching before starting the pattern.
Conclusion
Congratulations! You’ve just completed a cozy and adorable baby hat with a pompom, perfect for 0-3 months. The texture of the slip stitches combined with the fluffy pompom makes this hat stylish and functional for little ones. It's a versatile project that can serve as a cherished gift or an addition to a baby's wardrobe.