Infuse playful charm with this Crochet Blueberry pattern, adding vibrant color, delightful texture, and cheerful detail to any project.
The sight of plump blueberries can brighten a garden and lift the spirit. The Crochet Blueberry brings that same cheerful charm into homes in a lasting, handmade form. Each berry is carefully shaped with soft, durable yarn, capturing the gentle roundness and subtle texture of real blueberries. Its vibrant, deep blue hue adds a lively touch to any décor, while the tactile surface invites interaction and admiration. These crochet blueberries are versatile in use—they can serve as whimsical accents in bowls or jars, enhance seasonal displays, or be combined with other handmade crochet fruits to create decorative arrangements.
Delightful Crochet Blueberry for Table Accents

Lightweight yet resilient, they maintain their shape and color over time, making them perfect for repeated use and display. Beyond decoration, they also make thoughtful gifts, bringing a playful and colorful touch to friends’ or family members’ homes. The charming details and carefully constructed form highlight the attention and care invested in each piece, offering both visual appeal and tactile satisfaction.
The Crochet Blueberry combines beauty, durability, and versatility, turning ordinary spaces into lively, cheerful corners. Its lasting charm and practical use add personality and warmth, bringing a subtle touch of nature’s delight into everyday life.
How to Crochet Simple Amigurumi Blueberry
Materials Needed
You’ll need the following supplies to complete the berry trio:
- Yarn:
- Blue for the blueberry
- Green and pink for the strawberry
- Darker pink for the raspberry
- Other Supplies:
- Polyfill for stuffing
- Crochet hook
- Yarn needle
- Scissors
- Safety eyes (optional, depending on the intended age group)
Step-by-Step Instructions
Part 1: Making the Blueberry
- Start with the Magic Ring:
- Wrap your blue yarn around your finger three times.
- Pull the loop through two wraps and work six single crochets inside the ring.
- Wrap your blue yarn around your finger three times.
- Build the Base:
- Tighten the ring and begin rounds of increases:
- Round 1: Do two single crochets in each stitch (12 stitches).
- Round 2: Alternate single crochet and increase (total 18 stitches).
- Round 3: Alternate two single crochets and increase, repeating five times (24 stitches).
- Continue increasing through structured rounds until the shape takes proper form.
- Tighten the ring and begin rounds of increases:
- Add Body:
- Do single crochets around for five rounds.
- Decrease:
- Gradually reduce stitches by alternating patterns of single crochets and decreases.
- Gradually reduce stitches by alternating patterns of single crochets and decreases.
- Add Safety Eyes:
- Position safety eyes between rounds 9 and 10, with 5-6 stitch spacing.
- Top and Finish:
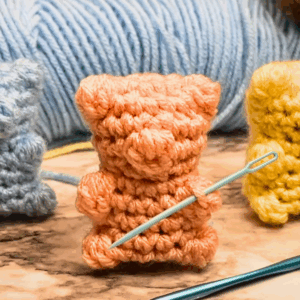
- After stuffing the blueberry with polyfill, close the remaining stitches as per the front-loop decrease stitches. Add cheeks for extra charm.
- After stuffing the blueberry with polyfill, close the remaining stitches as per the front-loop decrease stitches. Add cheeks for extra charm.


Part 2: Strawberry and Raspberry
The process follows a similar structure to the blueberry, substituting pink or darker pink yarn as needed. Both berries have unique stitching techniques to form their textured appearances (like seeds for the strawberry or clusters for the raspberry). The specifics are laid out clearly in the video.

Special Features
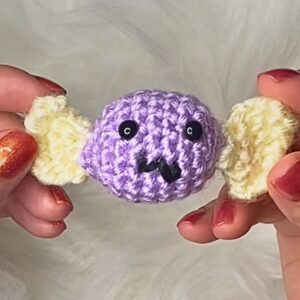
- Expressive Faces: Safety eyes and optional cheeks complete the whimsical look of each berry.
- Compact Size: Perfect for small gifts, home décor, or playful toys.
- Multi-Functional Designs: Versatile for decorations, keychains, or teaching tools.
Level of Difficulty
This project is ideal for beginners and intermediate crocheters. While the magic ring technique and structured increases may require initial practice, the repetition allows for steady progress and confidence building.

Tutor’s Suggestions
- Selection of Eyes: Avoid using safety eyes if the berries are for young children under three. Substitute with felt, crocheted eyes, or knots.
- Consistent Stitching: Maintain uniform tension for a clean and polished look.
- Adjusting Cheek Details: Use leftover yarn for playful, personalized features.
Uses
- Playful Decorations for kitchens, shelves, or tables.
- Cute Gifts for friends or family members.
- Learning Toys for older children; great for teaching fruit names.
Tip
If you’re new to crochet techniques like the magic ring and front-loop stitches, pause and rewind the video to master these steps slowly before continuing. This ensures a seamless result.
Conclusion
Crocheting the berry trio is not just a creative activity but a delightful way to bring charm and beauty to your surroundings. These cheerful berries encapsulate an artistic playfulness that anyone can appreciate. Easy-to-follow instructions and the versatility of the project make this pattern enriching for beginners while allowing advanced crocheters a chance to experiment with personalization and color combinations.