
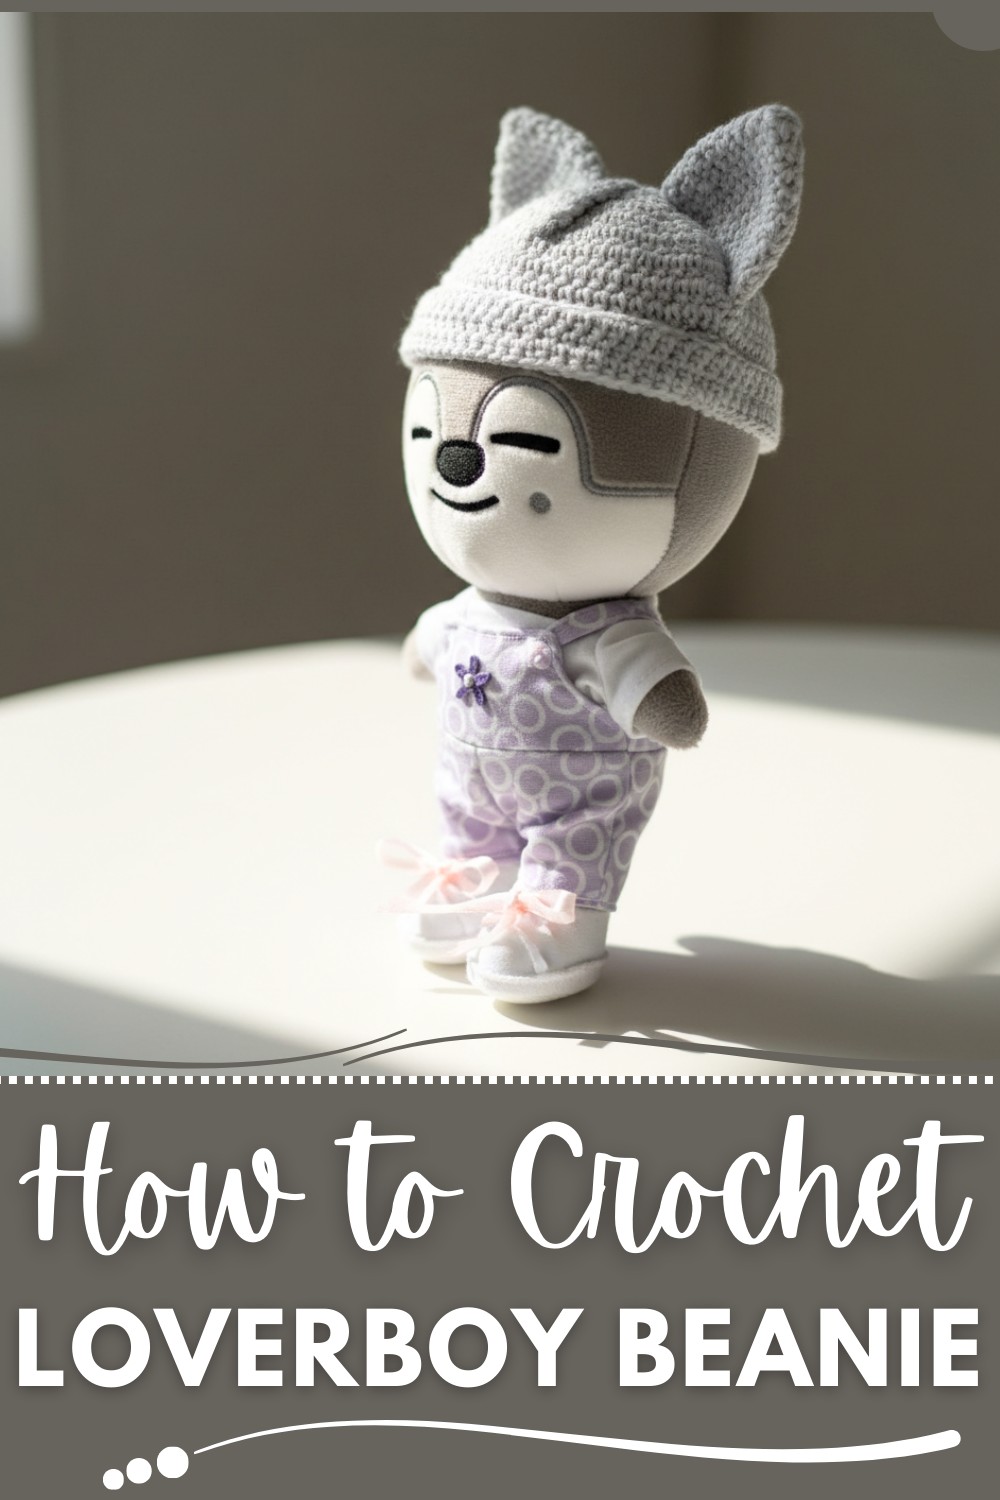
Cold mornings call for something warm, stylish, and handmade—and that’s where the Crochet Loverboy Beanie Pattern comes into play. Perfect for adding a trendy touch to your winter wardrobe, this pattern combines practicality with fashion-forward charm. Crochet enthusiasts love it for its easy-to-follow design and versatility, making it a must-have accessory for chilly days, casual outings, or gifting to loved ones.
Wear your finished beanie with oversized sweaters, jeans, or cozy scarves for a relaxed, everyday vibe that’s effortlessly cool. This pattern works up quickly, offering the satisfaction of creating something unique while keeping your head warm and snug. Whether you’re a beginner or experienced crocheter, this crochet beanie is an ideal project to showcase your creativity and flair.
Unique Crochet Loverboy Beanie Pattern for a Standout Style
Materials
For the Hat
- Yarn: Cotton yarn (lightweight or suitable for a 2mm crochet hook).
- Main color based on preference (e.g., Charcoal Grey).
- Optional contrasting color for embroidery details ("Loverboy Tag").
- Hook: 2mm crochet hook.
- Notions:
- Stitch markers.
- Tapestry needle for sewing.
- Scissors.
Optional Materials for Loverboy Tag
- Fabric: Small piece of light-colored fabric such as white cotton (approx. 2 – 2 ½ inches or 5 – 6½ cm in size).
- Embroidery Thread: Red for the "Loverboy" text.
- Needle: Embroidery needle and sewing needle for attaching the tag.
- Graphite pencil or chalk: For sketching out the embroidery text.
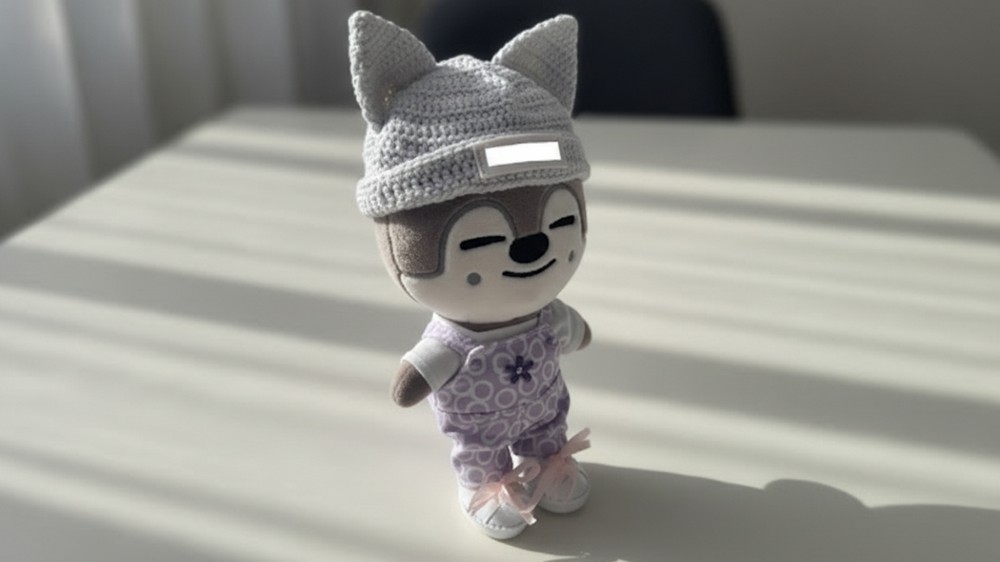
Crochet Loverboy Beanie Pattern for Doll
This crochet pattern outlines the process for making two styles of Loverboy beanies—one with cat ears and another with bunny ears—perfect for SK dolls. The pattern is formatted step-by-step to provide clarity and includes details for the optional embroidered logo ("Loverboy Tag").
Finished Size
- Beanie Base: Fits SK suit dolls with an adjustable design for oversized aesthetics.
- Ears: Cat ears are triangular, while bunny ears are elongated and tapered. Both styles are customizable.
Special Notes
- Foundation Chains: Begin with a stretchy foundation chain for a neat brim. Alternatively, use a standard chain and add a row of single crochet before continuing.
- Customizable Ears: The pattern offers guidance on modifying lengths and widths for both cat and bunny ears.
- Embroidery Tip: The “Loverboy” logo is optional and can be skipped for a simpler pattern.
Pattern Instructions
PART 1: Hat Base
Step 1: Foundation Row
- Foundation Chain (Preferred):
- Start with a slip knot and create 2 chains.
- Insert the hook into the first chain (front loop only), yarn over, pull through, yarn over again, and pull through the final two loops. (This creates the first single crochet foundation stitch.)
- Repeat until you have a length suitable to wrap securely around the doll’s head.
Alternative: Create a standard chain long enough to wrap around the doll’s head, then add a row of single crochet.
- Ensure the chain fits loosely and leaves slack for sewing when wrapped.
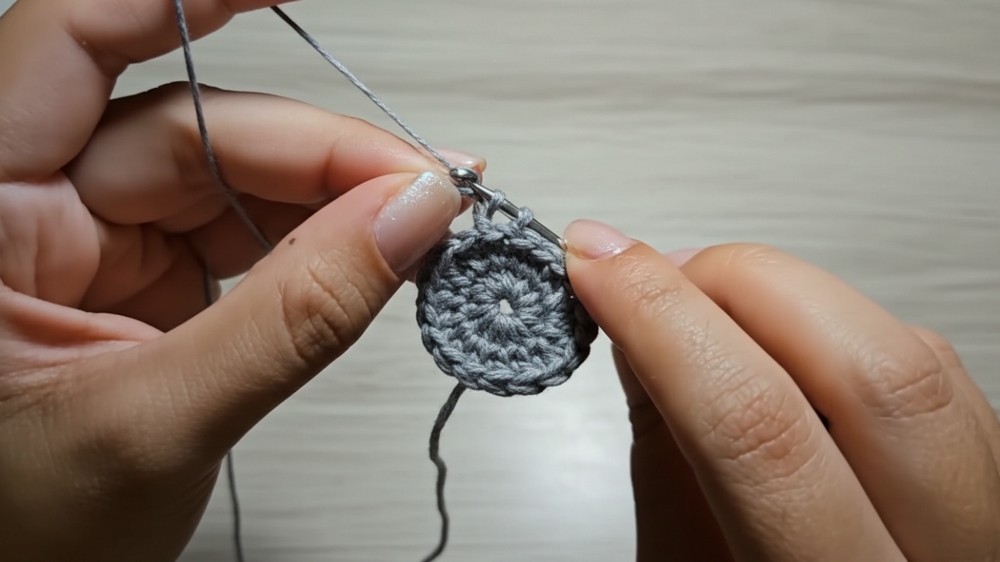
Step 2: Building the Body
- Row 1:
- Chain 2, turn your work, and work dc into each stitch across.
- Repeat Rows:
- Continue working dc rows for 2½ inches or 6 cm, ensuring the height allows for folding the brim over the head.
- Chain 2 at the end of each row, turn, and continue.
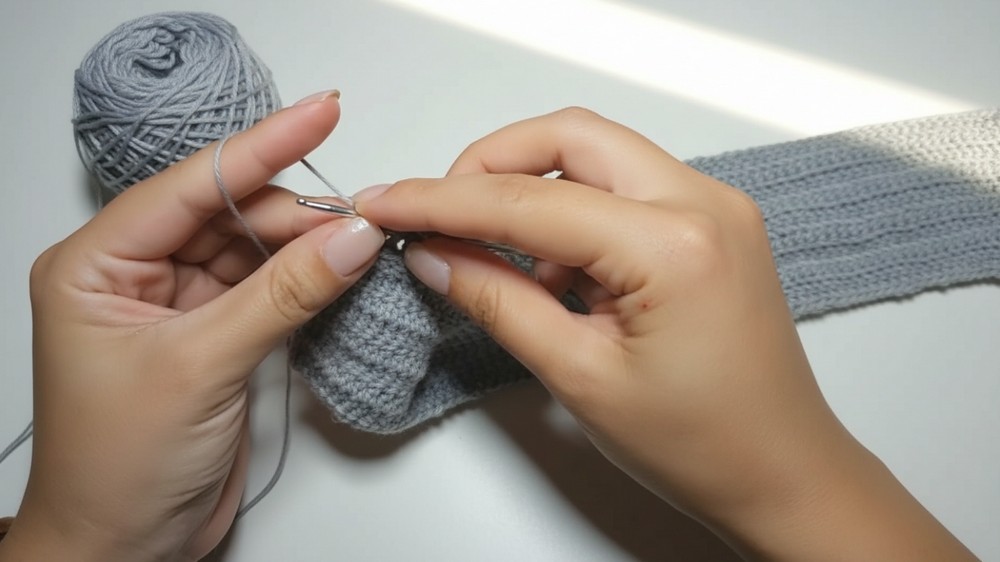
Step 3: Taper the Top
- Divide the stitches evenly into 4 panels (e.g., 84 stitches = 21 per panel). Use stitch markers to mark the boundaries.
- Panel 1:
- Begin at the first marked stitch.
- Row 1 (Panel Tapering): Chain 2, turn, work dc across, and 1 dec at the beginning and end of the row.
- Repeat this tapering row until you have 1–2 stitches left.
- Fasten off and leave a tail for sewing.
- Repeat the tapering method for 3 additional panels.

Step 4: Sew the Hat
- Align the edges of two panels, ensuring the folds face outward for visible seams.
- Sew the panels using a slip stitch or whip stitch, ensuring neat edges.
- Optional: Leave loose threads exposed for a stylized feature.
- Repeat for all seams.
PART 2: Cat Ears
- Chain Base:
- Start with a long tail for sewing, create a foundation chain of 16 stitches.
- Chain 1 and work sc across.
- Shaping:
- Chain 2 and turn. Begin dc rows with a decrease at both ends of the row.
- Continue tapering until you have 1–2 stitches left at the top.
- Finishing:
- Cut the yarn, leaving a long sewing tail. Repeat for the second ear.
Sewing the Cat Ears
- Position: Attach ears to the ridge along the brim of the hat.
- Pinch both edges slightly inward for a stylized look.
- Sew tightly along the base, ensuring symmetry.
PART 3: Bunny Ears
- Chain Base:
- Start with a long tail, create a foundation chain of 9 stitches.
- Chain 1 and work sc across.
- Length and Width:
- Work dc rows for 6 rows without increases or decreases to create a base.
- Add width with 1 inc every 5 stitches in the next row. Continue for another 6–7 rows of dc until reaching the desired length (approx. 14 cm).
- Taper the Ends:
- Begin decreasing at both ends in the final few rows, as explained in the hat panels.
Sewing the Bunny Ears
- Position: Pin the base of each ear to the ridge along the brim. Curve the ears inward slightly for added depth.
- Sew securely and knot the threads inside the hat.
PART 4: Loverboy Tag (Optional)
Step 1: Fabric Prep
- Cut a 2½ x 2-inch piece of white fabric (5–6 cm).
- Fold edges inward and sew them down using a whip stitch.
Step 2: Embroidery
- Use red embroidery thread for the text; thread one strand doubled for neat stitching.
- Lightly sketch "Loverboy" with graphite pencil or chalk.
- Embroider each letter carefully using running stitches.
Step 3: Attach Tag
- Position securely on the front brim using white thread.
- Add tiny decorative stitches on the corners, if desired.
Conclusion
You’ve now created a fashionable Loverboy-themed beanie with optional character ears and embroidery! The hat complements SK suit dolls, adding a unique, playful element to their wardrobe. Tailor the ear lengths or tag design according to your preferences.
Pattern Corrections
- Always count stitches for the panels and ears to maintain symmetry.
- Stretch foundation chains gently during measurement to avoid inaccuracies.
Tips
- Customizing Lengths: Adjust ear sizes by adding/removing rows or increases.
- Embroidery Precision: Practice embroidery separately before working on the final tag.
- Assembly Efficiency: Use safety pins or stitch markers to hold parts together while sewing.


