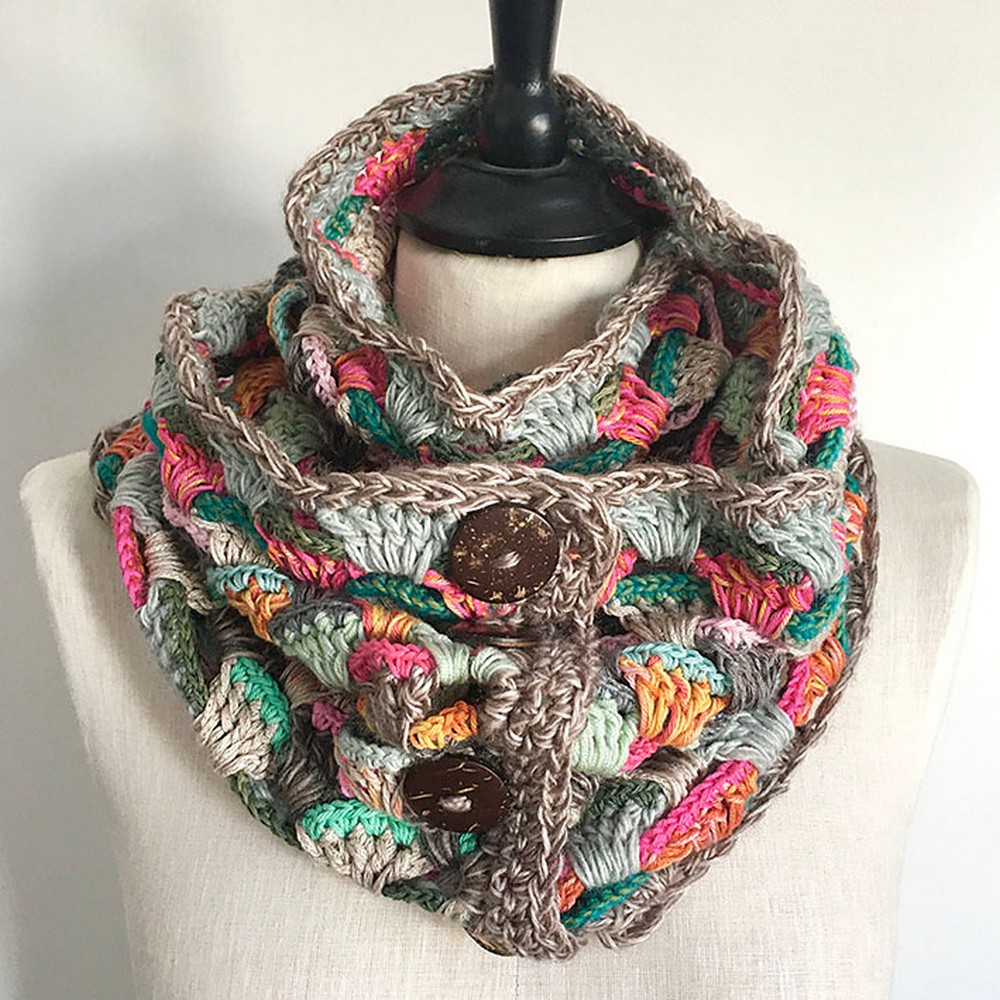
The Crochet Crest of the Waves Cowl design adds a fresh and exciting twist to common crochet styles. This unique blend of looks and the smooth flow of waves brings an air of class, making it look like a piece of art. The clever mix of various textures tells a captivating story of charm and grace, making this design suitable for any season. Its stand-out appeal enhances any outfit and mirrors the lively personality of the person wearing it. This cowl design mixes convenience with a strong sense of detail, highlighting the designer's impressive crochet skills.
Crochet Crest of the Waves Cowl
Materials
- Using the 8mm hook
- Double-yarn-combo as you wish to use for the edging/trim of the whole cowl.
Make a base chain of 139 ch (you can make it longer or shorter if you wish: use a multiple of 6, plus 1)
Ch 2 is for the turn sc into the third stitch from the hook, and each stitch back along the row ( 139sts ) breaks yarn.
Turn the work upside down.
Working from right to left (unless you are left-handed, in which case left to right)
Insert your 4.5mm hook in the base edge of the first stitch: as shown above, using a single contrasting yarn, work 2 ch (forms the first sc) and 1 sc in the first stitch.
Work 2 sc in each sc from the previous (8mm) row.
Break yarn.
Using your 8mm hook and a different-colored double-yarn combo, work as follows: (Work as if the 4.5mm ‘crest’ row didn’t exist) Ch 3 into the first stitch (forms the first dc), 2 dc, continue along the row as follows: *Ch 1, skip 5 sts: 5 dc into next.
Repeat from * to the last 6 sts, skip 5, and work 3 dc into the last st. Break yarn. It should now look like this:
Before inserting your 4.5mm hook in the base edge of the first stitch, use a single contrasting yarn. Ch 2 (forms the first sc), 1 sc in the first stitch. Work 2 sc in each stitch from the previous (8mm) row. Break yarn. now it should look like this:
INSTRUCTIONS 2:
using your 8mm hook and a different color double-yarn-combo, work as follows:
ch 3 into the first stitch (forms the first dc), *ch 1, 5 dc into the next space between waves on the previous row. Repeat from * to the last wave, ch1, and work 1 dc into the last st on the previous row. Break yarn. Work the crest row on top as before.
Continue in this manner (alternating the two wave row variants) until you have worked thirteen 8mm ‘wave’ rows, and their corresponding 4.5mm ‘crest’ rows. Work one more wave row, but do not add a crest. sew in all the ends.
For the trim/edging work, as follows: insert the 8mm hook in the side of the bottom right stitch from the first sc row (indicated with the grey arrow) using the edging/trim color double-yarn-combo, ch 2 (forms the first sc), 1 sc up the side of this stitch. Work 2 sc in the side of each DC going up the side of all the rows.
INSTRUCTIONS 3:
Ch 2, turn. Work back down the same side: 1 sc in each stitch from the previous row. at the bottom, ch 2, turn. Work back up the same side: 1 sc in each stitch from the previous row. Than Work 2 more sc into this same top right space (indicated by the arrow in the pic below) to form the corner. Work 1 sc in the edge of each sc stitch from these edging rows. Then continue along the top edge of the work: 1 sc in each stitch from the last ‘waves’ row.
Than work 3 sc into the top left corner as you did on the right, and continue down the left-hand side in the same way as you worked the right side. Work back up, and then down again to form the three edge rows as before. Break the yarn at the bottom left corner and sew in all ends. Sew buttons to one side of the trim to line up with the large gaps between the waves on the other side.