
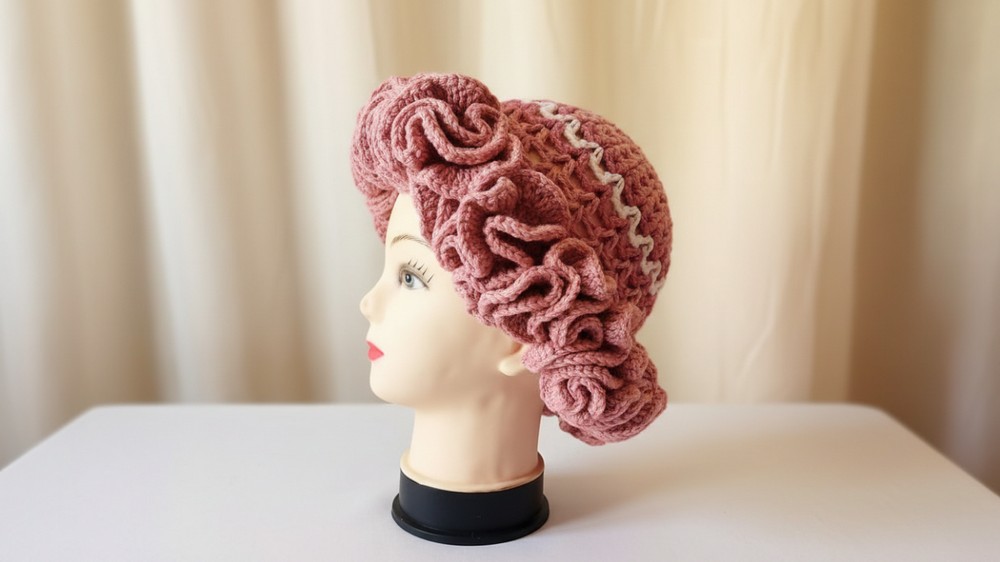
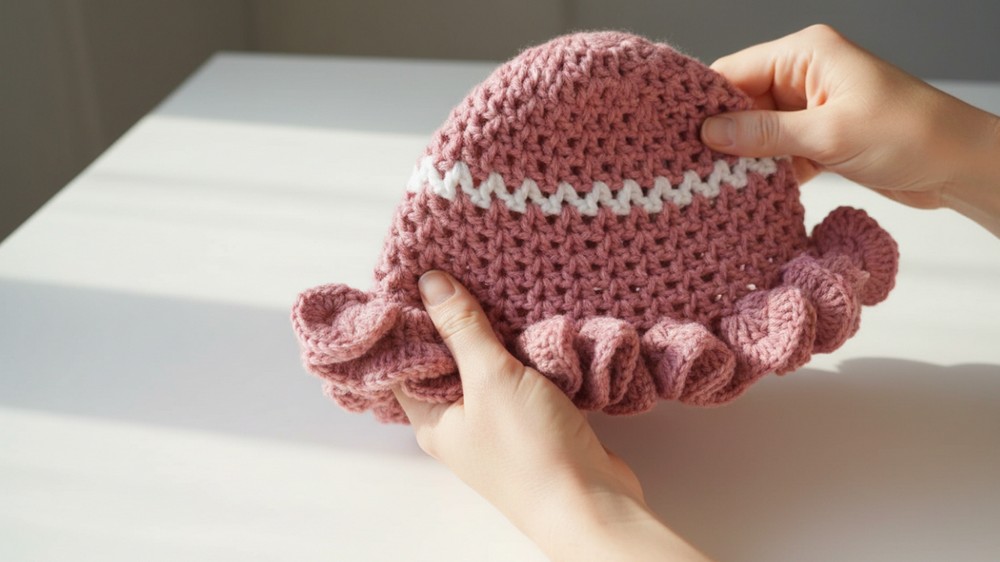
A winter accessory that’s practical yet fashionable is always a win. The crochet V-stitch ruffle hat pattern features a charming textured base and delicate ruffle edging, making it ideal for colder seasons while adding a touch of elegance to your outfits. Perfect for outdoor strolls or everyday errands, it pairs beautifully with winter coats or knit sweaters.
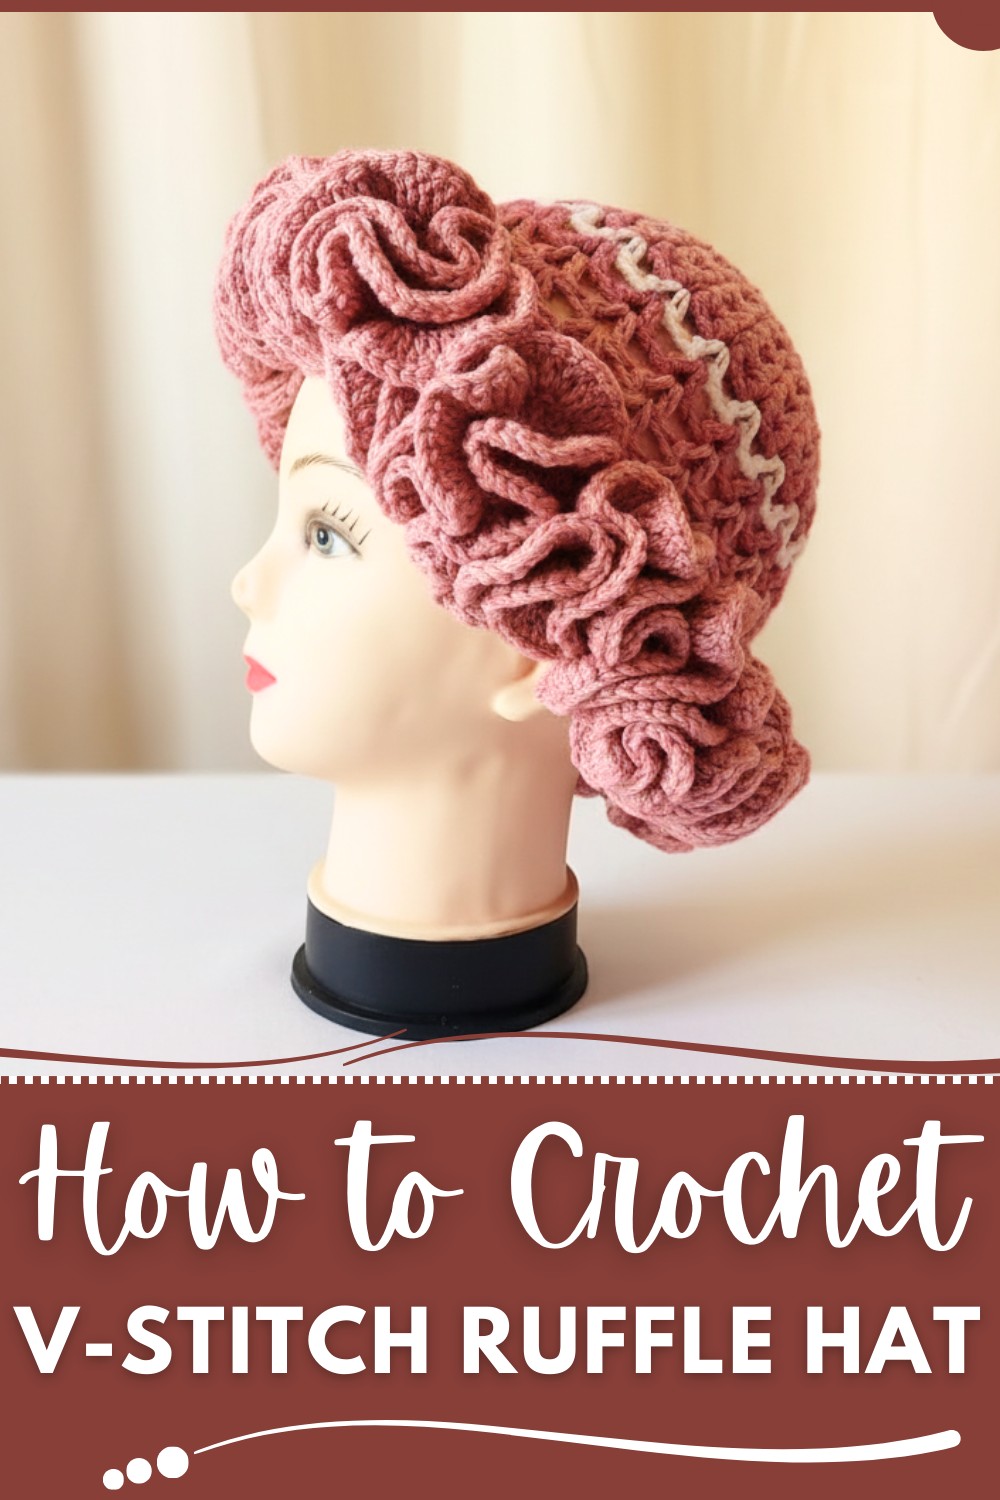
Using soft yarn, this hat offers not only comfort but warmth, helping you stay cozy in style. Personalizing with bold or subtle colors lets you match your own aesthetic or create thoughtful handmade gifts for loved ones. The V-stitch ruffles give the hat its unique appeal, balancing simplicity and sophistication. Stylish and functional, it’s perfect for anyone who cherishes handmade accessories.
Create Your Own V-Stitch Ruffle Hat in Easy Steps
Materials Required
- Yarn:
- Dusty Rose (Main Color): Fingering-weight acrylic yarn.
- White Yarn (Accent Colors) for stripes and decorative details.
- Example used: Robin brand acrylic yarn (Kenyan brand).
- Alternate suggestion: Medium-weight (Worsted weight, Category 4) yarn single strand if not doubling fingering weight yarn.
- Crochet Hook:
- 4.5 mm hook for adult size.
- Additional Tools:
- Scissors for trimming loose ends.
- Darning Needle for weaving in ends.
- Tape Measure to determine hat size.
V-Stitch Ruffle Hat Crochet Pattern
This detailed crochet tutorial guides you through creating a stunning V-Stitch Ruffle Hat with neat finishing and added dramatic rows of ruffles. A perfect accessory, this hat suits intermediate crocheters or advanced beginners looking to enhance their skills.
Key Abbreviations (US Terminology)
- ch: Chain
- dc: Double Crochet
- sl st: Slip Stitch
- st(s): Stitch(es)
- rep: Repeat
- V st: V-stitch (dc, ch 1, dc in same stitch).
Special Notes
- Sizing:
- Adult hats can accommodate dramatic ruffle rows.
- Adjust by adding or reducing V-stitches in initial increasing rounds for alternate sizing.
- Color Stripes:
- Carefully switch colors as directed and carry yarn if desired for neat edges.
- Understanding V-Stitch:
- One V-stitch contains: dc, ch 1, dc.
- When increasing, two V-stitches are placed into one V-stitch space.
Step-by-Step Pattern Instructions
Part 1: Hat Base (Crown)
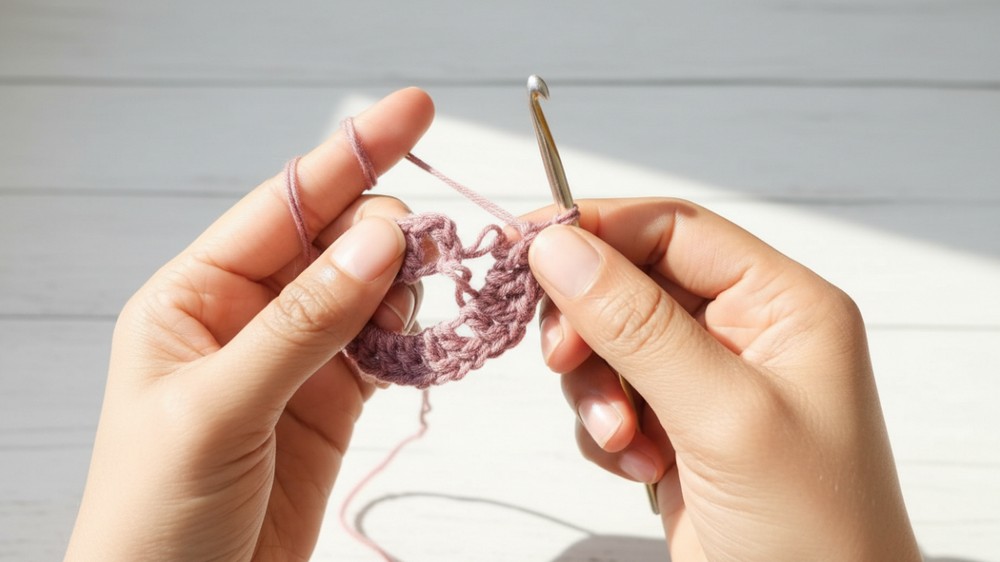
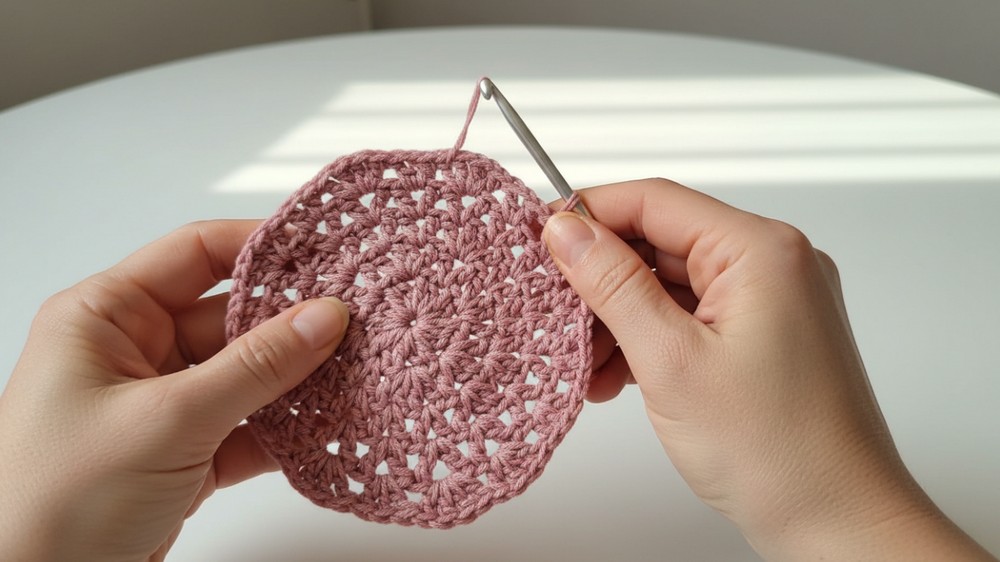
Row 1 (Magic Ring)
- Make a magic ring: Create a loose knot and hold it securely.
- Insert the hook into the ring, chain 4 (acts as the first dc + ch 1).
- Inside the ring, create your first V-stitch: dc, ch 1, dc.
- Repeat for a total of 8 V-stitches inside the ring.
- Each V-stitch = dc, ch 1, dc.
- Slip stitch into the top of the first dc to close the round.
- Pull the magic ring tightly to close the center hole.
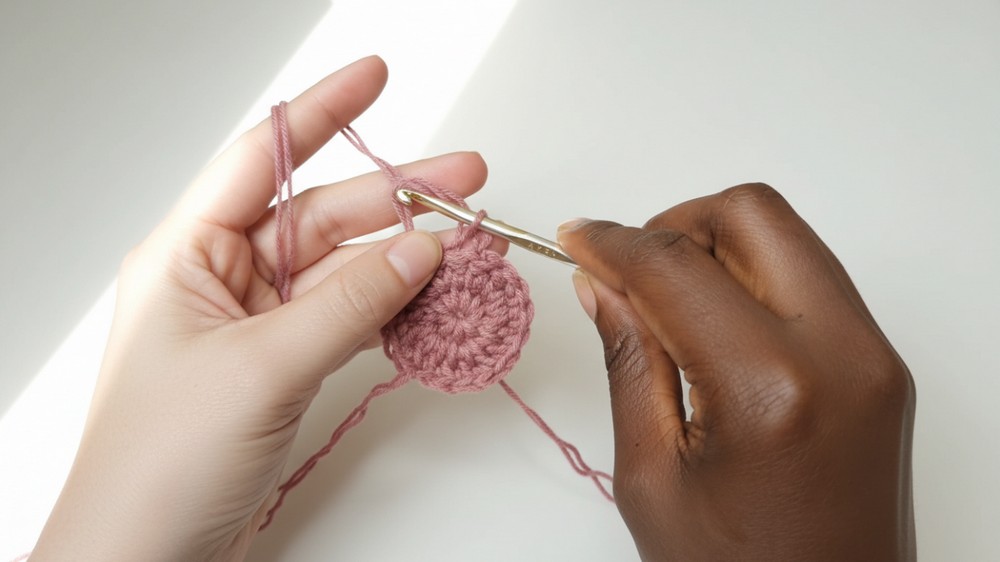
Row 2 (Increasing)
- Ch 4 (counts as the first dc + ch 1).
- Work another dc into the same V-stitch space.
- This completes the first V-stitch.
- In the next V-stitch space:
- Work 2 V-stitches to increase (dc, ch 1, dc twice in the same space).
- Continue alternating between 1 V-stitch and 2 V-stitches in the next spaces for the entire round.
- Slip stitch to join at the top of the first V-stitch.
Row 3 (Increase)
- Ch 4, dc in the same V-stitch space as the starting chain.
- Work 1 V-stitch in the next V-stitch space.
- For every third V-stitch space:
- Work 2 V-stitches (increase).
- Repeat this pattern around: alternating V-stitch spaces and increases.
- Slip stitch to join.
Note: At this row, you should have 36 stitches (12 V-stitches total).
Row 4 (Increase)
- Ch 4, dc in the same V-stitch space.
- Work 1 V-stitch in each of the next two V-stitch spaces.
- Every fourth V-stitch space:
- Work 2 V-stitches (increase).
- Slip stitch to join.
Result: You now have 48 stitches (16 V-stitches).
Row 5 (Increase)
- Ch 4, dc in the same V-stitch space.
- Work 1 V-stitch in each of the next three V-stitch spaces.
- Every fourth V-stitch space:
- Work 2 V-stitches (increase).
- Slip stitch to join.
Result: You now have 60 stitches (20 V-stitches).
Row 6 (No Increase)
- Ch 4, dc in the same V-stitch space.
- Work 1 V-stitch into each V-stitch space around.
- Slip stitch to join at the end of the row.
Result: Hat base has stabilized at 72 stitches (24 V-stitches).
For larger hat sizes, increase by working additional V-stitches (i.e., Row 7-8 includes new increases).
Part 2: Hat Body
Row 7+: Continue Base
- Work an even number of V-stitches around.
- Do not increase.
- Continue for several rows until you achieve the desired body height.
- Example height for adult size is 7 inches.
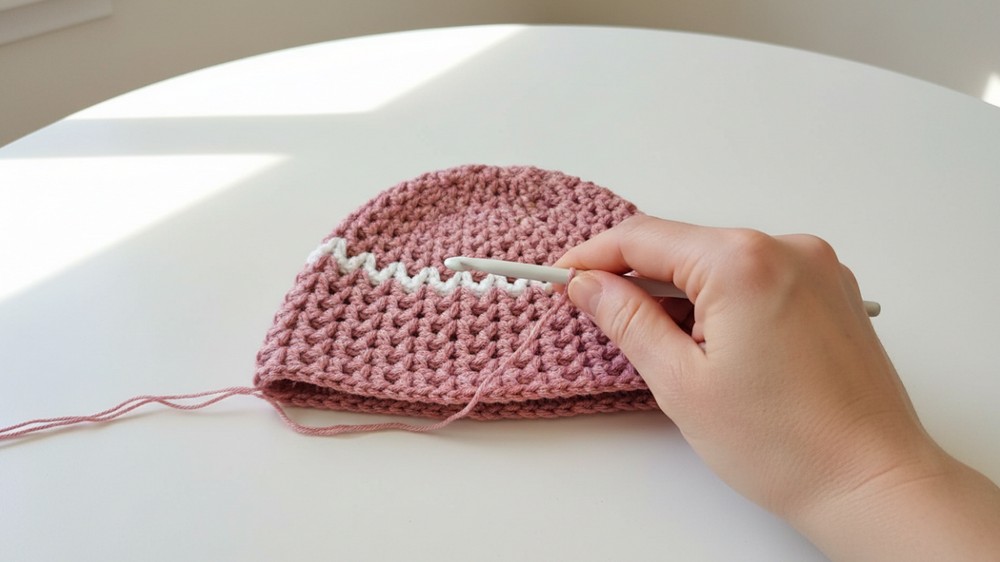
Color Changes
- Add stripes by switching yarn colors:
- Slip stitch with the next color at the end of a row.
- Carry yarn if desired.
- Alternate colors (e.g., dark blue, light blue, white) for decorative stripes.
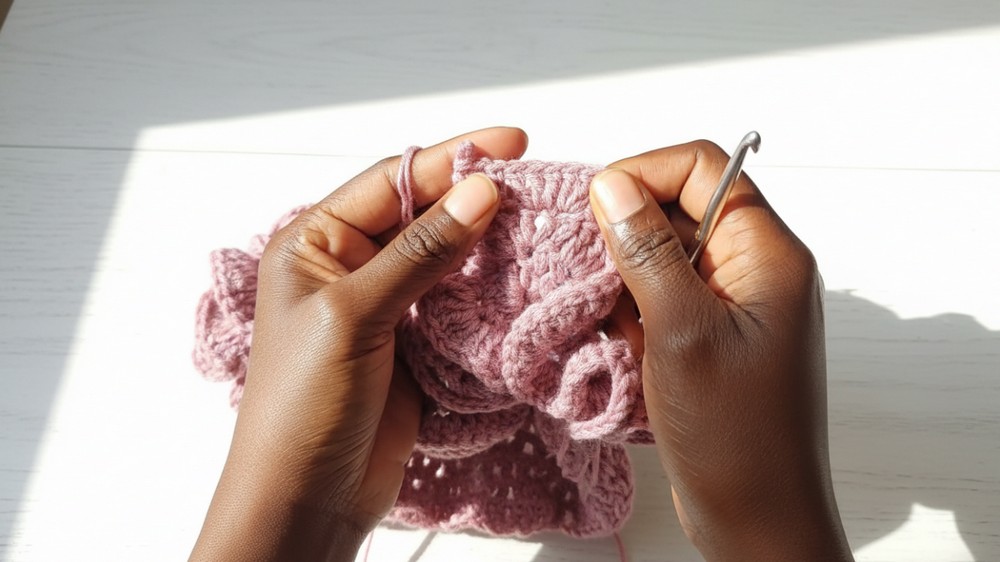
Part 3: Ruffle Rows
Row 1 (Start of Ruffles)
- At the start of the row, slip stitch into the third chain of the previous row.
- Ch 3 (counts as the first dc).
- In the same stitch, work 3 dc.
- For each remaining stitch, alternate:
- Work 3 dc per double crochet and chain stitch space.
- Slip stitch to join after completing the row.
Row 2 (Repeat Ruffles)
- Ch 3, work 3 dc into each stitch from the previous round.
- Continue working evenly without increases.
- Slip stitch to join.
Row 3 (Final Ruffle Row)
- Ch 3, work 3 dc into every stitch in the row for dramatic effect.
- Slip stitch to join, chain 1, and fasten off.
Tips for Success
- Sizing Adjustments: Ensure proper measurements for adult, child, or teen sizes by increasing rows before reaching the body height.
- Color Segments: Carefully weave in loose ends from the stripes to preserve neat final product.
- Ruffle Density: For extra dramatic effect, consider adding a fourth ruffle row.
Conclusion
Congratulations! You’ve created a V-Stitch Ruffle Hat that combines elegance with a playful flair. Its dramatic ruffle rows paired with colorful stripes give this hat a unique and eye-catching look. Whether styled for personal use or gifted to a loved one, this project highlights skillful mastery of textured crochet items.
Pattern Corrections
- Increases must be evenly spaced throughout crown rows to prevent awkward shaping.
Pattern Variations
- Color Experimentation: Use gradient or variegated yarn for a soft transition effect in stripes.
- Ruffle Adjustments: Reduce the ruffle rows for a subtler look.


