Elevate your creative flair with this FREE Distressed Crochet Turtleneck Top tutorial, blending unique texture and easy techniques for a chic, personalized fashion piece.
A wardrobe favorite doesn’t always come from a store – sometimes, it’s made with your own hands. The free Distressed Crochet Turtleneck Top brings together comfort and edgy style in one design. Perfectly suited for cozy evenings or casual outings, this piece strikes a balance between relaxed and bold fashion. Its distressed texture adds character, giving it a unique, effortlessly cool vibe that pairs beautifully with both jeans and skirts.
How To Make A Distressed Crochet Turtleneck Top

This pattern is designed for both beginners and experienced crocheters looking to try something trendy yet comfortable. Featuring a high neckline that offers warmth and stylish flair, it’s ideal for colder weather without compromising on individuality. The distressed detail gives it a modern twist, making it a fashion-forward statement piece that stands out while remaining versatile in your wardrobe.
With its ability to use leftover yarn, this project makes an eco-conscious choice to upcycle materials creatively. Wearing this handmade top not only provides a sense of accomplishment but also adds a personal touch to your daily outfits. Whether dressing it up or keeping it casual, this Distressed Crochet Turtleneck Top is a perfect blend of practicality and style, bringing something uniquely yours to every occasion.
Introduction
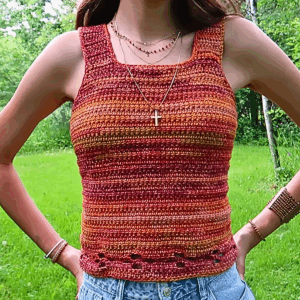
This tutorial revolves around creating a stylish distressed crochet top. The design combines creativity and simplicity, perfect for individuals looking to craft unique fashion pieces. The instructor ensures that the process is beginner-friendly, emphasizing flexibility in the pattern to suit personal preferences. It's crafted using basic crochet techniques with a special flair for creating "distress loops," making it ideal for casual wear or adding a fun layering piece to your wardrobe.
Special Features
- Distressed Design: The highlight of this project is the unique distressed loops, giving the top a textured, casual look.
- Versatility: The top can be styled multiple ways and adjusted based on body measurements.
- Beginner-Friendly: The tutor simplifies the process by offering tips for counting, tension control, and flexible design modifications.
Materials Needed
- Yarn: The tutor recommends using 2 skeins of yarn for this project.
- Crochet Hook: A standard hook suitable for your chosen yarn type.
- Measuring Tape: Helpful for checking measurements for fit.
- Scissors: For trimming excess yarn.
Step-by-Step Process
1. Making the Initial Slip Knot and Base Chain
- Begin by forming a slip knot and creating a long chain.
- The chain length should be sufficient to wrap around the chest area. It doesn’t need to cover the entire back; just ensure it fits well around the sides of the chest.
- If making this for a client, use provided chest measurements. If making it for yourself, wrap the chain around your chest area to check the fit.

2. Single Crochet Rows
- Once satisfied with the chain length, use single crochet stitches across each chain.
- At the end of the row, make a single crochet, chain one, and turn the work.

3. Creating Distress Loops
- Make a long loop, count four chains, insert the hook, and release tension on the loop at the back to keep it flexible.
- The counting is optional and merely ensures uniformity for beginners. Advanced crocheters can decide the loop length based on personal preference or visual judgment.
- Continue this distress-loop pattern across the row, ensuring even tension to prevent sagging or uneven appearance.

4. Expanding and Decreasing Rows
- Crochet until the fabric begins to cover the chest area partially.
- As you approach the sides, start decreasing by making single crochet stitches into the chains while continuing distress loops.
- Decreases occur only on one end of the work each time you turn. Pay attention to the starting single crochet stitch to avoid excessive decreases.

5. Final Adjustments for Symmetry
- Check both sides to ensure they are equal in length and width. If discrepancies are found, adjust rows accordingly by undoing and reworking them.
6. Neck Area and Back Tie Chains
- Create chains to form the neck area for tying the top securely. Begin by making a chain at one side and attaching fresh yarn to the other side to create matching chains.
- Add single crochet stitches in between the distress loops for stability, repeating the rows about 4–6 times depending on preferred neck thickness.
7. Adding Long Chains for Back Ties
- At the end, crochet long chains on either side to form straps. These will be used to tie the garment securely at the back.
Difficulty Level
This project is beginner-friendly, with simple techniques like slip knots, chains, single crochets, and basic loops. While the distressed design adds a unique touch, it doesn't involve complex patterns or math. Beginners can choose to simplify by skipping loop counting for flexibility.
Tutor’s Suggestions
- Beginners should focus on evenly pulling loops to avoid uneven textures.
- Concentration is key while decreasing rows to ensure accurate shaping.
- Check symmetry frequently by comparing both sides of the garment.
- If making adjustments for size, measure by placing the garment on your chest or referring to client-provided measurements.
Uses
The distressed crochet top is perfect for:
- Casual summertime wear.
- Layering over tank tops or light dresses.
- Offering a handmade, trendy addition to wardrobes.
Pro Tip
When working with distress loops, release tension on the yarn to keep the loops flexible rather than tight. Flexible loops ensure the top maintains its textured look without becoming stiff.
Conclusion
This crochet distress top is an innovative and stylish project that caters to all skill levels. Perfect for beginners looking to expand their skills or advanced crocheters wanting something unique, the design is flexible and allows for creativity in terms of fit and look. With adaptable instructions and tips for modifications, this project can transform your wardrobe with a personalized handmade touch.