
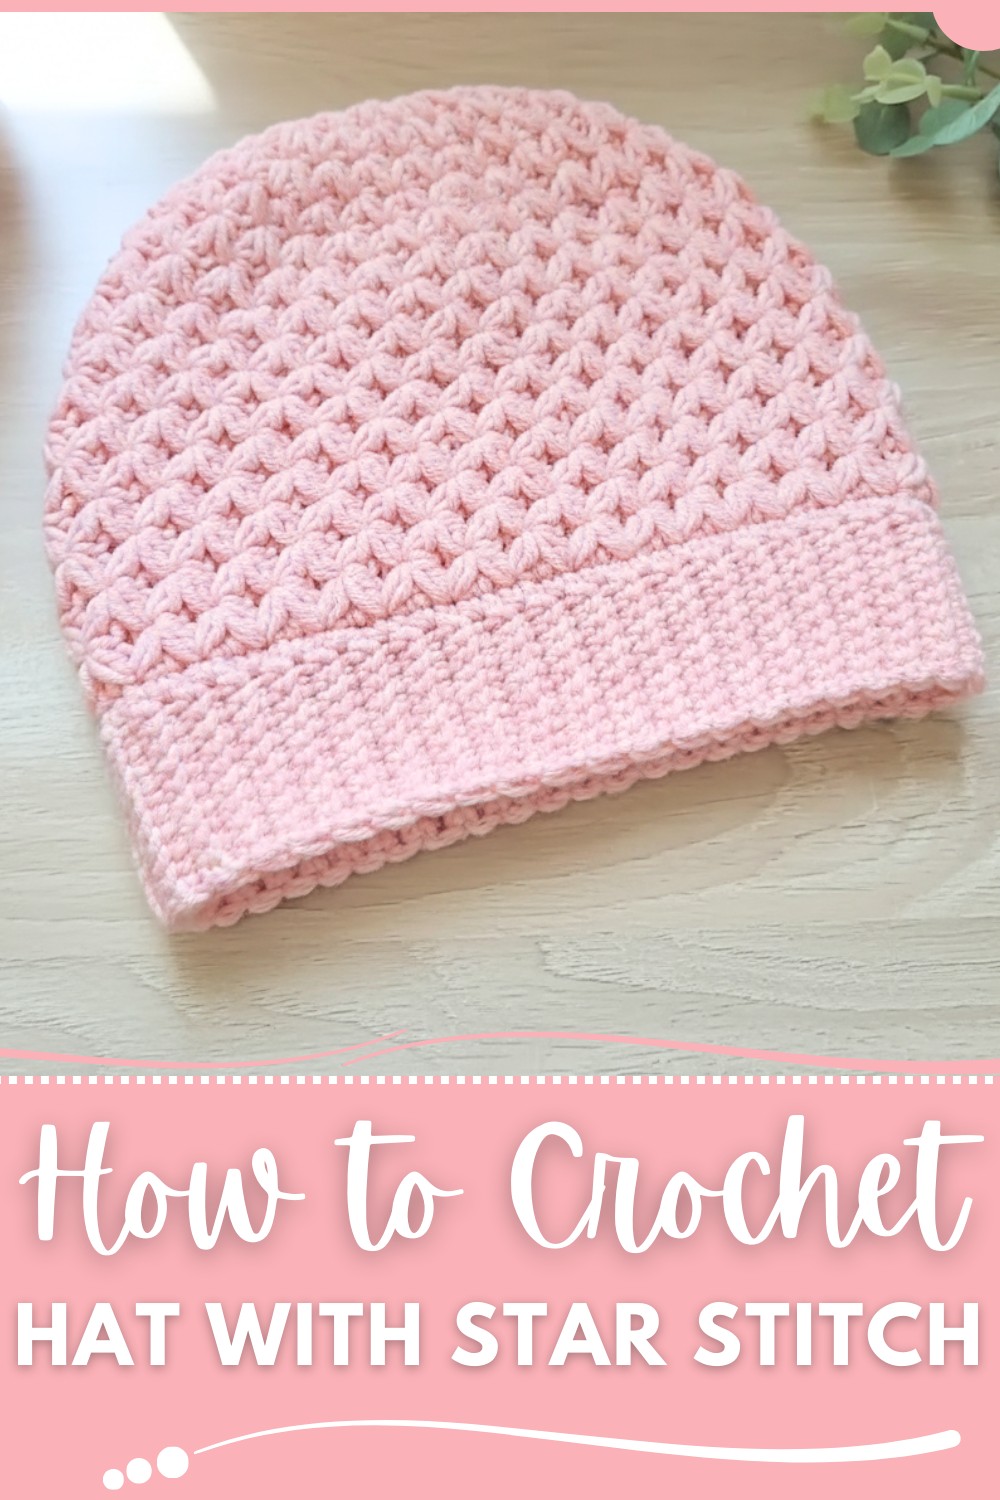
Creating something that is both functional and beautiful is always an enjoyable challenge. A Crochet Star Stitch Hat Pattern offers a unique way to combine warmth with intricate design for cold-weather wear. The delicate star stitch adds depth and texture, making this hat a standout accessory for crisp autumn mornings or snowy winter evenings.
You can style it with neutral layers, bold coats, or even casual sweaters for a timeless look. The pattern is accessible to all skill levels, from those newly learning crochet to seasoned makers seeking fresh inspiration. Aside from adding flair to your outfits, this hat makes a heartfelt handmade gift, providing style, coziness, and a personal touch all in one project.
Beautiful Crochet Star Stitch Hat Pattern in Easy Steps
Materials List
Required Supplies
- Yarn:
- Size 3 yarn is recommended (medium-weight yarn for comfort and flexibility).
- Example: Acrylic yarn for breathability and stretch.
- Crochet Hook:
- Preferred size: 4.0 mm.
- For smaller sizes (newborn and premature): 3.5 mm hook.
- Scissors
- Tapestry Needle for weaving in ends.
- Measuring Tape for determining size.
Crochet Star Stitch Hat Pattern
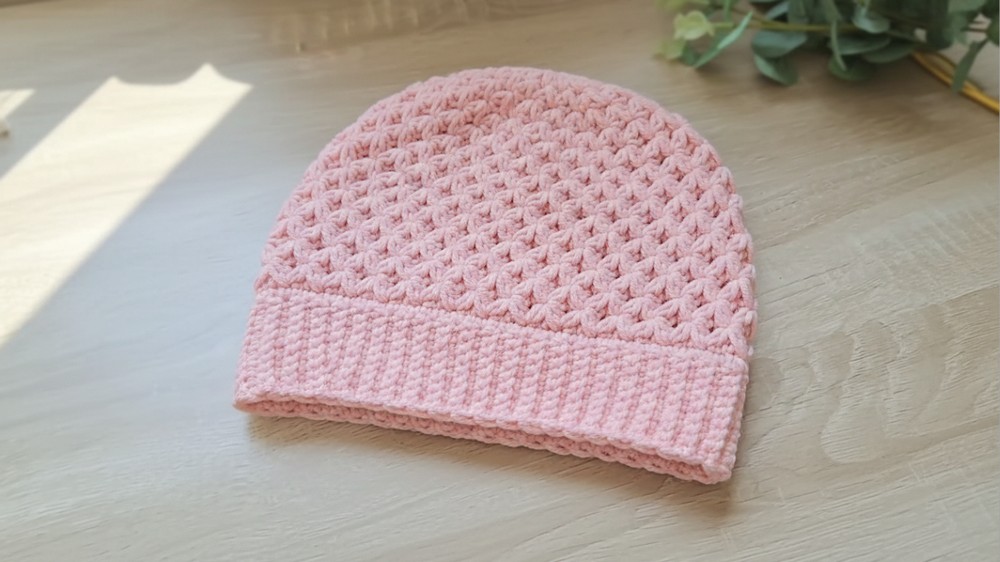
This pattern guides intermediate to advanced crocheters in crocheting a stylish star stitch hat with well-defined size instructions for all ages, from premature babies to adults. The pattern uses the versatile star stitch, offering an elegant texture to your crochet work.
Final Hat Measurements
Reference the following table for size and approximate circumference:
| Age | Circumference | Approximate Rows |
|---|---|---|
| Men | 56 cm (22 inches) | 87 rows |
| Women | 53 cm (20.8 inches) | 84 rows |
| Teenagers | 51 cm (20 inches) | 81 rows |
| 5–10 Years Old | 48 cm (18.9 inches) | 78 rows |
| 2–5 Years Old | 45 cm (17.7 inches) | 75 rows |
| 18–24 Months Old | 43 cm (16.9 inches) | 72 rows |
| 12–18 Months Old | 41 cm (16 inches) | 67 rows |
| 9–12 Months Old | 39 cm (15.3 inches) | 66 rows |
| 6–9 Months Old | 38 cm (15 inches) | 63 rows |
| 3–6 Months Old | 37 cm (14.5 inches) | 60 rows |
| Newborn (1 Month) | 32 cm (12.6 inches) | 54 rows |
| Premature Babies | 29 cm (11.4 inches) | 48 rows |
Skill Level
Intermediate
Key Abbreviations (US Crochet Terminology)
- CH: Chain
- SC: Single Crochet
- SL ST: Slip Stitch
- HDC: Half Double Crochet
- DC: Double Crochet
- ST: Stitch
Special Notes
- Gauge: Ensure consistent tension throughout, particularly for smaller sizes.
- Multiple Rule: Work in multiples of 3 wherever applicable.
Pattern Instructions
1. Foundation
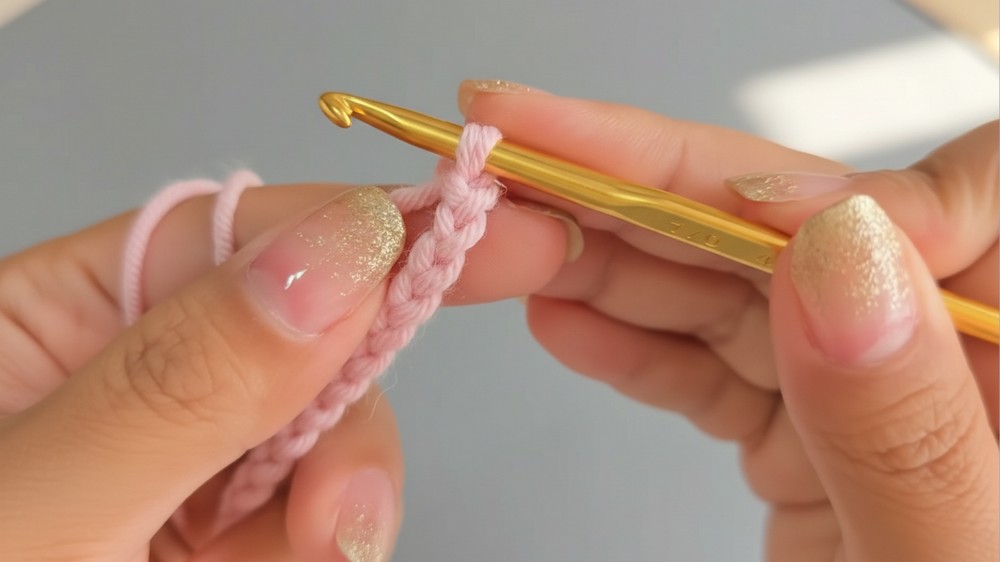
Step 1: Start with the Foundation Chain
- CH 11 (or adjust depending on size).
- Skip 1st chain and work SC into each chain across.
Step 2: Single Crochet (First Round)
- Begin in the second CH and work 1 SC into each chain, carrying leftover yarn under the stitches for a cleaner finish.
- Cut the excess yarn tail after pulling through.
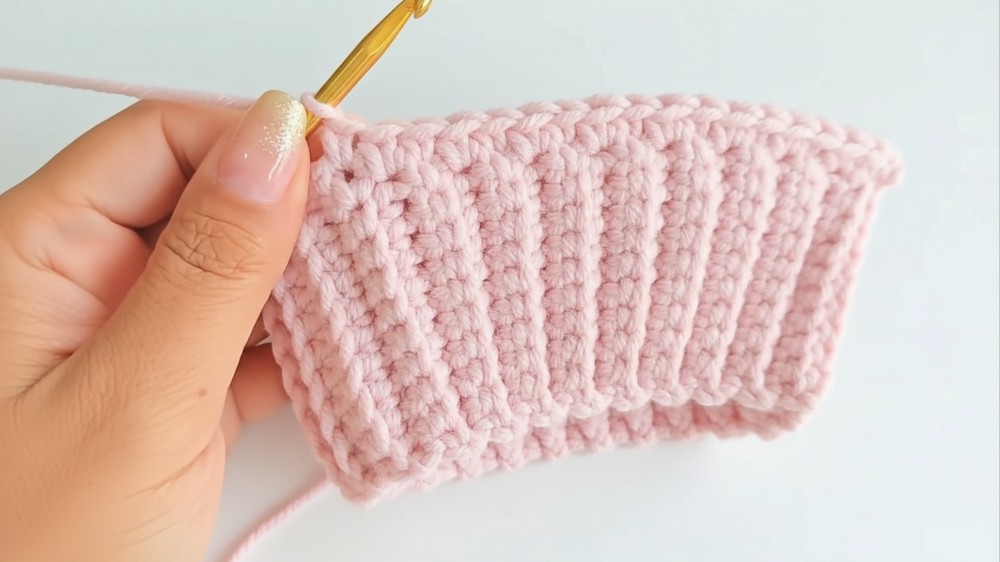
2. Main Body of the Hat
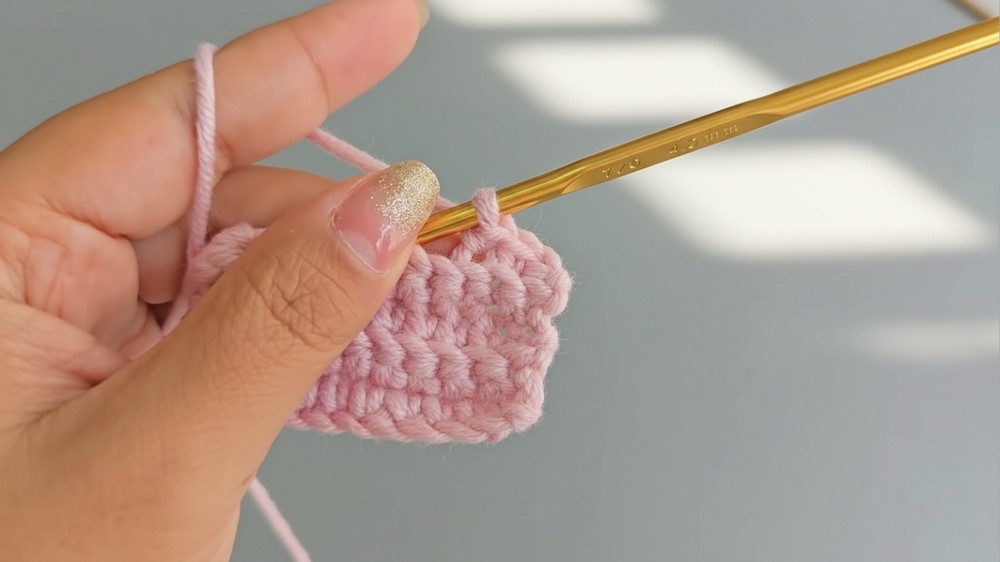
Step 1: Building Single Crochet Rows
- CH 1 to create the height chain.
- Work SC into half of each stitch from the previous row (using BLO for texture).
- Repeat this pattern in the next row:
- Start each row: Insert hook in BLO.
- End each row: Work into the whole stitch, and close with a single CH for turning.
- Continue this method row by row, taking half stitches for texture until you reach the circumference required for the hat size (refer to table provided).
Step 2: Joining Ends
- Measure the final width of the rectangle and fold it into a tube.
- SL ST across both ends to seam them together.
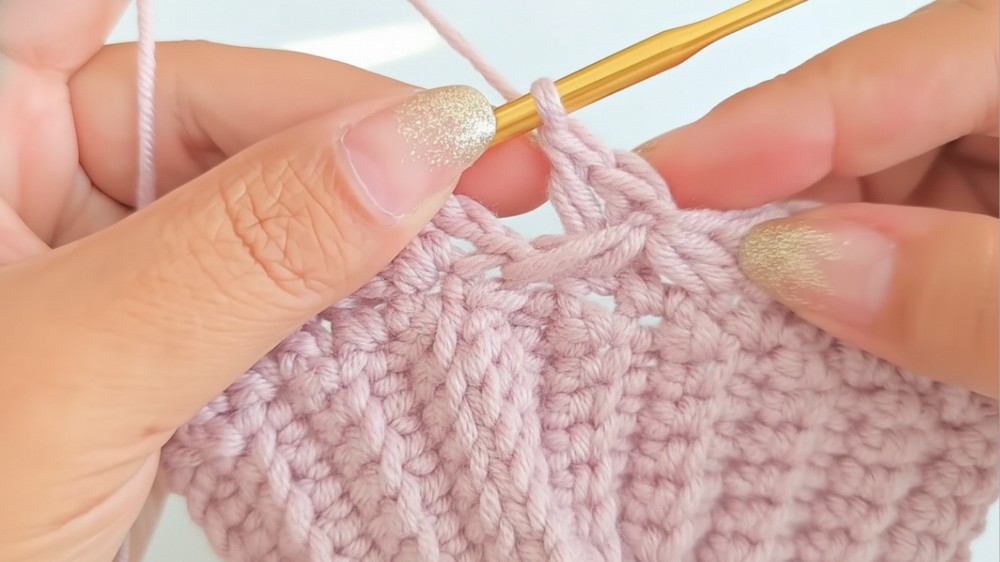
3. Transition to Star Stitch
Step 1: Work Base Round for Star Stitch
- CH 3 (counts as the first DC).
- Double Crochet (DC):
- Move to the next stitch, yarn over, pull up, and crochet a DC.
- Return to the same space where the first DC was created.
- Skip 2 stitches, then work:
- Lift loops in the skipped stitches, yarn over, and close together (Star Shape).
- Return to the first skipped stitch and work DC into both.
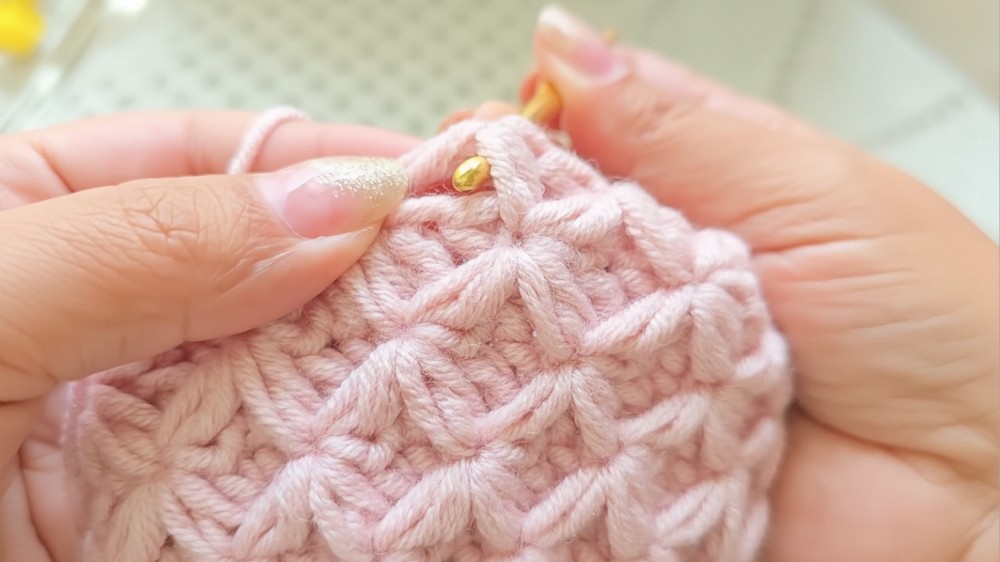
Step 2: Repeating Star Stitch Rows
- CH 3, move to the next row space and work star stitch clusters:
- Lift points (loops), close, secure, and create fans with star stitch clusters.
- Repeat this design for several rows:
- Work stars above the previous stars, evenly spacing clusters across rows.
4. Crown and Decrease
Step 1: Start Decreasing
- For shaping the crown, work fewer star stitch clusters in each row:
- Skip additional stitches between fans.
- Start tapering the top by crocheting smaller star patterns.
Step 2: Closing the Hat
- When ready to close, CH 3 and reduce star stitch spaces.
- Finish the last round with SL ST in the remaining openings.
5. Weaving Ends and Final Touch
- Cut yarn, leaving a tail for finishing.
- Use the tapestry needle to weave through edges and secure open spaces.
- Reinforce the loops by passing through stitches snugly to prevent unraveling.
Conclusion
You’ve completed your beautiful star stitch hat! This textured design offers both warmth and style, making it suitable for gifting, personal use, or selling. Its adjustable size makes it accessible for all ages.
Customization Ideas
- Color Variations:
- Alternate colors between rows for a striped effect.
- Use ombre or gradient yarn for a blended look.
- Embellishments:
- Add a pom-pom on top for a playful touch.
- Sew decorative appliques like flowers for personalization.
Pattern Corrections
Ensure consistent counting and placement of star stitch clusters to maintain symmetry. Uneven tension can distort the design or fit. Additionally, double-check the decrease rounds to avoid gaps at the crown.
Tips for Success
- Track Rows: Use stitch markers to ensure accurate row counts.
- Test Fit: Continuously measure the circumference for proper sizing.
- Closing Cleanly: Tighten loops at the crown for smooth finishing.


