Bring playful charm to your projects with this Free Crochet Gummy Bear Pattern, generating adorable, unique bears that delight as gifts or decor instantly.
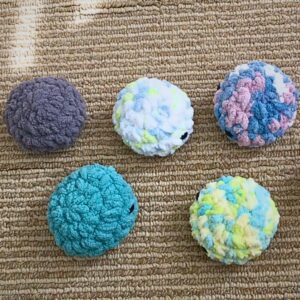
A colorful collection of tiny toys lay scattered across a bright tabletop, each one catching the light with cheerful vibrancy and playful charm. Among them, soft, cuddly figures held a special appeal, offering a sense of whimsy and comfort that brightened any room. The Free Crochet Gummy Bear pattern brings this delightful idea to life, turning simple yarn into small companions full of character. These gummy bears are perfect for gifting, decorating shelves, or adding a playful accent to a child’s room, combining fun with a touch of handmade warmth.
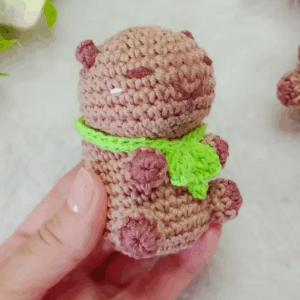
Modern Twist Crochet Gummy Bear Pattern You Can Try

Lightweight yet sturdy, they are easy to carry, making them ideal for imaginative play or as thoughtful keepsakes for friends and family. The gentle texture and carefully stitched details provide a tactile experience that is satisfying to both make and hold.
Beyond their aesthetic charm, these crocheted figures encourage focus, patience, and creativity, allowing each piece to become a meaningful expression of care and attention. Whether arranged in a colorful collection or given individually, the Free Crochet Gummy Bear pattern offers versatility, practicality, and joy. These charming little creations brighten spaces, spark smiles, and provide the lasting satisfaction of crocheting something small yet full of personality and warmth.
Step-by-Step Details
Materials Needed
- Yarn: Any yarn of your choice.
- Crochet Hook: Match your yarn type to the proper hook size (specific size not mentioned in video).
- Stuffing Material: Fiberfill, leftover yarn scraps, or pillow stuffing.
- Stitch Marker: A strand of different-colored yarn can be used as a stitch marker.
- Scissors
- Yarn Needle or Crochet Needle
Step 1: Start with a Magic Ring
- Wrap the yarn around two fingers twice, ensuring the tail end of the yarn is behind your fingers.
- Insert your hook through the first two loops, grabbing the third loop. Pull it through to form a ring.
- Pinch and pull the loop off your fingers while keeping it tight.
- Chain two stitches to secure the magic ring.

Step 2: Create Six Single Crochets in the Magic Ring
- Insert the hook into the center of the ring and:
- Yarn over.
- Pull up a loop (two loops on the hook).
- Yarn over again and pull through both loops to complete a single crochet.
- Repeat this process six times to form your base.
- Tighten the magic ring by pulling on the yarn tail. Adjust the second loop to fully close the ring.

Step 3: Add a Stitch Marker
- Use a contrasting-colored yarn strand as a marker to indicate the start of each round. Place the marker next to the last stitch.
- Fold the strand over for better positioning as you work continuously in rounds.

Step 4: Round Two – Increase Stitch Count
- Work two single crochets in each stitch (this is an “increase”).
- Continue this across all six stitches from the previous round.
- By the end of this round, you should have a total of 12 stitches.
- Remove the stitch marker and reposition it at the top of the new round.
Step 5: Round Three – Bubble Stitches (Ears)
- Work three single crochets (one per stitch for the first three stitches).
- In the fourth stitch, create a bobble stitch:
- Yarn over.
- Insert the hook into the stitch, yarn over, pull up a loop (three loops on hook).
- Yarn over and pull through two loops. Repeat until there are five loops on the hook.
- Yarn over and pull through all five loops.
- Continue with an increase (two single crochets into one stitch). Repeat the bobble stitch pattern in the correct stitches.
- Fold the bobble stitches upward to make sure they position correctly as the ears of the bear.
Step 6: Round Four – Single Crochets
- Work one single crochet in each stitch around the circle.
- Ensure that you include stitches at the two loops near each bobble stitch. By the end of this round, there should be 15 stitches.
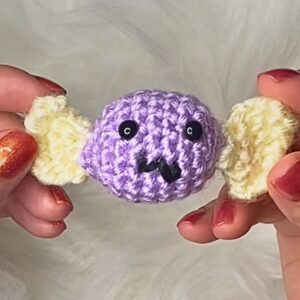
Step 7: Round Five – Form the Nose
- Start with seven single crochets (one per stitch).
- Create a bobble stitch as described earlier in the eighth stitch.
- Continue with seven single crochets in the remaining stitches.
- Fold the bobble stitch outward as the gummy bear's nose.
Step 8: Round Six – Decrease the Shape
- Alternate between one single crochet and one decrease:
- To decrease:
- Insert hook through the front loop of the first stitch and the back loop of the second stitch.
- Yarn over and pull through both loops to complete the decrease.
- To decrease:
- Continue the pattern until the round is complete.
Step 9: Round Seven – Body Shaping
- Alternate between one single crochet and one increase (two single crochets in the same stitch).
- Using the shaping pattern, create the base of the gummy bear’s body.
Step 10: Add Legs with Bobble Stitches
- In the next five stitches, work single crochets.
- Create a bobble stitch in the next stitch to form one leg.
- Work four single crochets, followed by another bobble stitch to create the second leg.
- Finish the remaining round with single crochets, ensuring the bobble stitches are outward-facing.
Step 11: Final Rounds – Closing and Stuffing
- Begin decreasing every alternate stitch to prepare for closing.
- Use a slip stitch to finish the final round.
- Cut the yarn, leaving a long tail for sewing.
- Stuff your bear using fiberfill or pillow stuffing.

Step 12: Seal the Bottom
- Thread the yarn tail through a yarn needle.
- Sew across the front loops only to tighten the base. Alternate directions while pulling the yarn gently to close the hole completely.
- Secure the yarn by weaving through several loops and trimming the excess.
Special Features
- Beginner-Friendly Pattern: Perfect for those new to crochet, with simple stitches and shapes.
- No-Sew Design: The gummy bear is crocheted seamlessly for easy assembly.
- Quick Project: Can be completed in 20 minutes, ideal for short crafting sessions.
- Versatile Designs: Can be used as decorations, toys, or keychains.
Level of Difficulty
Beginner: The tutorial focuses on simple techniques such as single crochet, bobble stitches, and basic increases/decreases.
Tutor’s Suggestions
- Use a Stitch Marker: Maddie recommends using a strand of yarn to track rounds efficiently.
- Position Bobble Stitches Carefully: Folding the ears, nose, and legs outward ensures the bear has a proper shape.
- Creative Stuffing: If you don’t have fiberfill, Maddie suggests repurposing pillow stuffing or leftover yarn scraps.
Uses
- Attach a keychain to make a cute charm.
- Use as a toy or gift for children.
- Decorate shelves or workplaces with small crochet creations.
- Sell at craft fairs or events – a quick, inexpensive project to showcase.
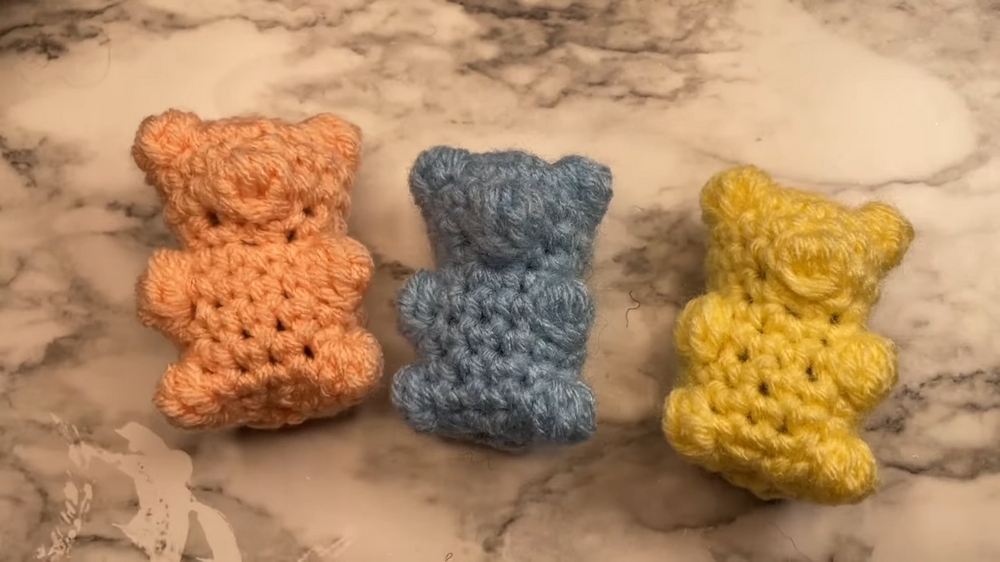
Tip: Use Bright, Fun Colors
Select vibrant yarn colors to emphasize the playful nature of the gummy bear. Experiment with pastel or neon shades for added charm.
Conclusion
Crocheting this gummy bear is a simple and creative project that combines functionality with fun. It’s beginner-friendly, quick to make, and requires minimal materials, making it ideal for crochet enthusiasts of all skill levels. Whether you keep it as a decoration, gift it to loved ones, or turn it into a keychain, this gummy bear is sure to bring smiles.