Dreams often hold a quiet magic, and throughout history people have found ways to guard them, weaving symbols of protection and serenity into everyday life. The Crochet Dream Catcher pattern carries that same sense of meaning, blending delicacy with timeless charm. Its circular form is worked with intricate stitches that resemble a web, strong yet airy, allowing light to filter through in subtle patterns that shift with the day.
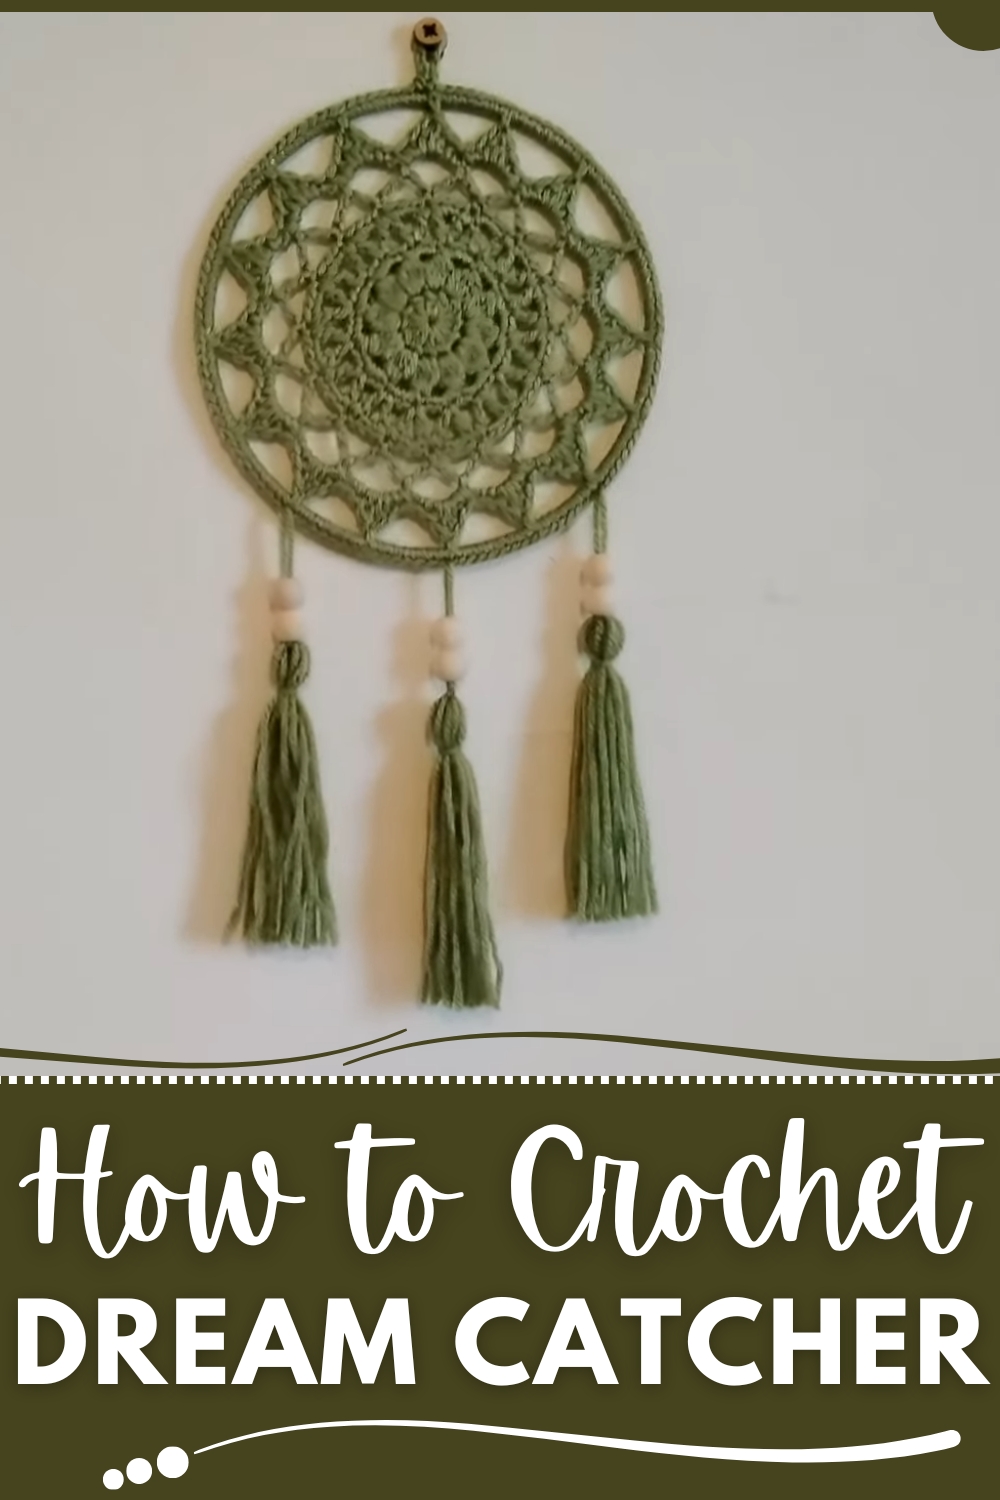
Creative Crochet Dream Catcher for Spiritual Spaces
Hanging one near a bed or window gives more than visual appeal, it becomes a symbol of calm, inviting a sense of peace into the room. The handmade texture adds warmth, while optional accents like beads, tassels, or feathers give each piece its own character. Its versatility means it suits a variety of spaces, from a child’s nursery to a sunlit corner in the living room or even outdoors where the breeze can bring it to life.
Beyond its decorative role, it carries symbolic value believed to encourage positive energy and shield against restless nights. It makes a thoughtful gift, personal and meaningful, while remaining practical as lightweight wall art. With a Crochet Dream Catcher, beauty meets purpose in a way that enriches both home and heart.
Materials Needed
- Metal Ring:
- 6-inch metal ring (sourced from eBay).
- Yarn:
- Double-knitting yarn in the color of your choice.
- Crochet Hook:
- 2.5 mm crochet hook.
- Optional Embellishments:
- Wooden beads (minor 12 mm).
- Other Tools:
- Stitch marker.
- Scissors.
- Tapestry needle.
Special Features
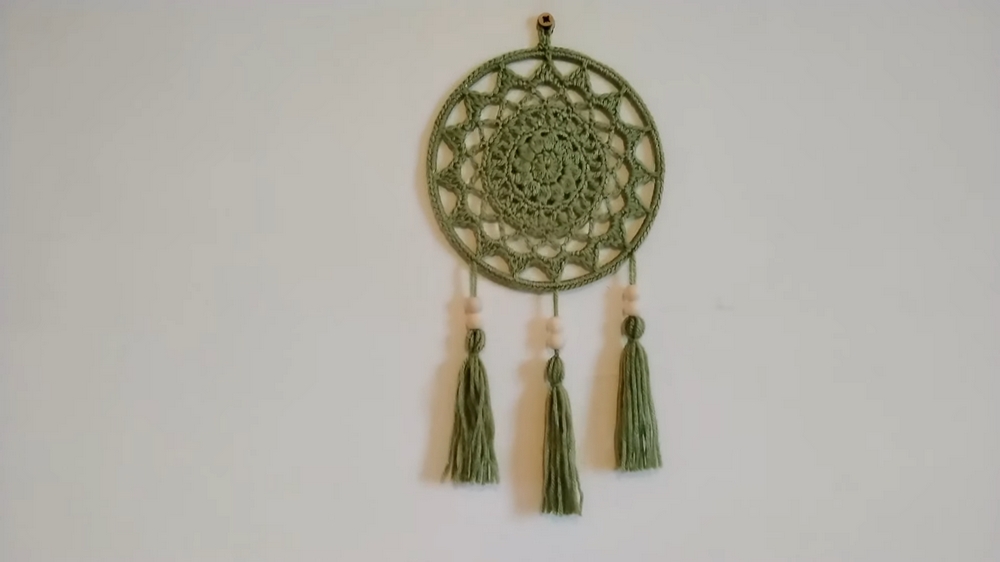
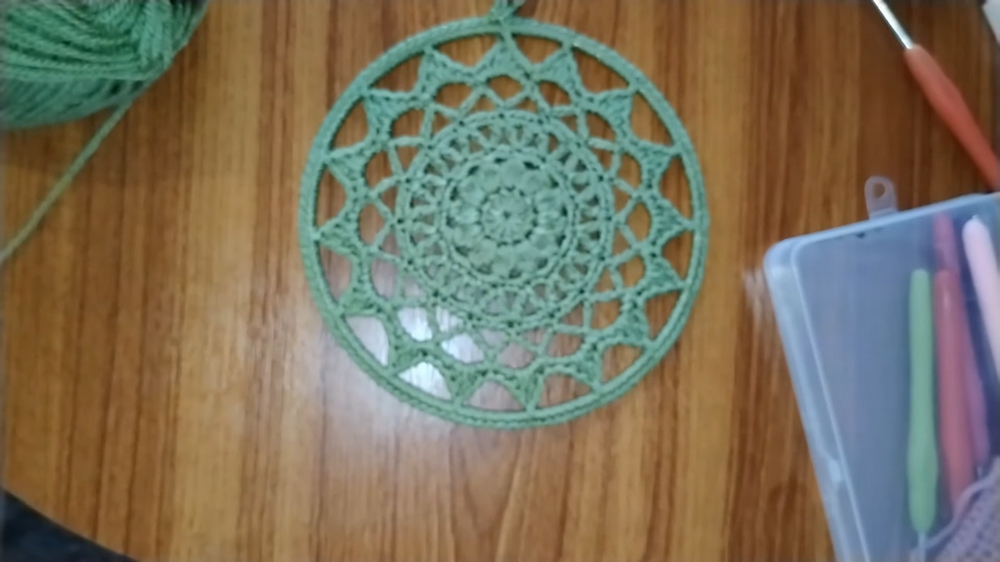
- Lace-Inspired Design:
- The finished dreamcatcher features intricate lace-like crochet patterns, forming a decorative centerpiece.
- Tassels and Wooden Beads:
- Optional tassels and beads add a bohemian flair and personal touches to enhance the dreamcatcher’s aesthetic.
- Customizable Size & Color:
- The metal ring size and yarn color can be customized to suit your taste and interior design.
- Durable and Lightweight:
- Made with sturdy yarn and a metal frame base, the design achieves a balance of structure and softness.
- Handmade Craft for Personal or Gift Use:
- The project is an excellent option for crocheting at leisure, as a personal home accessory, or as a heartfelt gift.
Level of Difficulty
Beginner to Intermediate
The pattern is perfect for crocheters familiar with foundational crochet stitches like single crochet, double crochet, chain, and slip stitch. The step involving connecting the centerpiece to the metal ring requires attention but is clearly explained in the pattern.
Tutor’s Suggestions
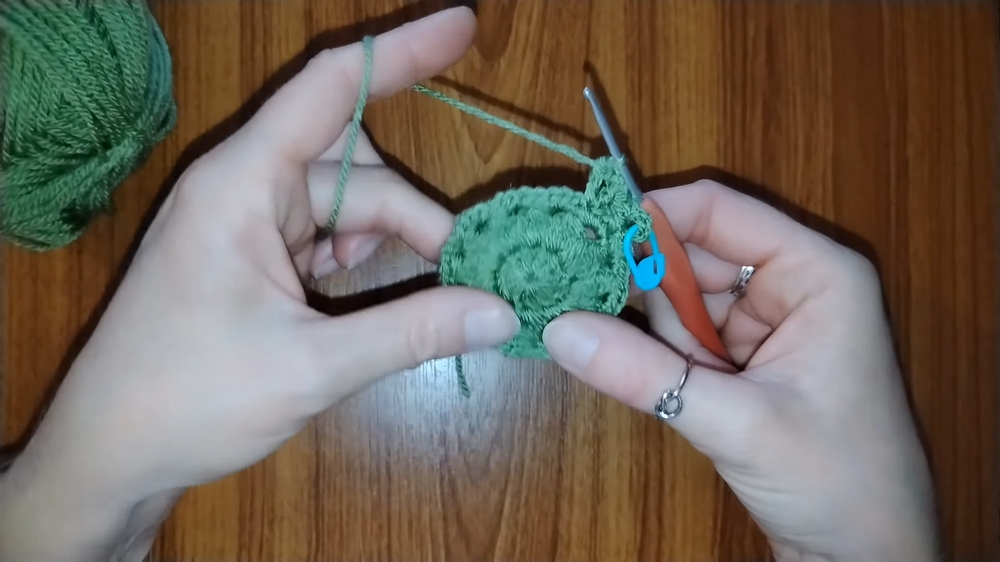
- Use a Stitch Marker:
- While not mandatory, the tutor recommends a stitch marker for clearer tracking of rounds.
- Secure the Magic Ring:
- When creating the magic ring, ensure you pull the tail tightly to keep it closed.
- Stretch on the Ring:
- Leave space between the crochet pattern and metal ring to prevent sagging when attaching the design to the ring.
- Optional Burn Tip for Yarn Fibers:
- For a neater finish, the tutor demonstrates using a lighter to burn off stray fibers from the yarn. Do so cautiously and in fast strokes to avoid burning the yarn itself.
- Experiment with Decor:
- Tassels and beads are optional but can be adjusted to your desired length or style.
Step-by-Step Instructions
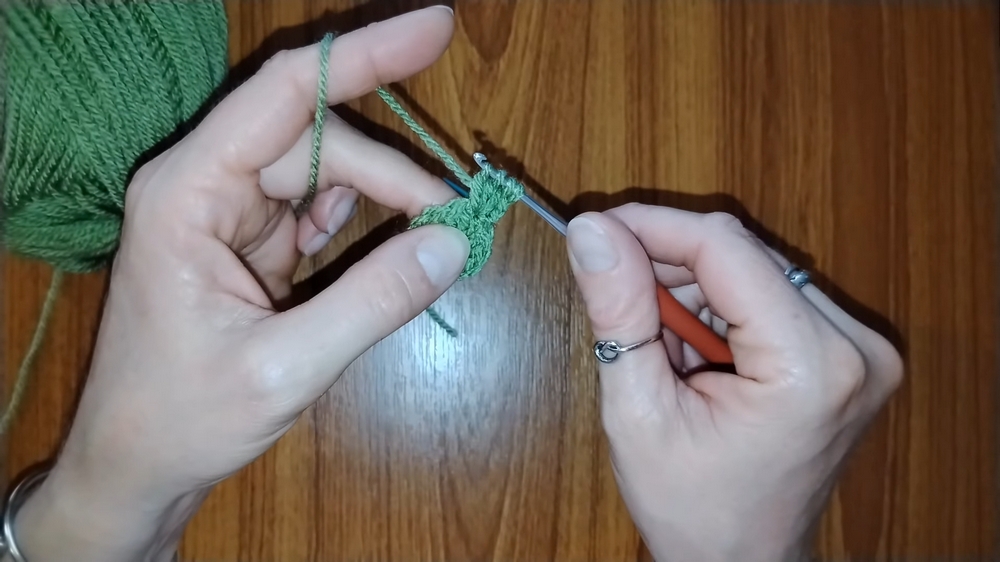
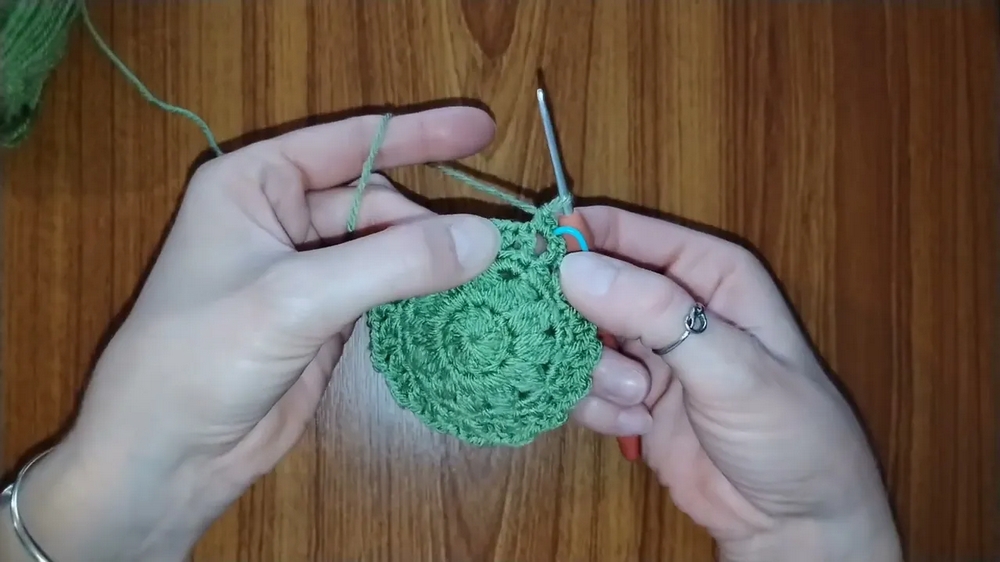
1. Magic Ring and Base (Round 1)
- Create a magic ring.
- Chain 2, then work 12 double crochets into the magic ring.
- Pull on the tail tightly to close the ring and complete the round with a slip stitch into the first double crochet.
2. Petal Formation (Round 2)
- Chain 2 and into the same stitch, make 3 partial double crochets:
- Yarn over, insert into the stitch, pull through 2 loops, leaving 1 loop behind.
- Repeat this 3 times.
- Yarn over and pull through all loops on your hook, chain 2 to close the petal. Make another chain to create space before moving to the next petal.
- Repeat the process for all 12 petals, ensuring 1 chain separates each petal.
- Complete the round by slip stitching into the first chain space.
3. Single Crochet Layer (Round 3)
- Chain 1.
- Work 4 single crochets into each chain space from the previous round.
- At the end of this round, you will have 48 single crochets. Slip stitch to the first stitch to close.
4. V-Stitch Pattern (Round 4)
- Chain 5 (counts as a double crochet + chain 2). Place a stitch marker in the third chain of this start, which will be used for slip stitching later.
- Make a double crochet into the same stitch.
- Skip 2 stitches, make another double crochet, chain 2, and double crochet in the same stitch.
- Repeat the skip-and-V-stitch pattern around. Slip stitch into the marked third chain to complete the round.
5. Filler Single Crochets (Round 5)
- Chain 1, then work 3 single crochets into each V-space followed by 1 single crochet in the reverse V-space.
- Repeat this pattern all the way around. You should end this round with 64 single crochets.
6. Chain Loops (Rounds 6 and 7)
- Slip stitch up to the first upside-down V space. Chain 5, then slip stitch into the next single crochet above the next V-space.
- Repeat this all the way around to create 16 chain loops.
- For Round 7, chain 5 into each gap again to create an extra layer of chain loops.
7. Wave Pattern (Round 8)
- Work the following sequence into each chain loop:
- Single crochet, half double crochet, double crochet, chain 1, backward double crochet into the chain, half double crochet, and finish with a single crochet.
- Repeat this pattern for each loop, creating 16 symmetrical waves.
8. Connecting to the Metal Ring (Final Stretching Round)
- With the pattern complete:
- Lay the crochet piece over the ring, ensuring the yarn comes from behind the project.
- Make a slip stitch onto the ring and then work seven single crochets along the metal ring.
- Insert a single crochet into the next chain-1 space of the pattern.
- Repeat this all around, ensuring the design stretches evenly across the ring.
9. Create Hanging Loop
- Chain 10, then slip stitch back into the same stitch on the ring to form a loop for hanging. Cut the yarn, secure the tail, and weave it back into the stitches.
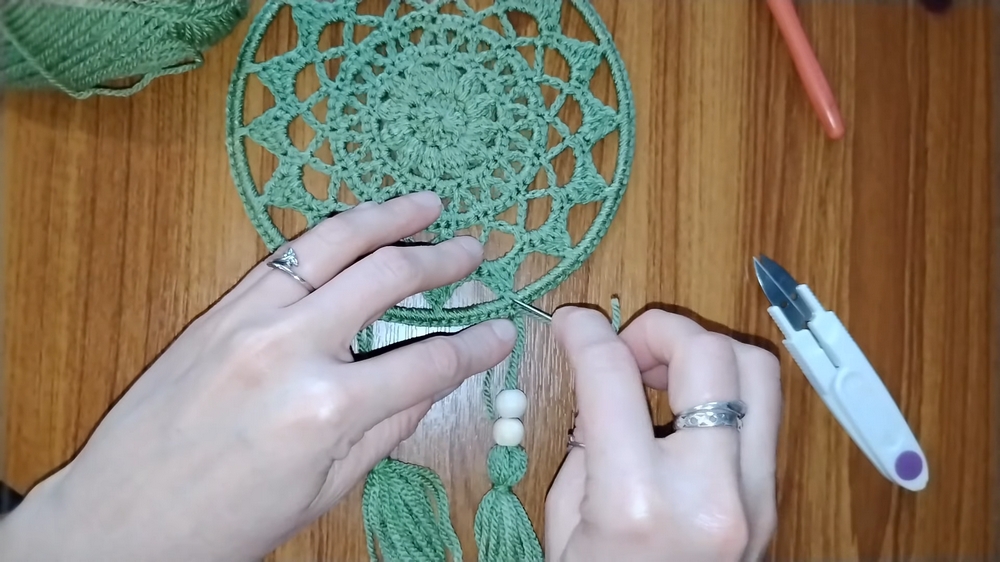
10. Add Tassels
- Wrap yarn around a 10 cm-wide object about 10 times and carefully cut it.
- Secure the top by tying it with a small piece of yarn and cut the bottom to form tassel strings.
- Tie the tassels to the bottom triangles of the dreamcatcher using double knots.
- If using beads, thread them through the tassels before attaching.
Uses
- Home Decor:
- A bohemian-style wall hanging for living spaces, bedrooms, or patios.
- Gifts:
- A thoughtful handmade gift for friends or family.
- Personalization:
- Colors, beads, and tassels can be tailored to match themes or unique preferences.
Tip
For a professional finish, "block" your crochet piece before attaching it to the ring by lightly dampening and pinning it to a flat surface to dry. This ensures the design is evenly shaped.
Conclusion
The crochet dreamcatcher blends functionality and charm, making it a perfect project for crocheters seeking to create something beautiful and personalized. Whether you add tassels or keep it simple, this pattern provides a versatile and beginner-friendly guide for creating unique decor. Take your time, experiment with colors and embellishments, and enjoy crocheting this timeless piece.