
On a chilly winter morning, nothing beats the comfort of a cozy, handmade accessory. Whether you're heading to a coffee date or taking a brisk walk outdoors, a crochet hat pattern is the perfect opportunity to create a stylish and functional piece for any occasion.
A crochet hat isn’t just about warmth; it’s an expression of creativity, allowing you to customize colors, textures, and even embellishments like a pom-pom. It pairs beautifully with casual outfits, oversized scarves, or can be given as a thoughtful handmade gift. Making your own crochet hat saves money, sharpens your skills, and delivers instant satisfaction as you bring it to life. It’s more than a craft—it’s a personal, practical way to stay fashionable.
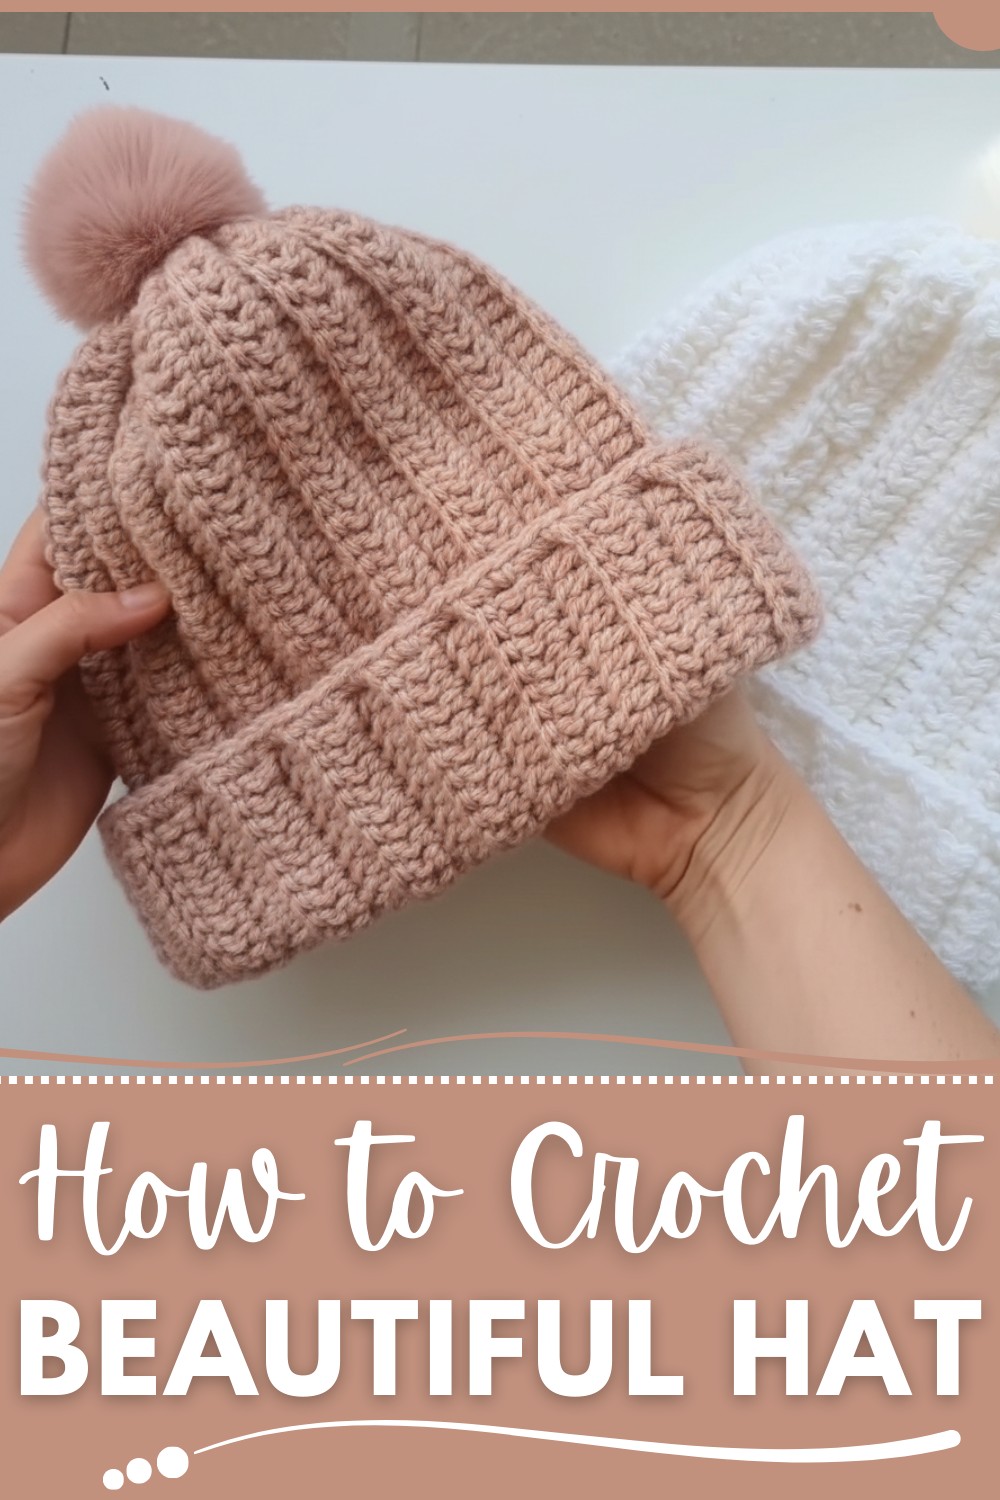
Simple Crochet Hat Pattern That Looks Stunning
Materials Needed
- Yarn:
- Use soft acrylic or wool-blend yarn.
- Yarn weight: Aran (Worsted/Size 4).
- Approximately 80-90 g of yarn per hat.
- Hook:
- Use a 5.0 mm crochet hook (adjust hook size for tighter or looser stitches based on your tension).
- Optional Pom-Pom:
- Pre-made pom-pom or yarn scraps to make your own.
- Tapestry Needle:
- For sewing in ends and closing the top of the hat.
- Scissors
- Measuring Tape:
- To ensure proper sizing and customization.
Gauge
- 10 double crochet stitches x 6 rows = 5 cm x 5 cm square.
Gauge is not critical for this project, but keep an even tension throughout.

Crochet Hat with Optional Pom-Pom
This step-by-step guide will teach you how to create a beautiful and easy crochet winter hat. This ribbed design is perfect for keeping warm during cold weather and is customizable for various sizes. The project is beginner-friendly, quick to work up, and requires minimal materials.
Abbreviations (US Terms)
- ch: Chain
- dc: Double crochet
- sc: Single crochet
- sl st: Slip stitch
- st(s): Stitch(es)
- loop: Back loop only (of a stitch)
- yo: Yarn over
Special Techniques
Ribbing Effect with Back Loop Only (BLO):
- Insert your hook into the back loop of each stitch rather than under both loops to create a ribbed texture. This technique gives the hat its stretchy design and cozy appearance.
Invisible Seam:
- Joining the first and last rows with slip stitches ensures a seamless finish.
Top Closure:
- Using a tapestry needle, thread yarn through the tops of the final row to cinch the hat neatly closed.
Pattern: Ribbed Winter Hat
Step 1: Create the Base Chain
- Make a slip knot to start.
- Chain the base stitches according to your desired size:
- S: 38 chains
- M: 44 chains
- L: 50 chains
- Add 3 extra chains (to serve as the first double crochet in the next row).
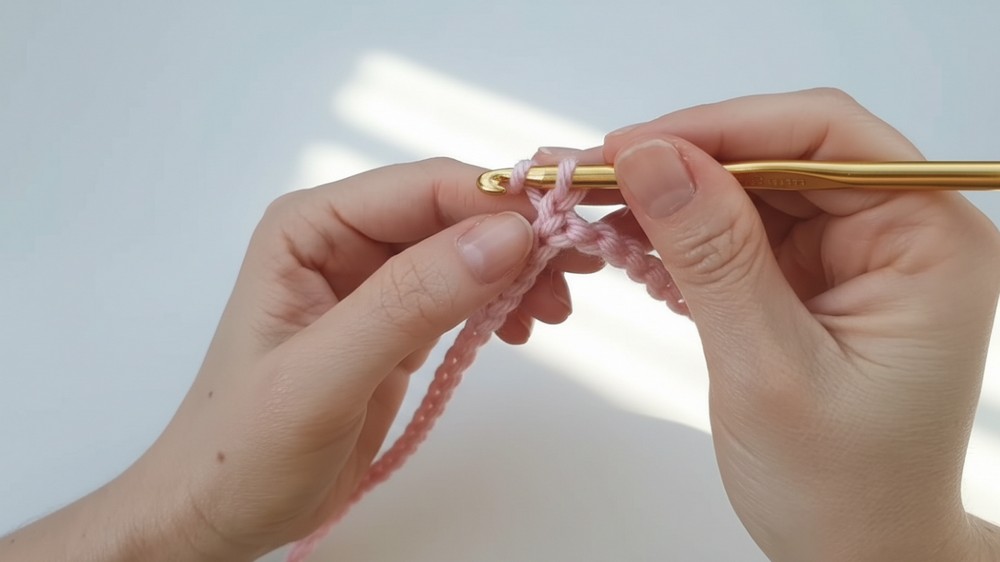
Step 2: Crochet the Foundation Row
- Foundation Row:
- Yarn over (yo) and insert your hook into the fourth chain from the hook.
- Make a double crochet (dc).
- Continue working 1 dc in each chain across the row.
- This will give you:
- 36 sts for S
- 42 sts for M
- 48 sts for L
- This will give you:
- Remember: The initial ch-3 counts as your first stitch.
Step 3: Begin Ribbing Rows
Ribbing Effect (Back Loop Only):
- At the start of every row, ch 3, turn your work.
- This ch-3 counts as your first dc.
- Work 1 dc in the BACK LOOP ONLY (BLO) of each stitch across the row.
- In the final stitch of each row, make sure to work your dc into the top of the ch-3 from the previous row to maintain a straight edge.

Step 4: Work Rows for Hat Length
- Continue working rows of double crochet (BLO) until you reach the desired number of rows:
- Size S: 30 rows
- Size M: 31 rows
- Size L: 32 rows
Tip: The ribbed pattern will enhance the hat’s stretchiness, so focus on maintaining consistent tension for an even look.
Step 5: Seam the Edges
Once you complete the required rows:
- Fold the piece in half width-wise, with the right sides facing inside.
- Seam the edges together as follows:
- Insert your hook into the back loop of the last row and the corresponding chain stitch of the first row.
- Work slip stitches across to join the edges, stitch by stitch, ensuring no gaps are left.
- When you’ve reached the end of the seam, make a slip stitch, fasten off, and weave in the ends.
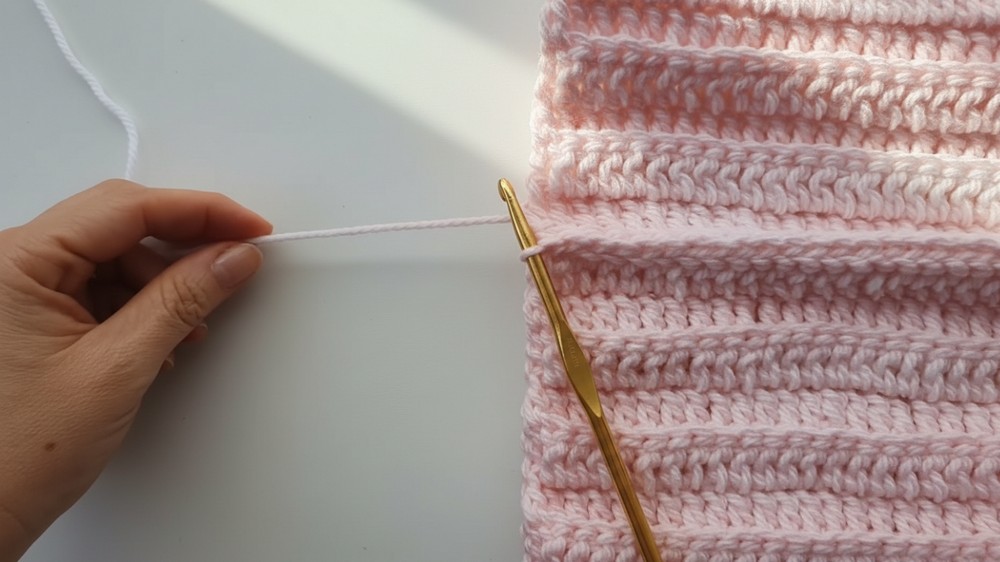
Step 6: Close the Top of the Hat
- Cut a long piece of yarn and thread it onto a tapestry needle.
- Use the needle to weave through the top stitches of the last row (where you joined the seam).
- Begin at one end and weave in and out through every few stitches all around the hat’s opening.
- Once completed, gently pull the yarn to cinch the top closed.
- Tie a secure knot, pass the yarn through the top to reinforce the closure, and weave in the tail to hide it.
Optional Step: Add a Pom-Pom
If you’d like to add a pom-pom:
- Attach a pre-made pom-pom or create your own using the remaining yarn.
- Thread the pom-pom’s tails through the top center of the hat, secure with tight knots inside, and weave in the ends.
Step 7: Add a Bottom Border (Optional)
To give the hat a polished look, add a single crochet border around the bottom edge:
- Insert your hook into one of the seam stitches at the bottom edge.
- Work 2 sc into every space to create an even border.
- Slip stitch into the first sc to join, fasten off, and weave in the ends.
Tips for Success
- Choose soft yarn: Acrylic or wool-blend yarns create a comfortable, warm, and stretchy hat.
- Tighten your closure: For a neat top finish, ensure the yarn is securely cinched and knotted.
- Color customization: Experiment with solid colors, stripes, or variegated yarns for a personalized touch.
- Size adjustments: For larger or smaller hats, simply adjust the chain length and row count accordingly.
- Pompoms are optional: Opt for no pom-pom if you prefer a sleeker winter look.
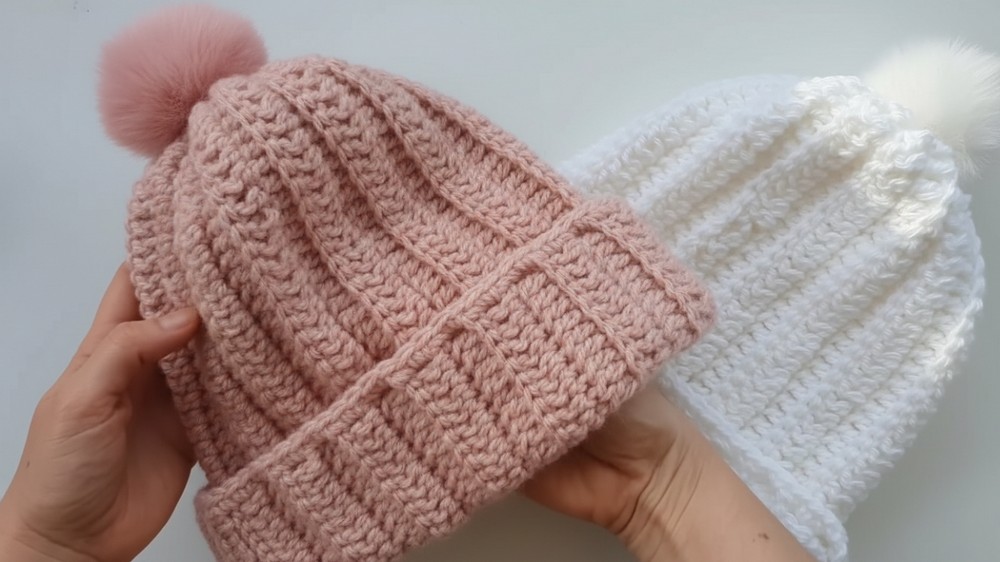
Final Look
Your handmade ribbed winter hat is complete! This hat is warm, stretchy, and stylish, making it ideal for gifting, personal wear, or selling. It can be decorated with a pom-pom or left plain for a versatile design. The simple yet attractive ribbed texture highlights the beauty of your crochet work.
Conclusion and Final Remarks
This cozy ribbed hat provides an excellent combination of warmth and style while being a quick and satisfying project. Its beginner-friendly construction allows anyone to create a professional-looking accessory in no time. Customize the colors and size to suit your needs, and don’t hesitate to try other embellishments like buttons or bows.


