Add a cozy touch to your bathroom with a crochet toilet water tank cover! This delightful project brings warmth and a splash of color to even the smallest spaces. By crocheting small squares called granny squares and then joining them together, you create a charming cover that fits snugly over the top of your toilet tank.
Crochet Toilet Water Tank Cover

It's not only a fun way to introduce a bit of handmade beauty into your home but also a practical piece that can be customized to match your bathroom's color scheme. Whether you're a crochet enthusiast or looking for a new craft to try, making a crochet toilet water tank cover is a satisfying project that adds a unique and personal touch to your bathroom.
Materials Needed
- Hook size 3.5 or 3
- Scissors
- 100% cotton thread, 4 ply (such as Aunt Lydia's number 3)
- Thread colors: off-white/tan, royal blue, lime green
- For some parts, a 5 ply 80% cotton and 20% different fibers thread
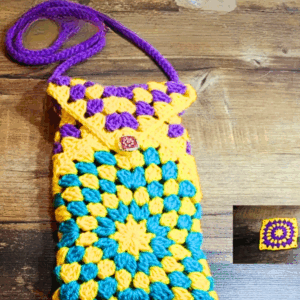
Granny Square (Make 3)

Magic Circle: Start with a magic circle.
- Round 1: Chain 3 (counts as first double crochet), 2 more double crochet into circle, chain 2, 3 double crochet. Repeat from * to * 2 more times (total of 4 groups of 3 double crochets), join with slip stitch.
- Walk with Slip Stitch: "Walk" with slip stitches to the corner space to start the next round.
- Subsequent Rounds: Repeat the pattern of creating corners (3 double crochets, chain 2, 3 double crochets) and sides (3 double crochets) maintaining the square shape, changing colors as desired.
Joining Granny Squares

Once you have 3 granny squares, begin joining them side by side using slip stitches or your preferred method of joining squares.
Creating the Tank Cover
- Starting Edging: Starting from the first granny square edge, crochet around the squares to begin forming the tank cover. Adjust the number of rows according to the size of your toilet tank.
- For the Handle: Make a chain long enough to cover the toilet handle space, skipping the appropriate number of stitches to create an opening for the handle.

- Tuck in Loose Ends: Use a smaller hook to tuck in any loose ends securely.
Decorative Edging and Finish

- Final Rows: For the last few rows, consider changing colors to match the granny squares for a cohesive look.
- Edge Finish: Create a decorative edging around the entire piece for a polished finish. Options include scallops, picots, or simple slip stitch edging.
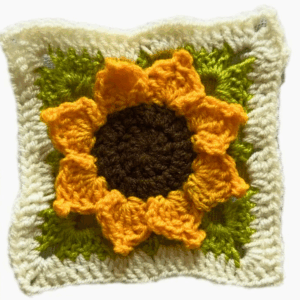
- Decorative Flower: A crocheted flower, such as the "margarita flower" mentioned, can be added for decoration. Secure the flower onto the tank cover with a bit of hot glue or sew on securely.
Final Assembly
- Drape the completed cover over the toilet tank to ensure a proper fit.
- Adjust as needed by adding or removing rows for a perfect fit.
Notes:
- Always measure your toilet tank to customize the fit of the cover.
- Feel free to adapt thread colors and decoration according to your preferences.