
Wrap yourself up in the comfort of a hand-made crochet mesh cardigan. This charming piece of clothing is perfect for those who seek both elegance and a light touch on their skin. With its openwork design, it offers a soft shield against a cool breeze while allowing you to move freely and with ease.
Crochet Mesh Cardigan
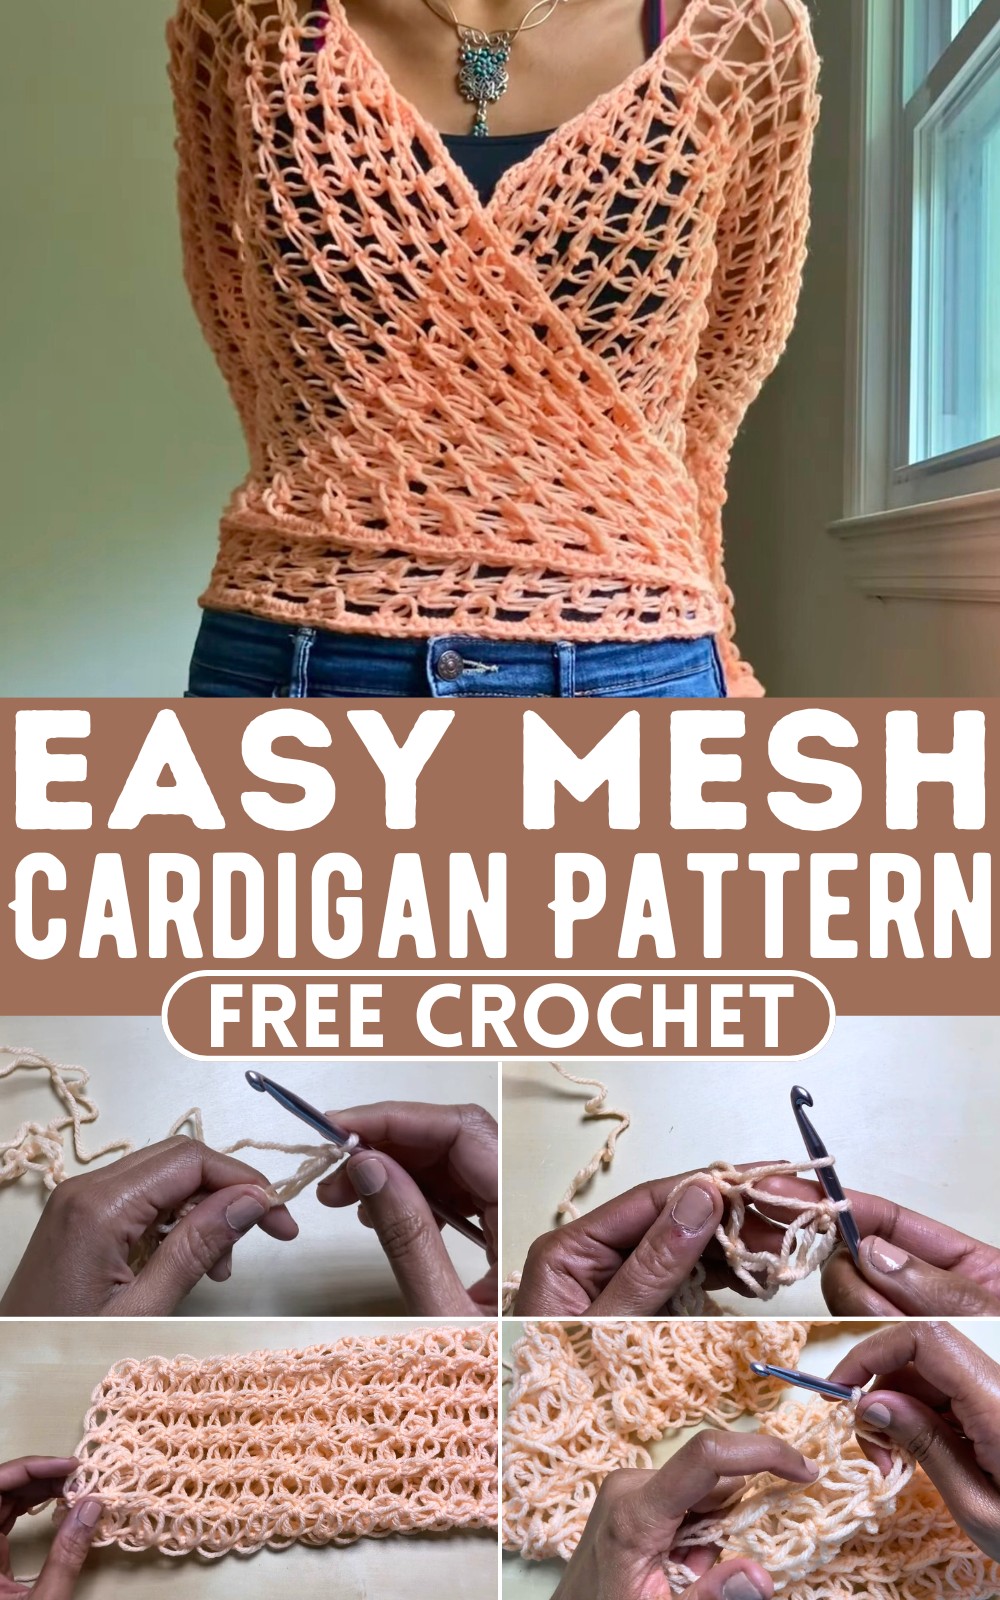
With every stitch carefully placed by hand, you can see the attention to detail that makes this cardigan unique. It's more than just an item of clothing; it's a testament to the skill and care that went into its creation. Whether you're relaxing at home or out for a casual event, this mesh cardigan is a delightful addition to any outfit.
Materials Needed:
- Yarn: Approximately 11 ounces of worsted weight yarn
- Hook: 5.5 mm crochet hook
Measurements Needed:
- Shoulder to Shoulder: Measure the distance between your shoulders.
- Shoulder to Underarm: Measure from around your shoulder down to where your underarm starts.
Cardigan Pattern:
Back Panel:
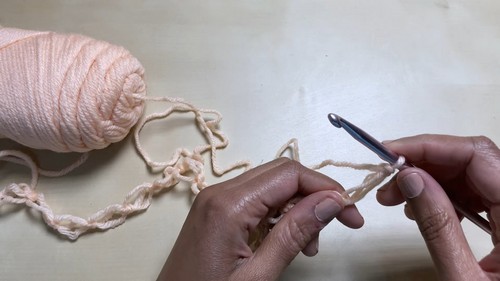
- Foundation Row: Make 16 stitches (or the number based on your shoulder to shoulder measurement) of square stitches, which should be approximately one inch by one inch.
- Rows: Create 4 rows high for a tighter fit (round down for even number) using the square stitch. Each square is made by connecting loops to form a chain and then securing it to form the square.
Shoulder/Neck Area:
- Repeat the same number of rows as the back panel to match the height (4 rows in the example).
- For the neck shaping, ensure to leave a space of 7-8 stitches open in the middle. For the example, that's 4 stitches on each side of the open space.

- The first row of the shoulder area includes a little triangle to round out the neck area.
Connecting Front to Back:
- Chain 2-3 stitches (use 3 stitches for a tighter fit as mentioned in the example) to create the armholes by connecting the front and back panels at the shoulder area.
Sleeves:
- Armhole Edge: Start connecting around the armhole opening, making square stitches. Increase the number of rows according to your arm length, usually around 12-14 rows up to just below the elbow.

- Increases for Bell Sleeves: Begin increasing stitches below the elbow area for the Bell effect, alternating a row with increases and a row without. Place increases under the arm.
Finishing Sleeves:
- Continue the pattern until you reach the desired sleeve length, then finish with a border of half double crochets around the edge for a neat finish.
Front Panels and Neckline:
- Resume work on the front panel, adding rows of square stitches downward from the shoulder area.
- For neckline shaping, include small triangles at the beginning of the rows as needed to shape the neckline inward.

Joining: Eventually, connect both front panels with continuous square stitches all around, leaving no open fronts unless a wrap-around style is desired.
Edging:
- Finally, add a simple edging around the front panels and neckline for a finished look, potentially using single crochet stitches for a less bulky edge.
Additional Notes:
- This is a very customizable pattern; adjust stitch numbers and row counts based on your measurements and preferred fit.
- The example assumes a specific size, but adapt the number of stitches and rows according to the measurements you've taken for shoulder width and underarm length.


