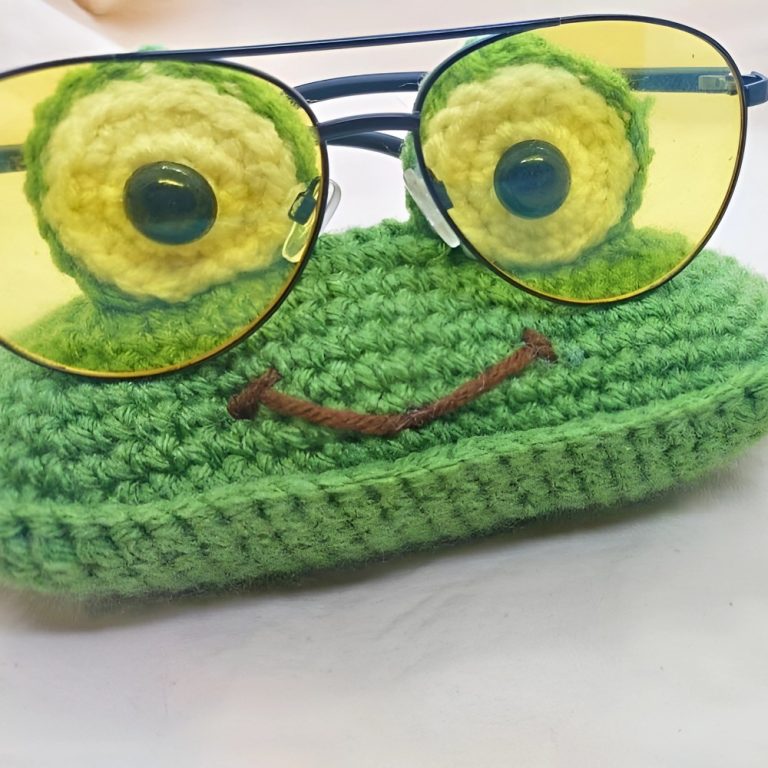
Keep your glasses safe and your room lively with this Crochet Glasses Holder designed like a happy frog, combining charm with convenience.
For someone who frequently misplaces their eyeglasses, a clever yet adorable solution is here. With a charming frog-shaped design, this crocheted glasses holder offers both function and aesthetic appeal. Shaped like a small, plump frog and accessorized with cheerful eyes and a cheerful smile, it keeps your glasses safe and adds a playful touch to your personal space. Perfect for gifting or personal use, this glasses holder serves as an excellent addition to any bedside table or desk, ensuring your glasses are always within reach while brightening up the surrounding area.
DIY Crochet Glasses Holder Pattern

Frog Eyeglasses Holder Crochet Pattern
Crochet a super cute and functional frog-shaped eyeglasses holder to keep your glasses secure and stylish! This project is beginner-friendly, uses basic crochet techniques, and can be customized to suit your preferences. Let’s dive in and create your adorable frog eyeglasses holder!
Materials Needed
- Green Yarn: Red Heart Super Saver or similar worsted weight yarn
- Brown Yarn (for details): Scrap yarn (Red Heart Super Saver recommended)
- White Yarn (for the eyes): “I Love This Yarn” or similar
- 4mm Crochet Hook
- Stitch Markers: At least 4
- Safety Eyes: Purchased from Amazon (~$6 for a pack) or sewn-on alternatives
- Darning Needle: For sewing pieces together
- Scissors
- Stuffing: Fiberfill or alternative stuffing material
Abbreviations Used
- ch – Chain
- sc – Single Crochet
- sl st – Slip Stitch
- inc – Increase (2 single crochets in the same stitch)
Pattern Instructions
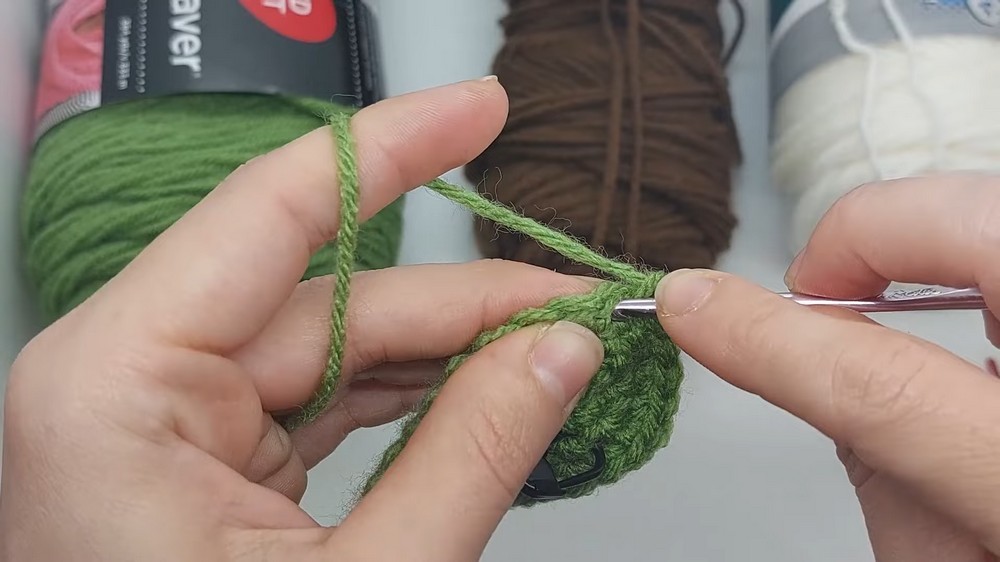
Base Shape (Make 2 Pieces)
- Foundation Chain:
- Using green yarn, make a chain of 18 + 1 (19 total).
- Row 1:
- Work 17 sc down one side of the chain.
- In the last chain, make 3 sc to create a corner.
- Move to the opposite side of the chain. Work 16 sc down this side.
- In the last stitch, place 2 sc and sl st to the first sc of the round.
- Row 2:
- Ch 1. Make 2 sc in the first stitch (inc).
- Place stitch markers around the increase stitch.
- Work 16 sc, then inc in the next 3 stitches.
- Work 16 sc on the opposite side, followed by 2 inc stitches at the end.
- Sl st to the first sc of the round.
- Row 3:
- Ch 1. Work 1 sc, followed by 1 inc.
- Work 16 sc, then alternate between 1 sc and 1 inc 3 times around the curve.
- Work 16 sc on the opposite side.
- Finish the row with 2 inc stitches. Sl st to the first sc.
- Row 4:
- Ch 1. Continue building the oval by placing 2 sc, an inc, and 16 sc.
- Around the bend: Alternate 2 sc followed by 1 inc, repeat 3 times.
- Work 16 sc on the next side.
- End with 2 sc, inc repeated twice. Sl st to the first sc.
- Row 5:
- Ch 1. Place 3 sc, followed by 1 inc. Continue with 16 sc.
- Around the curve: Alternate 3 sc followed by 1 inc, repeat 3 times.
- Work 16 sc on the next side and finish with 3 sc, inc repeated twice. Sl st to the first sc.
- Row 6:
- Ch 1. Place 4 sc, followed by 1 inc. Work 16 sc down the side.
- Around the bend: Alternate 4 sc followed by 1 inc, repeat 3 times.
- On the next side, work 16 sc and end with 4 sc, inc repeated twice. Sl st to the first sc.
- Finish:
- Make 2 identical oval-shaped pieces. Fasten off one piece. Leave the other unfastened to attach later.


Frog Eyes (Make 2 Green and 2 White)
Green Portion of the Eyes
- Round 1:
- Create a magic ring with green yarn. Place 6 sc into the ring. Tighten and sl st to the first sc.
- Round 2:
- Work 2 sc in each stitch around (inc in each stitch). Total: 12 sc.
- Round 3:
- Alternate between 1 sc, inc all the way around. Total: 18 sc.
- Round 4:
- Alternate 2 sc, inc all the way around. Total: 24 sc.
- Round 5:
- Place 1 sc in each stitch around. Total: 24 sc. Sl st to finish.
- Repeat:
- Make 2 green circles. Fasten off.

White Portion of the Eyes
- Round 1:
- Create a magic ring with white yarn. Place 6 sc into the ring. Tighten and sl st to the first sc.
- Round 2:
- Work 2 sc in each stitch around (inc in each stitch). Total: 12 sc.
- Round 3:
- Alternate between 1 sc, inc all the way around. Total: 18 sc.
- Finish:
- Sl st to the first sc. Make 2 white circles. Fasten off.

Assembly Steps
Attach Green and White Eye Portions
- Layer the Green and White Parts:
- Place the white circle inside the green circle, ensuring the right sides face outward.
- Sew Together:
- Using a darning needle, sew the edges of the white circle to the front loops of the green circle, adding a bit of stuffing before sealing completely.
- Attach Safety Eyes:
- Secure the safety eyes through the center of the completed eye piece.
Attach Eyes to Base
- Position the Eyes:
- Place the eyes near the top center of the frog’s oval base. Adjust the spacing to your liking.
- Sew Onto Base:
- Use the darning needle and green yarn to carefully sew the bottom of each eye to the oval base.
Add the Smile
- Create Smile:
- Use brown yarn and a darning needle to add a simple smile beneath the eyes. Start at one corner of the mouth, work in small curved stitches, and secure the yarn at the back.
- Weave in Ends:
- Weave in any loose ends to finish your project.
Conclusion
Congratulations! Your adorable frog eyeglasses holder is complete. This functional and cute project is perfect for keeping your glasses safe while adding a playful touch to your home. Share your creation with friends and inspire others to crochet along. Don’t forget to experiment with different yarn colors to make your frog unique!