Delight your loved ones with the crochet duck amigurumi pattern, offering an adorable design that ensures smiles and cozy handcrafted gifts.
A delightful toy can give both children and adults moments of joy and warmth, becoming a memorable keepsake or a thoughtful gift. The Crochet Duck Amigurumi Animal Pattern is an adorable design that showcases intricate details such as its charming bill, minimalistic wings, and cute little feet. Its round body, soft curves, and lively appearance make it an engaging decorative piece or a cuddly companion. This pattern brings a sense of personality and warmth, whether used as a unique nursery decoration, a comforting playtime buddy, or even a handmade gift for special occasions.
Easy Crochet Duck Amigurumi Pattern

How To Crochet Duck Amigurumi Animal
Here is the step-by-step pattern for crocheting the remaining parts of the duck, including the bill, feet, assembly, and finishing details.
Materials Needed
- Darker yarn for the bill and feet
- Lighter yarn for the body, wings, and head loops
- Stitch markers
- Yarn needle
- Scissors
- Crochet hook suitable for your yarn weight
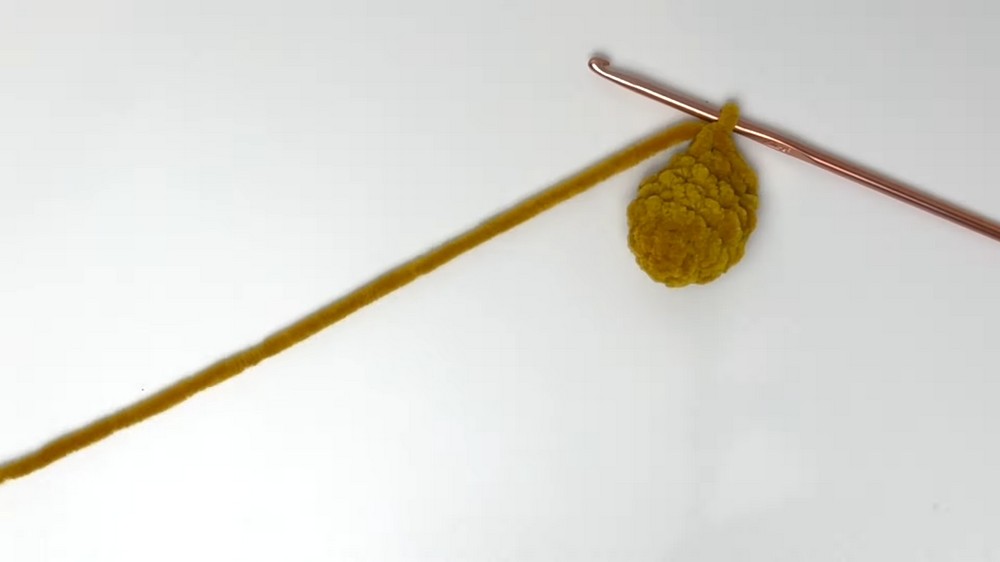
Creating the Bill
- Foundation Chain:
- Start with a slipknot using the darker yarn.
- Chain 5.
- Round 1:
- Single crochet in the second chain from the hook.
- Add a stitch marker to this stitch.
- Single crochet in the next 2 chains.
- In the final chain, make 3 single crochets to start working around to the underside of the chain.
- On the underside, single crochet in the next 2 chains.
- Increase with 2 single crochets in the last stitch.
- Slip stitch to the first marked single crochet to finish the round. Move the stitch marker to the slip stitch.
- Round 2:
- Start in the next stitch after the slip stitch.
- Single crochet 10 around.
- Round 3:
- Single crochet in the next 4 stitches.
- Increase with 2 single crochets in the next stitch.
- Repeat: single crochet 4, increase.
- This round will now have 12 stitches.
- Round 4:
- Single crochet 12 around.
- Slip stitch to close.
- Cut the yarn leaving a long tail for sewing.
Creating the Feet
- Round 1:
- Using the darker yarn, make 6 single crochets into a magic ring.
- Round 2:
- Make 2 single crochets into each stitch from Round 1.
- You will have 12 stitches.
- Round 3:
- Single crochet 12 around.
- Round 4:
- Single crochet 2, then decrease.
- Repeat this 3 times to bring the stitch count down to 9.
- Round 5:
- Single crochet 1, then decrease.
- Repeat this 3 times to bring the stitch count to 6.
- Secure the tail from the magic ring and tuck it in.
- Closing:
- Fold the piece flat and make single crochets through both sides to close.
- Cut the yarn leaving a tail for sewing.
- Make two feet in total.
Assembly Instructions
- Attaching the Wings:
- Sew the wings to the side of the body, one round below the neck.
- Secure the wings by catching a stitch on the body, then going up into the wing and back down into the next stitch.
- Repeat until the wing is secured. Tie and weave in the ends.
- Attaching the Feet:
- Position the feet at about round 3 or 4 of the body, facing slightly outwards.
- Pin in place if needed.
- Sew as previously done for the wings.
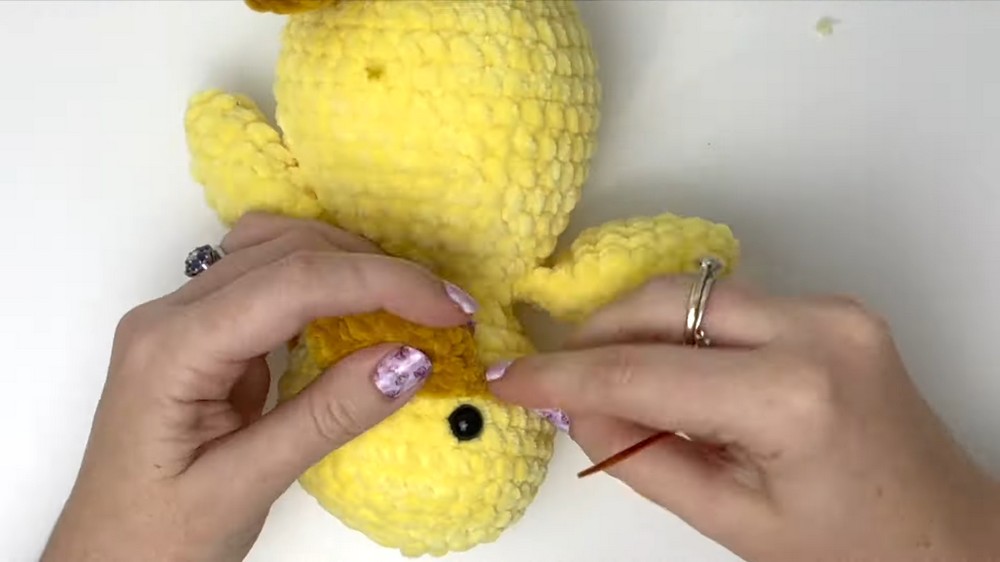
- Attaching the Bill:
- Insert the starting tail of the bill just below the eyes, pin in place.
- Using the long tail, sew the bill ensuring it is symmetrical.
- Tie and weave in the ends.
- Creating the Tail:
- Using the darker yarn (or lighter if preferred), insert the hook where you want the tail.
- Chain 8, then slip stitch back into the body close to the starting point.
- Make 3 similar loops for the tail.
- Cut the yarn and weave in or tie the tails and pull into the body.
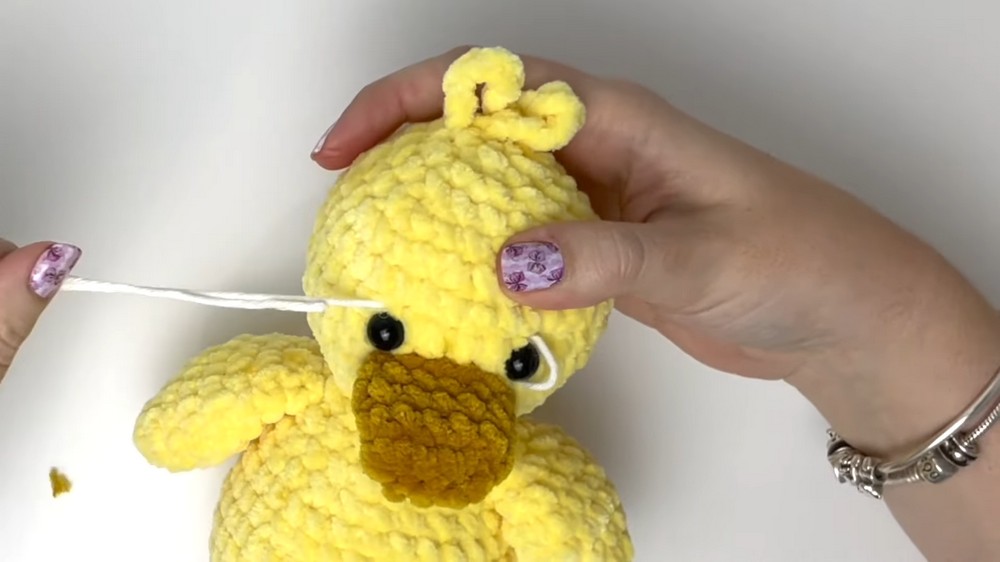
- Creating the Head Loops:
- Repeat the same steps as the tail to form loops on the head.
- For a different look, you could use fewer loops.
- Adding Details:
- Eye Whites:
Use a small amount of white yarn to embroider behind the eyes.- Feather stitch the yarn around the eye and tie the ends securely.
- Eyebrows:
Split some black yarn to make it thinner, and make diagonal stitches above the eyes.
- Eye Whites:
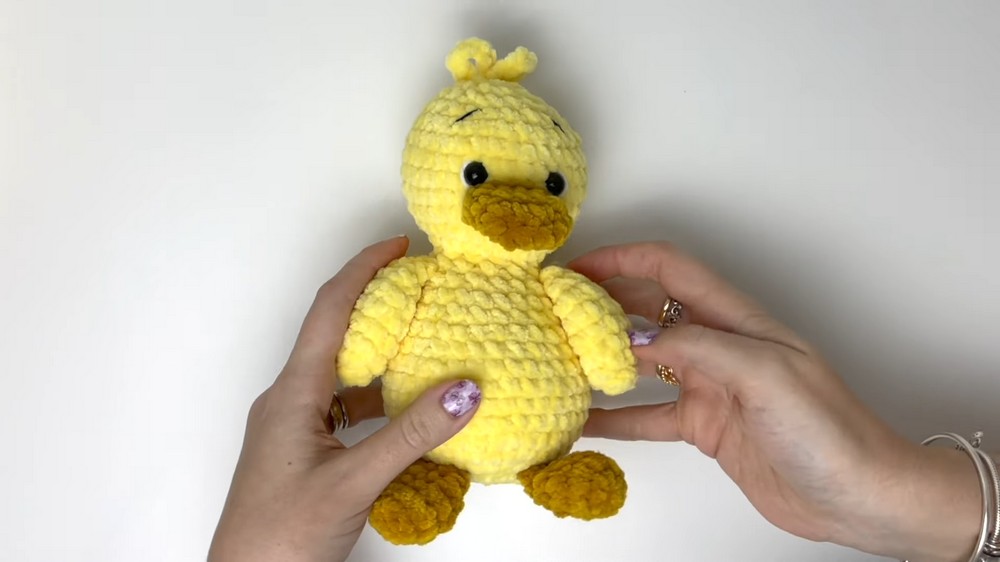
Your crochet duck is now complete!