Begin a new quest into the realm of crochet with this pattern for a cropped sweater vest that's as simple as it is captivating. Picture yourself picking up yarn and a hook, gradually building a piece of clothing that's both comfortable and stylish. This DIY project is not just about creating something wearable; it's about adding a personal touch to your wardrobe, stitch by stitch.
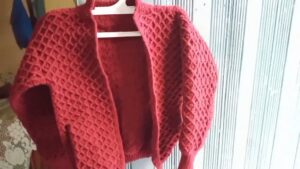
Crochet Cropped Sweater Vest Pattern

With this pattern, you can craft a unique garment that pairs well with various outfits, making every day a little more special. So, gather your materials and start on this creative endeavor that promises to be as rewarding as it is enjoyable.
Materials Needed:
- Under 300 grams of medium-weight (Templar) yarn
- 6 mm crochet hook
- 5 mm crochet hook (for ribbing)
- Stitch markers
- Darning needle
- Scissors
- Measuring tape (optional, for measurements and adjustments)
Pattern Overview:

Starting Chain: Make a slip knot with your 6 mm hook. Chain a number of stitches that is divisible by 3 plus 1 extra (ex. for size small, chain 22). Adjust the chain length for desired crop level or length.
Row 1 (Set Up Row for Almond Stitch):
- Slip Stitches: Skip the first chain. Insert the hook into the second chain, yarn over, pull through the chain and the loop on your hook. Repeat for the next two chains.
- Half Double Crochets: Yarn over, insert the hook into the next chain, yarn over, pull through, then yarn over and pull through all three loops on your hook. Repeat for the next two chains.
- Continue the pattern of 3 slip stitches followed by 3 half-double crochets down the chain.

Row 2 (Back Loop Only):
- Chain up (one for slip stitch starting or two for half double crochet starting), start with the opposite stitch type you ended with on the previous row, working in the back loops only.
- For every original slip stitch, work a half-double crochet in the back loop. For every original half-double crochet, work a slip stitch in the back loop.
- Continue this contrasting pattern till the end of the row.
Repeat the Pattern: Continue with alternating rows, working into the back loops only, and always starting a row with the opposite stitch type that you ended the previous row.
- Increases for Armhole: Once you reach the end of the underarm section, perform increases for the armhole by chaining three (to add one lot of 3 stitches) then continuing in pattern across the row.
- Continue Body: Follow the established pattern (almond stitch, back loops only) until you reach the desired length before the shoulder section, adding increases as needed for sizing or shape.

Shoulder and Neck Shaping:
- Work until the piece measures around your shoulder.
- Begin decreases to shape the armhole and neck appropriately, ensuring symmetry.
Front Panel: Repeat the same steps for the front panel but introduce decreases sooner for neck shaping depending on the design.
- Joining Panels: Stitch the front and back panels together at the shoulders and sides, leaving openings for the armholes.

Ribbing for Edges:
- Switch to a 5 mm hook for ribbing around the waist, arms, and neckline.
- Chain a small number (e.g., 8 for waist ribbing), then work in rows of back loop single crochets until the ribbing is long enough to fit around the waist, arm holes, and neck opening.
- Seam the ribbing to the corresponding vest openings.
Finishing: Weave in all ends and add any additional trims or buttons as desired.
Customization Options:
- Adjust the length and width as needed by altering the initial chain number and the total number of rows worked.
- Ribbing can be made tighter or looser by changing the hook size or the number of chains in the starting row.
Remember to check the measurements against the wearer for a customized fit.