Turn an ordinary butter tub into something extraordinary with this Crochet Butter Tub Bassinet pattern, perfect for doll lovers and creative enthusiasts.
Finding innovative ways to repurpose everyday items can turn the simplest objects into something delightful. Did you know that an ordinary butter tub can transform into a charming bassinet for a baby doll, complete with a matching crochet dress? This is the magic of the Crochet Butter Tub Bassinet Pattern—a heartwarming design that combines creativity with functionality. Featuring a cozy little bassinet, detailed scalloped edges, and an adorable doll-sized dress, this set makes for the perfect DIY project for gifting or personal use.
Crochet Baby Bassinet & Baby Dress

This pattern stands out with its thoughtful mix of practicality and style. The bassinet hugs a standard butter tub, lending it structure while providing plenty of customization options with intricate crocheted textures. Made completely with easy-to-follow crochet techniques, the bassinet is paired with a flared gown that perfectly suits four-inch dolls. A fulfilling project for crochet lovers, it adds a personalized and whimsical touch to any crochet collection or playroom set.
How To Crochet Butter Tub Baby
With a butter tub, yarn, a small doll, and some creative crochet techniques, you can create a charming bassinet for your doll. This project is ideal for those who enjoy upcycled crafting and crocheting small toys. Below is the step-by-step breakdown of the materials, abbreviations, and pattern details.
Materials Needed
The following materials are required to complete the Butter Tub Baby project:
Supplies
- Butter Tub Option:
- A 15 oz white butter tub (e.g., Imperial or similar size; prefer a white interior for visual appeal). Avoid brown interiors like Country Crock unless you paint them.
- Scissors (sharp enough to cut butter tub edges).
- Doll:
- A 4-inch plastic doll (movable limbs, removable clothes).
- Example: Set of 4 dolls available on Amazon (~$14).
- Ribbon:
- ⅛ inch thick ribbon (for bows and tying the dress).
- Measuring Tape & Sharpie Marker to mark dimensions.
- Punching Tool:
- An awl or a Phillips screwdriver (to make holes in the tub).
Yarn and Crochet Materials
- Yarn:
- Red Heart Super Saver or any other worsted weight (size 4) yarn.
- Colors: White and one additional color (e.g., blue or pink).
- Crochet hooks:
- 3.25 mm crochet hook (used for working in butter tub holes).
- 5 mm crochet hook (used for all other crochet work).
- Large-eye yarn needle for attaching the hood and weaving ends.
- Stitch Markers to track progress.
Abbreviations (US Terminology)
| Abbreviation | Definition |
|---|---|
| ch | chain |
| sc | single crochet |
| hdc | half double crochet |
| dc | double crochet |
| inc | increase (2 stitches in the same stitch) |
| sl st | slip stitch |
| st(s) | stitch(es) |
| sk | skip |
| * * | repeat instructions between asterisks |
Pattern Instructions
Step 1: Preparing the Butter Tub
- Cutting the Tub:
- Use scissors to remove the rim/lip of the butter tub to create a clean, flat edge.
- The tub’s dimensions after removal should approximately be:
- Top Diameter: 4.75 inches
- Bottom Diameter: 3.25 inches
- Depth: 2.75 inches.
- Smooth out sharp edges as needed.
- Marking Holes:
- With a Sharpie, mark holes ½ inch apart along the top edge of the tub.
- Total: 28 evenly spaced marks.
- Punching Holes:
- Using an awl or a Phillips screwdriver, punch holes at each mark. Ensure the diameter of each hole allows the 3.25 mm hook to fit through.


Step 2: Crocheting the Bassinet Base
Round 1: Working in the Tub
- Attach yarn in any hole and secure with a sl st.
- Ch 1, sc into the same hole, sc into the next hole—repeat all around the tub.
- Total: 56 sc.
- Switch hooks: After this round, move to the 5 mm hook.
Round 2–4: Building Bassinet Walls
- Work 1 dc in each sc all around.
- Sl st to the first dc to close the round.
- Repeat for 3 rounds (total 4 rounds of dc from the bottom).
Round 5: Eyelet Round
- Ch 1, dc in the next dc, ch 1, sk 1 dc—repeat all around.
- Sl st to the first dc. This creates an eyelet row for the ribbon.
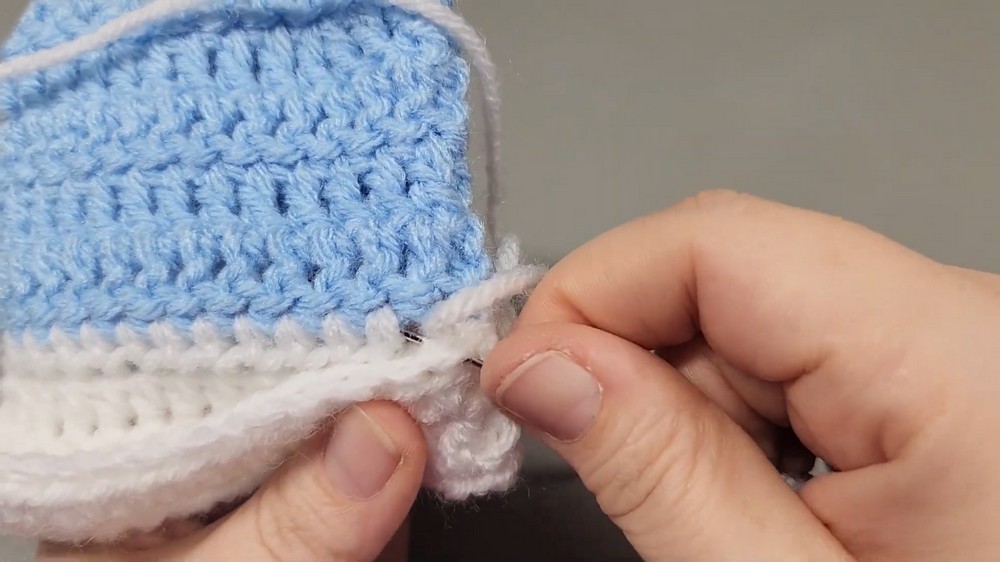
Round 6: Single Crochet Shell Border
- Attach white yarn to any eyelet space.
- [sc, hdc, sc] into the next eyelet space, sc in next dc—repeat around.
- Finish off and weave in ends.

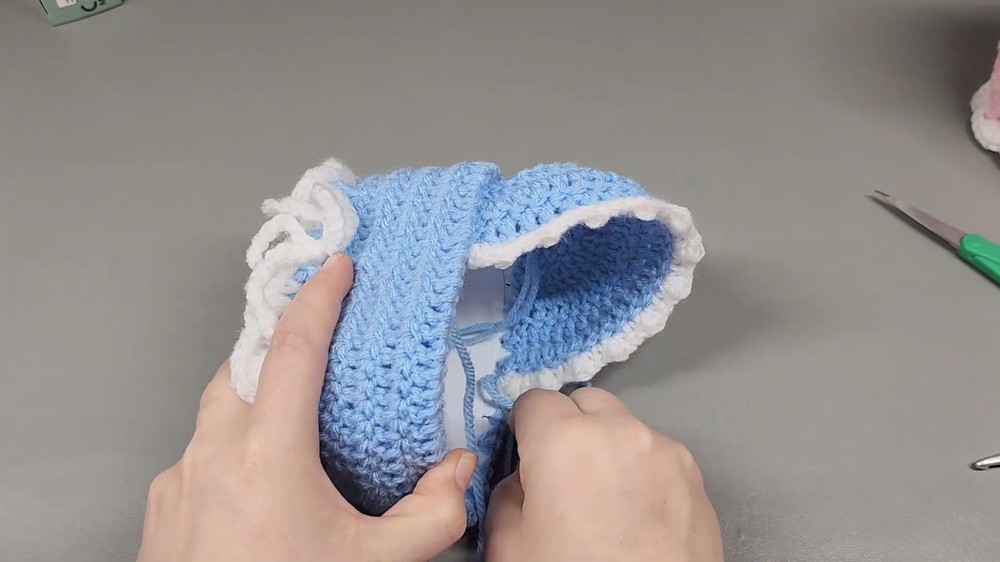
Step 3: Creating the Hood
- Base Circle:
- With color yarn, make a magic ring or ch 4 and join into a ring.
- Round 1: Ch 1, work 6 sc into the ring.
- Round 2: 2 sc in each st (12 sts).
- Round 3: 2 sc in each st (24 sts).
- Rectangular Sides:
- Row 4–6: Ch 1, turn. Sc in each st across (24 sts).
- Keep edges straight by working rows.
- Shell Edging:
- Attach white yarn. [sc, hdc, sc] in first st, sc in next—repeat across.
- Weave in ends.
- Attaching the Hood:
- Position the hood to the inside of the bassinet (seam facing outward). Use a yarn needle and whip stitch the hood’s bottom row to the single crochet round near the tub’s edge.
- Ensure the hood is symmetrical and centered.
Step 4: Making the Mattress
- Mattress Base:
- Ch 13.
- Row 1: Dc in 3rd ch from hook, dc across (11 dc).
- Row 2–5: Ch 2, turn, dc across.
- Row 6: To create a rounded edge, work back loop dc across. Bind off.
- Assembly:
- Fold and slide the mattress into the bassinet.
Step 5: Crocheting the Doll’s Dress
- Starting Chain and Foundation:
- Ch 11. Sc in 2nd ch and across (10 sc).
- Row 2: Ch 1, turn. Sc in first 2 sts, ch 2, sk 1, sc in next 4 sts, ch 2, sk 1, sc in last 2 sts.
- Row 3: Ch 1, turn. Sc in each sc and 2 sc in ch-2 spaces.
- Bodice and Expanding Skirt:
- Row 4–6: Work sc evenly across.
- Row 7: Begin increasing. 2 sc in first st, sc across, 2 sc in last st.
- Rows 8–10: Work sc or dc to create desired skirt length.
- Last round: Add decorative eyelet row [ch 1, sk 1, sc in next st].
- Add a ribbon around the waist for tying or embellishment.
Conclusion
You’ve now completed your Butter Tub Baby! With a bit of creativity and crochet skills, you've transformed a recycled container into a charming handmade toy. This project is fun, economical, and makes a wonderful gift or keepsake. Enjoy personalizing your Butter Tub Baby with different colors, accessories, and finishing touches.