Crochet baby sandals are soft, adorable footwear made from yarn, perfect for tiny feet. These handmade treasures offer warmth and style, with endless color and design possibilities. The crochet pattern we brought today simplifies the process, ensuring even beginners can create a cute, comfortable pair of sandals for the little ones in their lives. Step-by-step instructions guide you through each stitch, making adding a personal touch to your baby's wardrobe easy.
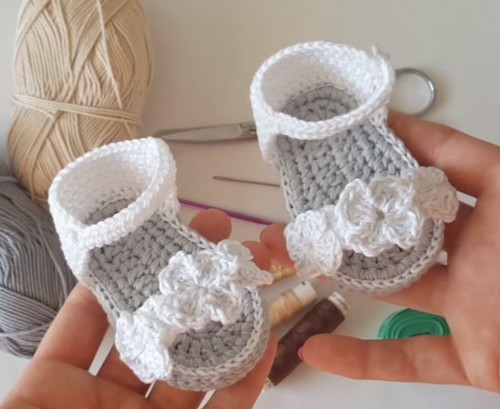
Features and Customizations: These charming sandals are made with a soft sole, ensuring the utmost comfort for your baby's feet. Designed thoughtfully, they come with openable straps, making them incredibly convenient to slip on and secure. Moreover, they embody the essence of personalization, from the option to adorn the straps with crochet flowers and tags to various embellishments, allowing you to infuse a bit of personality and love into each stitch. These crochet baby footwear not only cradle little feet in gentleness but also add a dash of whimsy to any outfit, making them a delightful addition to your baby's wardrobe.
Making Your Crochet Baby Sandals
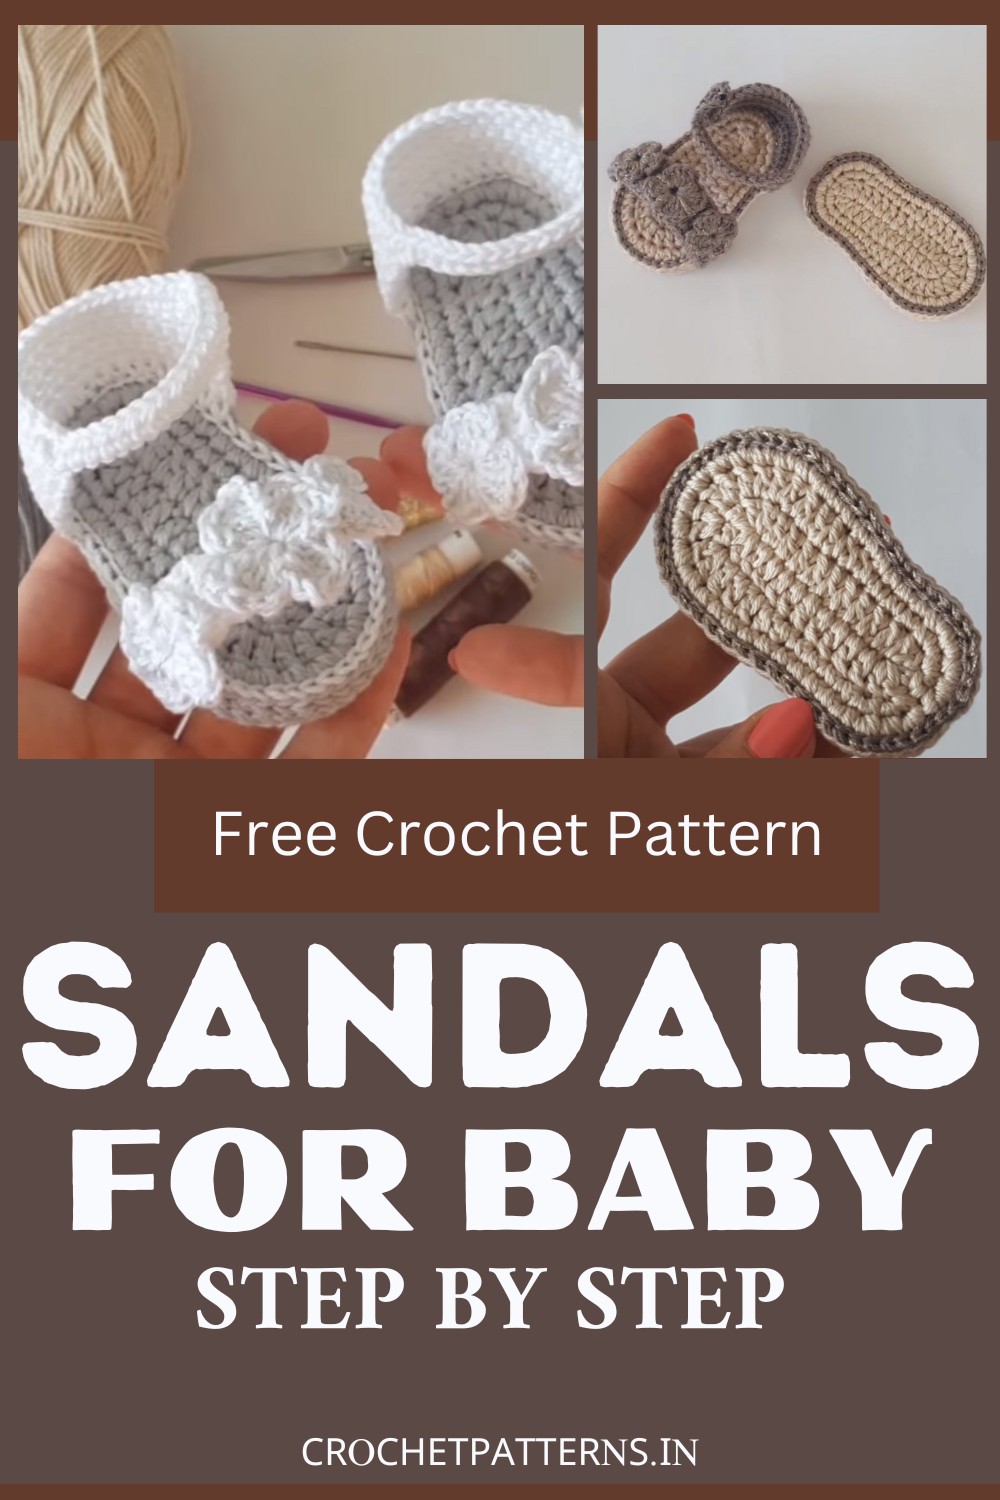
Creating these crochet baby sandals consists of two parts: Crocheting the sole and forming the straps. Once these are finished, the final step is to join these two components together. Below, you will find all the visual and written patterns for both the parts:
Step-by-step pattern
Materials Required
- Crochet hook (3 millimeters size)
- Two balls of 100% cotton yarn
- Scissors, Sewing threads
- Sewing needle, Yarn needle
- Measure tape
Start the Sole with a Slip Knot:
Use double yarn (either from two balls or both ends of one ball).
Create a slip knot and then chain 13 (start with 10 chains, then add an extra 3 chains).
Initial Row of Double Crochets:
The first 3 chains count as your first double crochet.
Make 2 double crochets in the third chain from your hook.
Make 1 double crochet in each of the next 9 chains.
In the last chain, make 5 double crochets to turn the corner of the sole.
Mirror this pattern on the other side to create a symmetrical shape, ending with a slip stitch to join the round.
Increasing for Shape:
Second Round:
Start with 1 double crochet in the next two stitches.
Follow with 1 double crochet in the next three stitches.
Increase by making 2 double crochets in the next five stitches for the sole curve.
Make 1 double crochet in the next three stitches and then a half-double crochet in the next two stitches.
Finish with 1 single crochet in the next four stitches, increasing in the next two stitches.
Join the round with a slip stitch.
Third Round (Final for the Sole):
Begin with a chain one.
Increase by making two single crochets in the next four stitches.
Make 1 single crochet in the next nine stitches.
Increase again by making two single crochets in the next ten stitches.
Make 1 single crochet in the next nine stitches, then increase in the next four.
Instead of joining with a slip stitch, cut the yarn, pull through, and weave in the end for a seamless finish.
Joining the Soles:
Create three more soles following the pattern above.
To join two soles, align them with their right sides facing out.
Use a gold sewing thread along with another color of your choice (dark brown is used in the video).
Hold the soles together and start joining them with a slip stitch around. For the final part, use a yarn needle for an invisible finish.
Part # 2
Watch the complete video tutorial part #2 below to learn how to transform the sole created in part #1 into a charming baby sandal. Don't miss out; follow along with the video to craft a pair of cozy and cute crochet sandals for your child's comfort.