
Creating your very own crochet polo shirt, combining the joy of creation with the charm of hand-made fashion. Using simple crochet techniques, you can weave together a unique piece of clothing that stands out in both comfort and style.
Cozy Crochet Polo Shirt
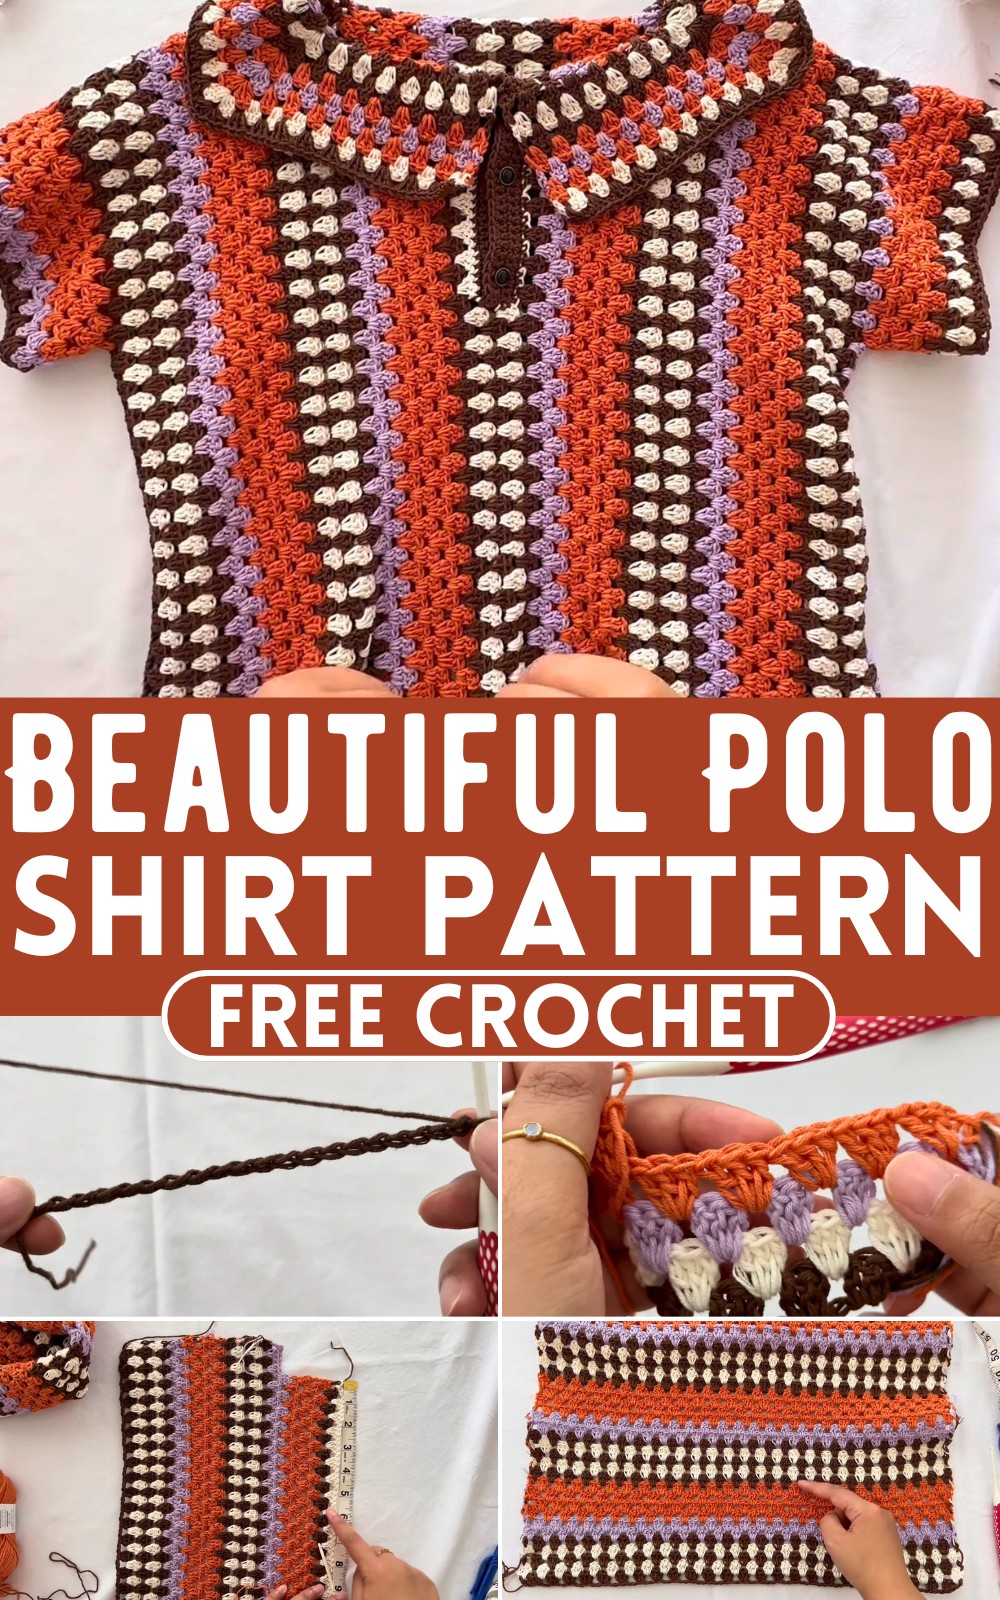
Starting with just a hook and yarn, make yourself piecing together a cool, breathable fabric that forms the perfect polo shirt. Whether it's for a casual day out or a special gathering, this crochet polo shirt isn't just a garment and it's a statement of creativity and individuality.
Materials
- Drops Safran yarn (fine weight to sport weight)
- 3.5 mm crochet hook
- Scissors
- Yarn needle
- Two stitch markers
- Tape measure
Measurements Reference
- Top size: 20 inches wide and 18 inches long
- Chains to start: Multiple of 3 + 5
Back Panel
- Start Chain: Make a slip knot and chain a multiple of 3 plus 5 to achieve the desired width.
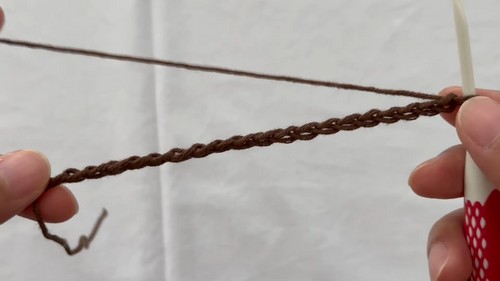
Row 1 Pattern:
- Skip five chains, and in the sixth chain, work three double crochets (this forms your first granny stitch cluster).
- Skip two chains and work another cluster of three double crochets in the next chain.
- Continue this pattern across the chain until you reach the end.
- In the last chain, work only one double crochet.

Row 2:
- Chain three (counts as first double crochet), turn your work.
- Work two more double crochets in the space between the first cluster.
- Continue by working three double crochets in the space between each cluster from the previous row.

Repeat Row 1 and Row 2: Keep repeating these steps for the pattern, alternating the rows until your panel reaches the desired length.
Front Panel
- Creating a Gap and Neckline: Work according to your back panel pattern until the panel is half the total length, deduct 7-8 inches of rows for the neckline gap, then divide the remaining rows by two for each shoulder side.
- Decreases for Neckline: On the decrease rows, either stop early for Row 1 or slip stitch over to the center for Row 2 to create the slope of the neckline.
- Neckline Gap Rows: Work a few rows straight to form the gap for the head which will be closed with buttons later.
- Increasing Rows: After completing the gap rows, chain a number of stitches across the gap and continue the pattern as before to resume the full width of the panel.

Assembly
- Sew Panels Together: Sew the shoulder seams together right sides facing each other.
- Sew Side Seams: Decide on the armhole opening length and sew the sides together from the bottom up to the armhole markers.
- Sleeves: Work the granny stitch pattern directly around the armhole, constructing the sleeves in the round.
Finishing Touches
- Border and Hem: Work a row of single or half double crochets around the bottom hem of the sweater to neaten the edge.
- Collar: Create a collar by working the granny stitch clusters in rounds around the neckline, increasing in four evenly spaced points for a soft collar flare.
- Front Closure: To close the neckline gap, work rows of single crochet along one edge, add buttonholes on the other, and sew on buttons.
- Finishing the Sleeves: Adjust the pattern as you like to shorten or lengthen the sleeves. Make sure to finish both sleeves symmetrically.


