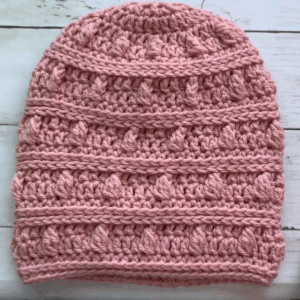
Materials Needed
- Yarn (Thread):
- Alize Volim yarn, color number 152.
- Crochet Hook: 3.25 mm crochet hook.
- Scissors: For trimming and finishing edges.
Step-by-Step Process
Part 1: Creating the Initial Motif
1. Forming the Magic Ring
- Start with a magic circle.
- Chain 3 (acts as the first double crochet).
- Work 18 double crochets into the ring and close with a slip stitch.
2. Building the Foundation (First Row)
- Chain 3, then work 1 double crochet in the same stitch.
- Follow this pattern: chain 2, then work 2 double crochets. Repeat this sequence 4 times.
3. Continuing the Pattern (Second Row)
- Chain 2, and make 2 double crochets.
- Slip stitch into the next stitch and repeat around the circle.
Part 2: Expanding the Motifs
4. Adding Rounds
- In each new row, continue adding double crochets.
- For example, the third row will have blocks of 3 double crochets separated by chain 2 spaces.
- Continue this pattern, increasing the number of double crochets in each block and creating new rows until reaching the desired size.
5. Making More Motifs
- Follow steps 1-4 to create additional motifs.
- The size of each motif can be adjusted depending on the desired vest dimensions.
Part 3: Connecting the Motifs
6. Joining Motifs
- Place motifs side by side.
- In the last row of each motif, slip stitch to join adjacent motifs.
- Ensure alternating sides (front and back) for a consistent pattern.
7. Creating Corners and Edges
- Add double crochets in each corner, ensuring consistency and smooth joins.
- Continue to connect motifs until the vest reaches the required size: typically, 3 motifs across the back, and 4 motifs down.
Part 4: Adding Detail and Final Touches
8. Adding Elastic Edges
- For the hem and sleeves, use an elastic stitch pattern:
- Two stitches from the front, and two from the back.
- Repeat the pattern around sleeves and bottom edge for a neat finish.
9. Crafting the Collar
- Similar to the motif process, create a collar by attaching motifs and adding double crochet edges to finish.
10. Buttonholes and Buttons
- Create buttonholes by chaining 2, skipping 2 stitches, and continuing with double crochets.
- Sew buttons onto the corresponding side.
Special Features
- Unique Motif Design: The vest uses a motif-based approach, allowing customization.
- Flexible Size: Adjust the size by altering the number and size of motifs.
- Detailed Stitch Work: Includes various stitches such as double crochets and elastic stitches for a professional finish.
Level of Difficulty
Intermediate:
- Involves double crochet, magic ring, and intricate joining techniques.
- Requires stitch counting and careful pattern following.
Tutor’s Suggestions
- Count Stitches: Carefully count stitches in each row to maintain pattern accuracy.
- Join Carefully: Ensure motifs are aligned properly by alternating sides.
- Match Yarn Tension: Keep consistent tension to avoid variations in motif size.
Uses
This beautiful vest is versatile and can be used for:
- Stylish layering in various outfits.
- Gift-giving as a thoughtful, handmade item.
- Showcase of crochet skills at crafting fairs or exhibitions.
Tip for Success
When joining motifs, ensure to slip stitch evenly and follow the pattern to prevent misalignments. This will help achieve a professional, seamless appearance.
Conclusion
This tutorial provides a comprehensive guide to creating a lovely vest from crochet motifs. With detailed instructions and helpful tips, even intermediate crocheters can achieve a beautiful, professional-looking piece.


