Quack up your accessories with this Crochet Duck Keychain pattern, adding cute charm, soft texture, and cheerful detail to your everyday style.
Tiny keepsakes often carry the most joy, turning everyday objects into meaningful companions. A crochet duck keychain brings that playful charm into daily life, combining function with a cheerful touch that instantly brightens a bag, backpack, or set of keys. Its compact size makes it easy to carry, while its soft texture and whimsical form add personality to even the most ordinary items.
Whimsical Crochet Duck Keychain for Everyday Joy

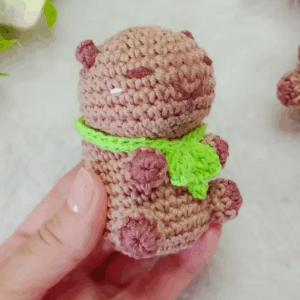
The process begins with a rounded body worked in tight, secure stitches to hold its shape firmly. Small details such as the beak, wings, and little feet are added with care, each one enhancing the duck’s character. Safety eyes or embroidered features give it expression, while the sturdy keyring attachment ensures it remains practical for everyday use. Lightweight and durable, it can withstand frequent handling without losing its charm.
Beyond being an accessory, this keychain makes a thoughtful gift for friends, children, or anyone who appreciates a touch of handmade sweetness in their daily routine. It is also a delightful collectible, allowing for variations in color or size to suit personal preference. A crochet duck keychain combines playfulness, durability, and style, offering a simple yet memorable way to add warmth and individuality to everyday essentials.
Materials Needed
To crochet the duck, you will need the following:
- Yarn: Multiple colors, including yellow (duck body), orange (beak and feet), blue or other colors for clothing, and your choice for the hat.
- Crochet Hook: Suitable size for the yarn used (not specified in transcript but typically around 2.5mm–3mm for smaller amigurumi projects).
- Fiberfill: For stuffing the duck.
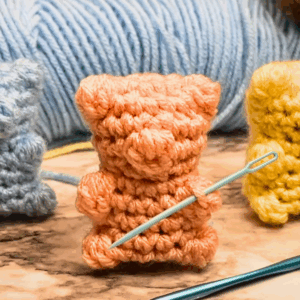
- Yarn Needle: For sewing parts together and weaving in ends.
- Scissors.

Step-by-Step Details
1. Head
- Row 1: Start with a magic ring and make 8 single crochets (SC) into the ring. Pull it tight and close with a slip stitch.
- Row 2: Chain 1, and make an increase in all 8 stitches (2 SC in each). Total: 16 stitches.
- Row 3: Chain 1, alternate 1 SC in the first stitch and increase in the second stitch (repeat 8 times). Total: 24 stitches.
- Row 4: Chain 1, make 1 SC into each stitch around. Total: 24 stitches.
- Rows 5-6: Same as Row 4, SC in each stitch, maintaining 24 stitches.
- Row 7: Chain 1, make 6 SC, then alternate 1 SC and 1 increase in the next stitches for 8 stitches, then 4 SC, 4 increases, and 6 SC. Total: 36 stitches.
- Row 8: Adjust the pattern slightly to alternate 1 SC and 1 increase (specific sequence provided in the transcript). Total: 42 stitches.
- Row 9: Begin shaping with 6 SC, add single and double decreases. Total stitch count decreases (the transcript gives a detailed pattern).
- Rows 10-12: Continue shaping the head, incorporating decreases. After Row 12, stuff the head and close the final stitches.


2. Body
- Row 1: Crochet into the front loops only. Make 8 SC in the initial round.
- Row 2: Increase in all stitches—total 16 stitches.
- Row 3: Alternate 1 SC and 1 increase for 8 rounds. Total: 24 stitches.
- Rows 4-5: SC in each stitch around (24 stitches per row).
- Change to a new yarn color to make the clothing part of the duck.
- Row 6: Crochet 24 SC in the new color.
- Row 7: Adjust pattern to incorporate back loop stitches for part of the body’s design.
- Row 8: Crochet decreases as described, reducing the size of the body.
- Row 9: Finish with 8 decreases, and stuff the body before closing.

3. Arms
- Start the arm with a magic ring of 6 stitches.
- Make SC stitches around for 3-4 rows to create small rounded arms that will be sewn to the sides of the body.
4. Legs
- Begin with a magic ring and make 6 SC as the base.
- Add a few rows to shape small, stubby feet that will attach at the bottom of the body.
5. Hat
- Row 1: Create a magic ring with 8 SC.
- Row 2: Make 8 increases, resulting in 16 stitches.
- Row 3: Alternate 1 SC and 1 increase for 8 times, resulting in 24 stitches.
- Rows 4-5: SC in each stitch around the row.
- Row 6: Add some decorative stitches to define the brim of the hat, include half-double crochets and double crochets for texture.
- Finish with slip stitches and fasten off.
6. Assembly
- Use a yarn needle to carefully sew the parts together (head to body, arms, legs, and hat).
- Add stuffing to all parts before securely attaching them.
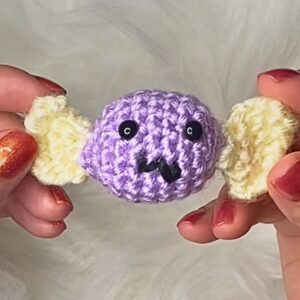
- Attach facial details: Eyes can be embroidered, and the mouth is added with slip stitches in the orange yarn.

Special Features
- Beginner-Friendly: This pattern avoids complex stitches, making it suitable for newcomers.
- Personalization: You can choose different colors for the hat or clothing to make the duck unique.
- Functional Design: The duck’s legs and arms are shaped in a way that provides stability when sitting.
Level of Difficulty
- Skill Level: Easy
- The pattern is straightforward, involving mostly single crochets, increases, and decreases. Slightly more care is needed when shaping the hat’s brim and attaching all the small parts.
Tutor’s Suggestions
- Practice Magic Rings: If you’re new to the magic ring technique, it’s worth practicing separately before starting the pattern.
- Tight Stitches: Keep your tension firm to avoid gaps, especially when stuffing the duck.
- Small Adjustments: Feel free to tweak the duck’s size or proportions to suit your preference.
Uses
- Decorative Piece: It’s a cute addition to shelves or tables.
- Gift Idea: Perfect for baby showers, birthdays, or as a token for crochet lovers.
- Keychain Option: With a slight downsize, this can be made into a keychain.
Tip
When working on smaller amigurumi projects like this, use stitch markers to keep track of your rounds. It can be easy to lose count when working on detailed sections like the head or body.
Conclusion
This crochet pattern for a duck wearing a hat is an enjoyable and simple project for beginners. With its quirky design and adorable details, it’s both fun to make and a charming addition to your collection or a thoughtful gift. Even if you’re just starting, the step-by-step instructions will guide you seamlessly through the process.