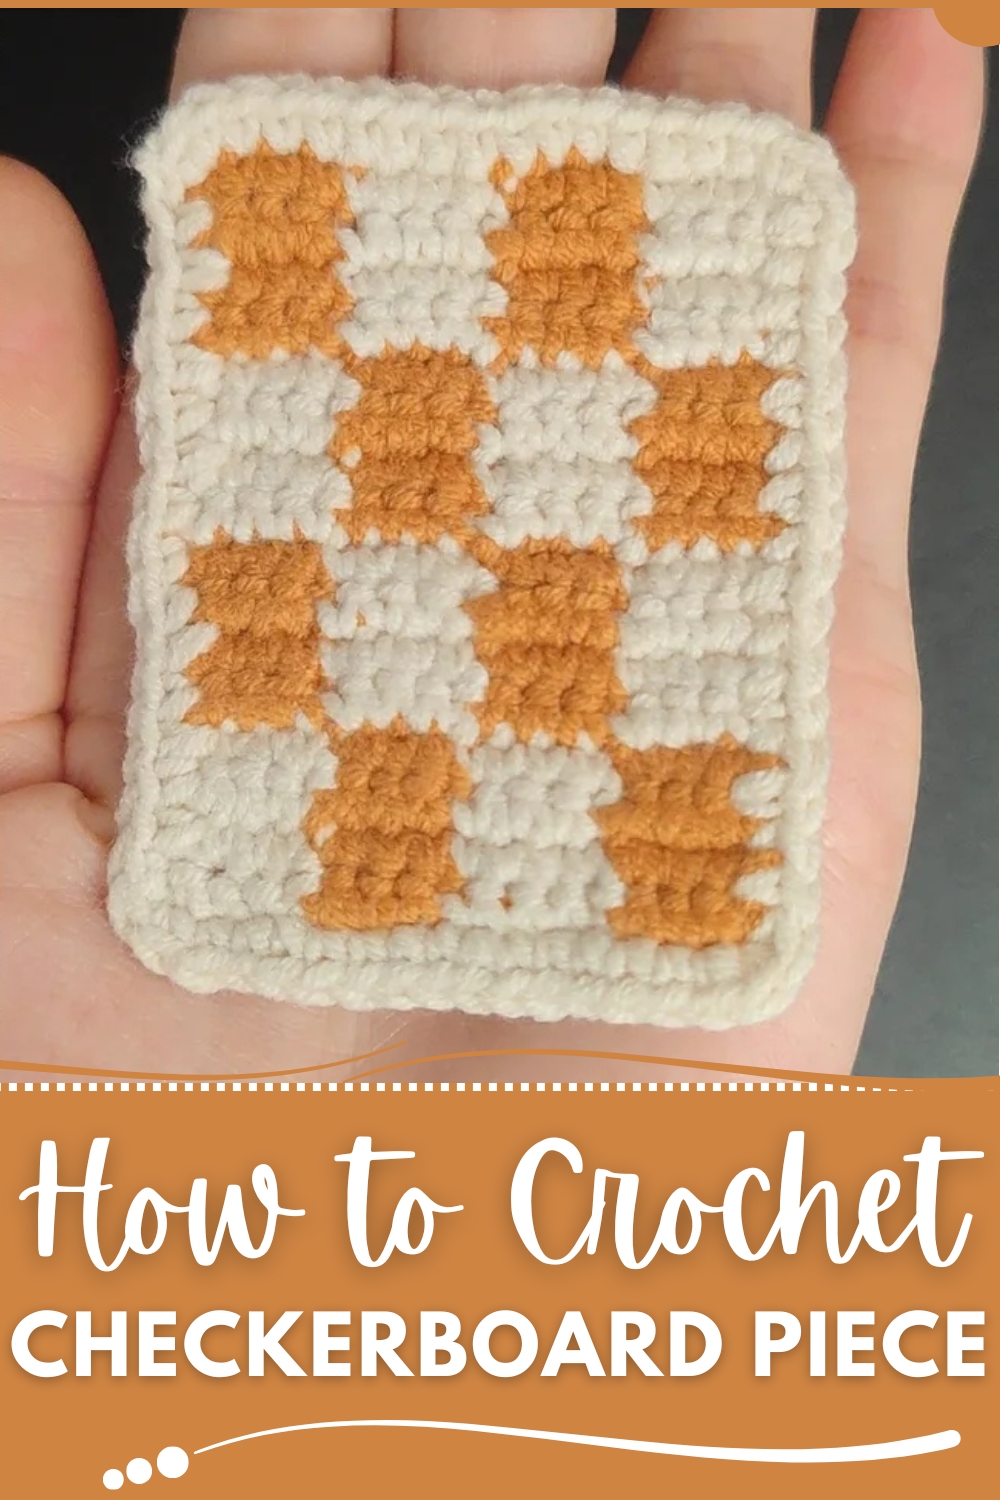
Express unique flair with Crochet Checkerboard Piece pattern, bringing modern charm and bold appeal to projects or décor.
Symmetry has long been admired for the balance it brings, and nothing reflects that charm more vividly than a checkerboard arrangement in crochet. The Free Crochet Checkerboard Piece Pattern turns this timeless motif into a functional and stylish project that works beautifully for both everyday use and decorative purposes. Its structured appeal makes it equally fitting for bags, cushions, table accents, or clothing inserts, offering a versatile touch of texture and contrast wherever it is applied.
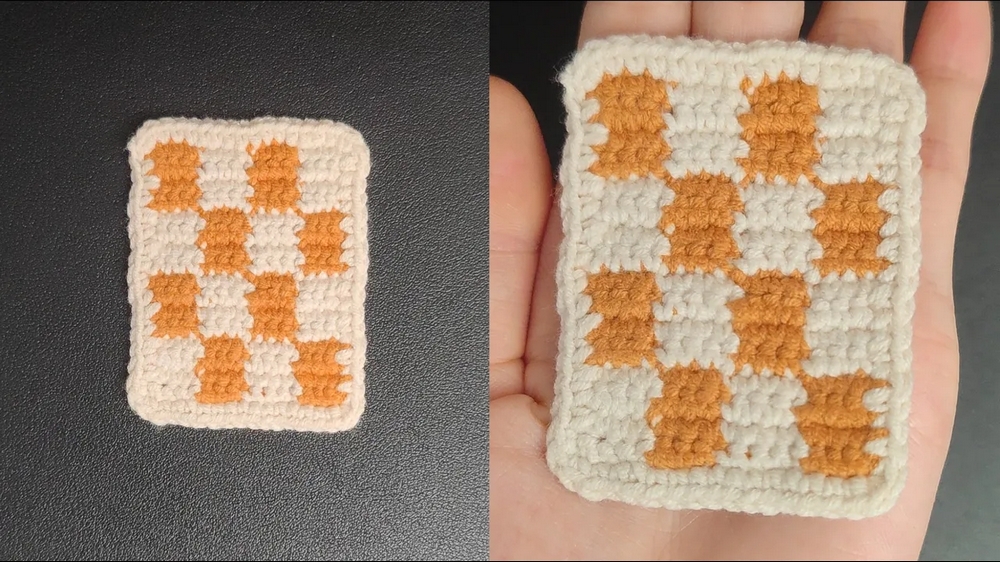
Free Crochet Checkerboard Piece for Fun Moments
The beauty of this project lies in its precision and clarity. Each stitch contributes to a graphic composition that is strong yet elegant. Beyond its visual appeal, the benefits include minimal seaming, durability, and adaptability to different sizes or uses. Whether fashioned into panels for accessories or accents for home décor, the checkerboard piece is a reliable method of introducing contrast and structure to crochet work. It is a pattern that rewards careful attention and results in a timeless textile marked by balance and versatility.
Materials & abbreviations
- Two contrasting yarn colors (cotton or worsted-weight cotton is common for bags — example: WeCrochet Dishie / cotton used in many checkerboard bag patterns).
- Crochet hook recommended for your yarn (check label; many bag tutorials use an H/5.0 mm for worsted cotton).
- Yarn needle, scissors, stitch markers, measuring tape.
- Optional: lining fabric & needle/ sewing machine; bag hardware (magnetic snap or D-rings) if making a bag.
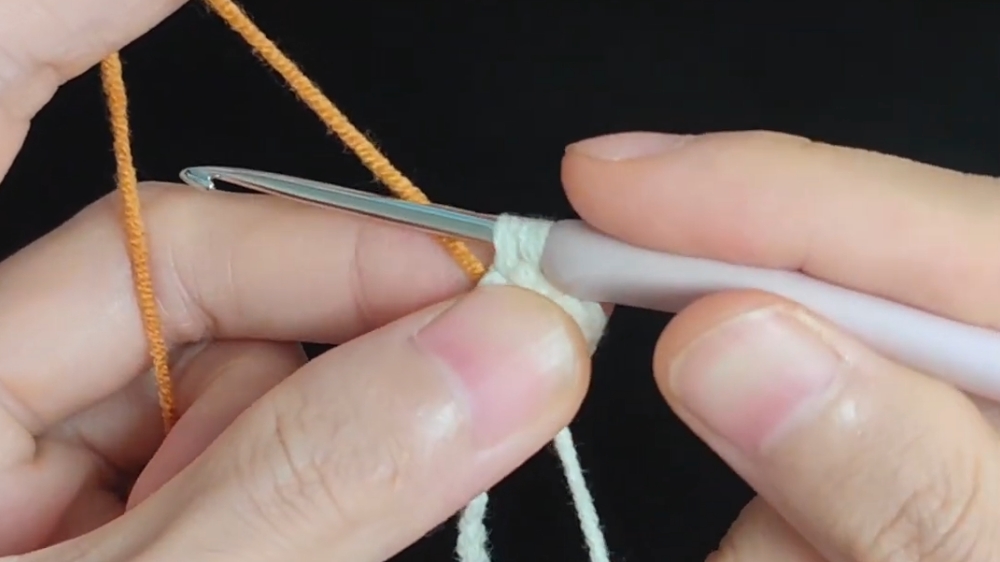
Common abbreviations used in the steps below: ch (chain), sc (single crochet), dc (double crochet — US), sl st (slip stitch), RS/WS (right/ wrong side).
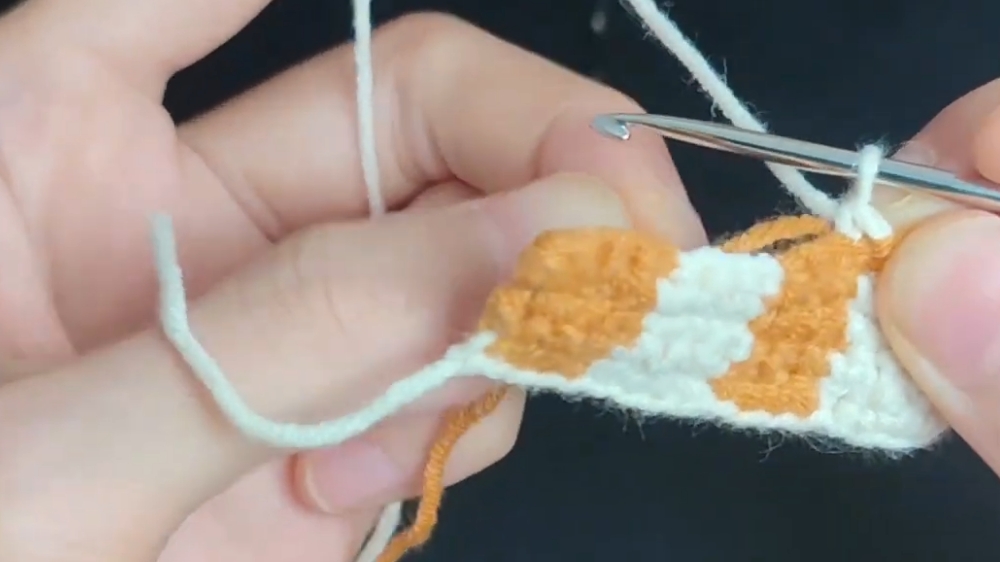
The central feature of this pattern is the sequence of alternating colored blocks, each square holding its place in neat alignment. The process begins with a foundation chain set to a multiple of the chosen block width.
Once the first row is established, stitches are worked in one color until the block limit is reached, then a seamless change introduces the second color.
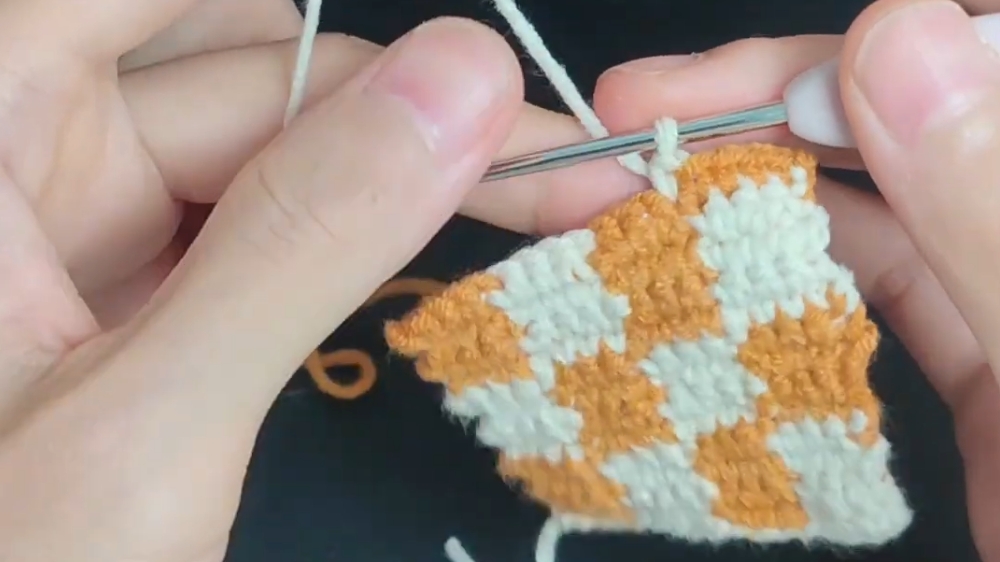
Yarn is carried carefully across the back to prevent unnecessary ends, keeping the piece tidy and lightweight. After several rows form the first set of squares, the placement shifts so the next section alternates above, producing the signature checkerboard look. In the early part of the pattern, the rows establish a steady rhythm of alternating colors, teaching the hand to maintain even tension during each change. The mid-section showcases the true visual impact, as rows of offset squares stack neatly to form a striking grid that is both bold and orderly.
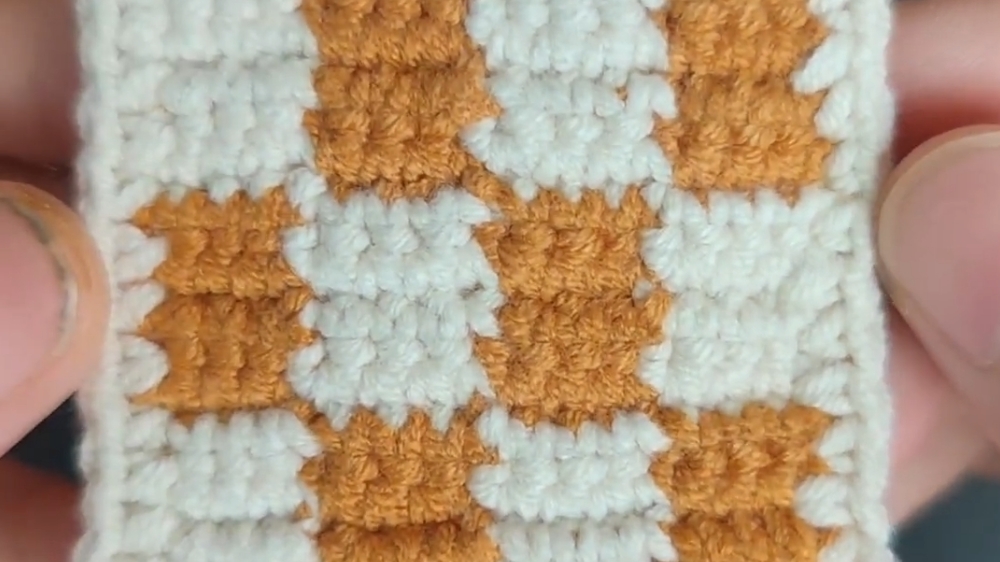
Toward the end, final rows complete the last band of squares, and someone works a smooth border of single crochet stitches around the edges to stabilize and refine the finished shape.
Step by Step Guide
This tutorial shows how to make a checkerboard crochet panel — a rectangular/strip piece made of alternating colored squares — that you can join into a bag, tote, or use as a decorative panel on clothing. The method focuses on making a flat checkerboard fabric using two colors and joining/finishing it so the panel is ready to assemble.
Special features (what makes this piece special)
- Bold graphic checkerboard that is highly customizable by color and block size.
- One-piece panel approach means fewer seams and a cleaner inside (especially if you carry colors).
- Can be scaled to leather straps/hardware for a boutique-style bag or kept soft and casual for clothing inserts or home décor.
Level of difficulty
Most checkerboard bag patterns using the carried-color technique rate as intermediate — the pattern itself is straightforward, but the colorwork (clean color changes, carrying yarn, keeping even tension) requires some experience. If you choose to make separate squares and join them, the project becomes more beginner-friendly.
Tutor’s suggestions
- Keep a consistent tension when carrying colors — uneven tension makes blocks warp.
- Use stitch markers to mark block boundaries or the beginning of rounds.
- Make a small gauge swatch so you know how many stitches/rows make a square (this keeps panel planning accurate).
- Use bobbins or small balls for color control and to avoid tangles.
- Blocking the finished panel (especially cotton) evens stitches and makes seaming easier.
Uses
- Main: bags and totes (panel can become front/back of a bag).
- Pockets, decorative panels on jackets/shirts, cushions, placemats, scarves (depending on yarn weight), or joined into garments as an accent.
Handy tip (one single short tip)
To keep the back tidy when carrying yarn, carry the unused color across only the width of one block and twist yarns at the block seam (or use a bobbin per color block) — this reduces long floats and makes lining optional.
Short conclusion
This video shows a practical, modular way to crochet a checkerboard panel that you can directly assemble into a bag or use as clothing embellishment. The carried-color, block-by-block approach gives a neat checkerboard with minimal seaming and flexible finishing options. If you’re comfortable with color changes and carrying yarn, it’s a satisfying intermediate project; if not, you can achieve the same look by making and joining smaller squares.