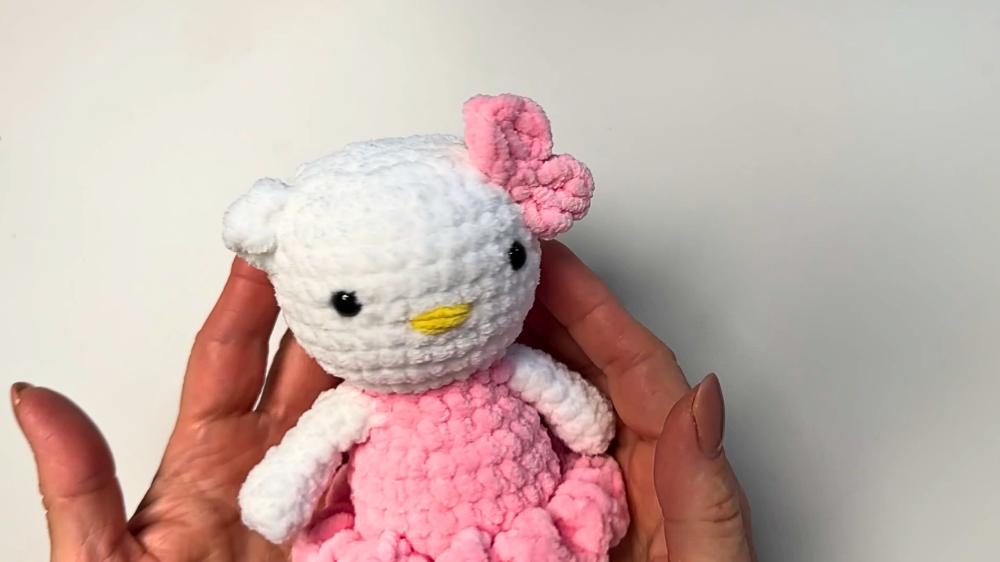
Bring a life with this cute and simple crochet Hello Kitty plush that’s perfect for beginners and guaranteed to add joy to your collection.
A plush toy is more than just an object, it’s a bundle of love and creativity. The kitty crochet plush captures the adorable charm of this famous character with its delicate design and soft features. From its signature bow to its friendly, iconic face, this plush is the perfect companion for kids or even adults who adore collecting cute, handmade creations.
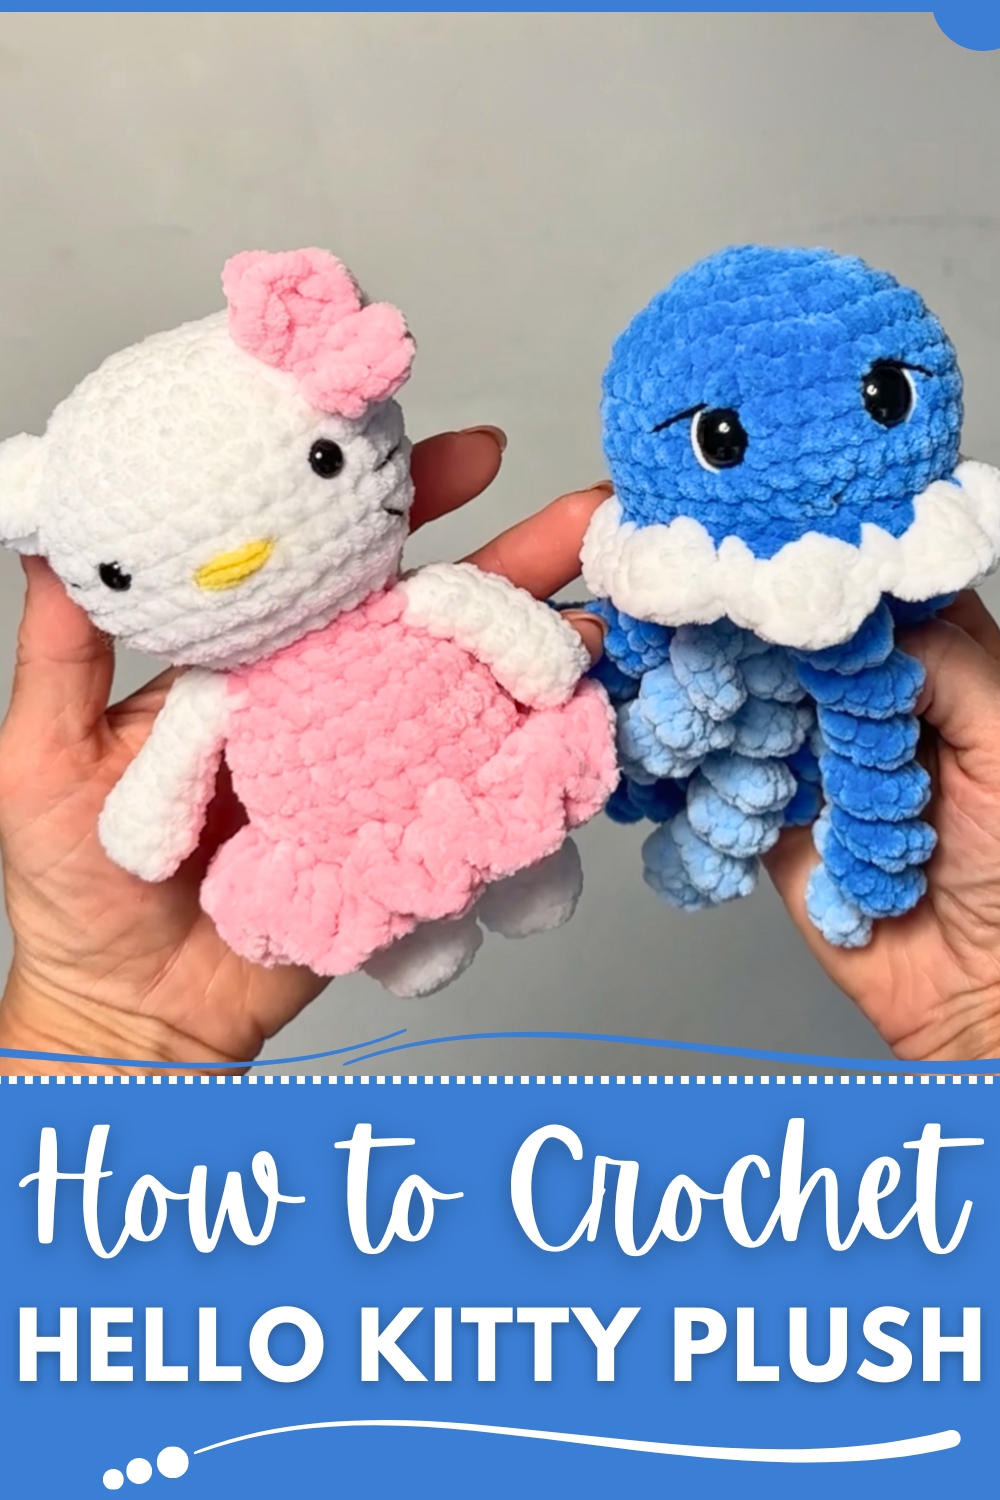
How to Crochet Hello Kitty Plush Pattern Step-by-Step
It’s small, lightweight, and detailed, making it ideal for gifting, decorating, or simply keeping as a lovable accessory.
This pattern is beginner-friendly and fun to make, featuring simple stitches and clear steps that anyone can follow.
You don’t need to be an expert to create a plush that looks special and unique. With a little patience and practice, beginners can complete it in no time.
Whether you want to relax while crafting or surprise someone with a thoughtful gift, this Hello Kitty crochet plush pattern will bring joy and smiles wherever it goes.
Let's start your day with this cute Kitty Plush!
Required Materials and Supplies
To achieve the best results, ensure the following supplies are available:
Yarn: Medium-weight (Size 4) cotton or acrylic yarn in White (Head/Body), Pink or Red (Dress/Bow), and Yellow (Nose).
Crochet Hook: 3.5mm or 4.0mm (to ensure tight stitches so stuffing does not show).
Safety Eyes: 10mm or 12mm black plastic safety eyes.
Fiberfill: Polyester stuffing for plushness.
Tapestry Needle: For assembling parts and embroidering whiskers.
Stitch Markers: Essential for tracking rounds in continuous spirals.
Scissors.
Customization Options
Outfit Variations: Replace the dress color with light blue for a "classic" look or use sparkly yarn for a festive version.
Size Adjustments: Use bulky "Chenille" yarn and a 6.0mm hook to create a jumbo-sized plush using the same stitch counts.
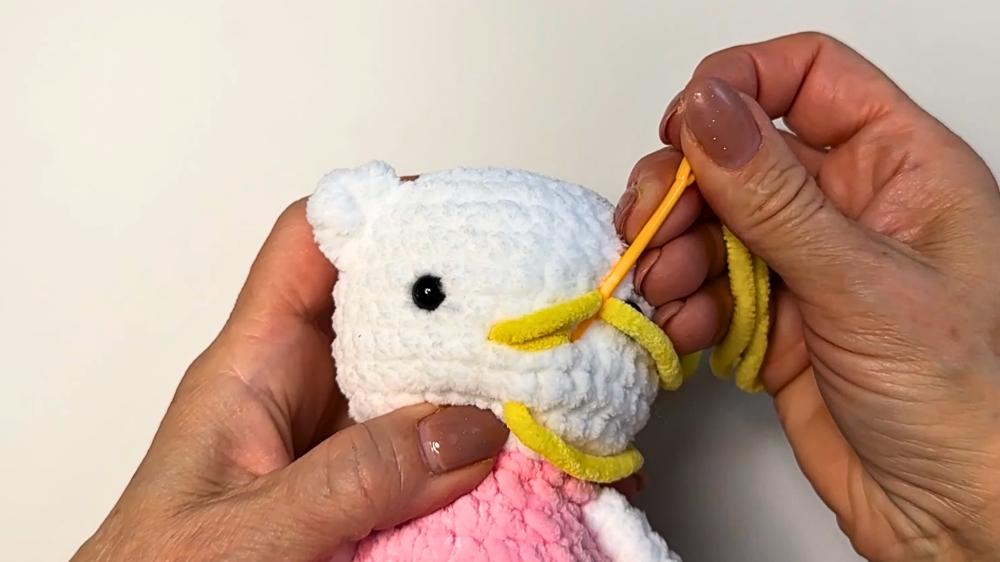
Facial Expressions: While Hello Kitty traditionally has no mouth, you can embroider a small smile for a personalized touch.
Tips for Success
Tension: Keep stitches tight. If you see gaps where the stuffing is visible, move down a hook size.
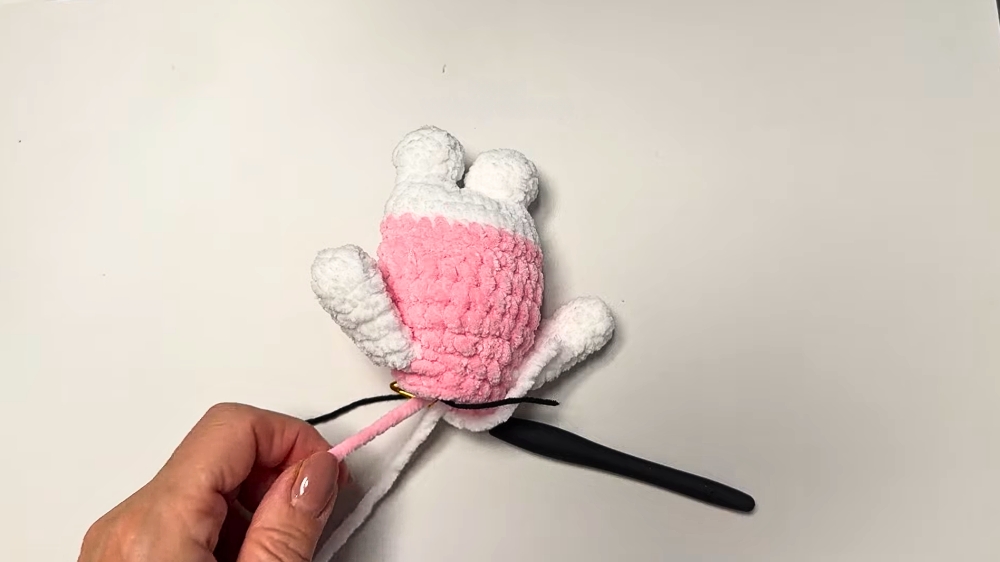
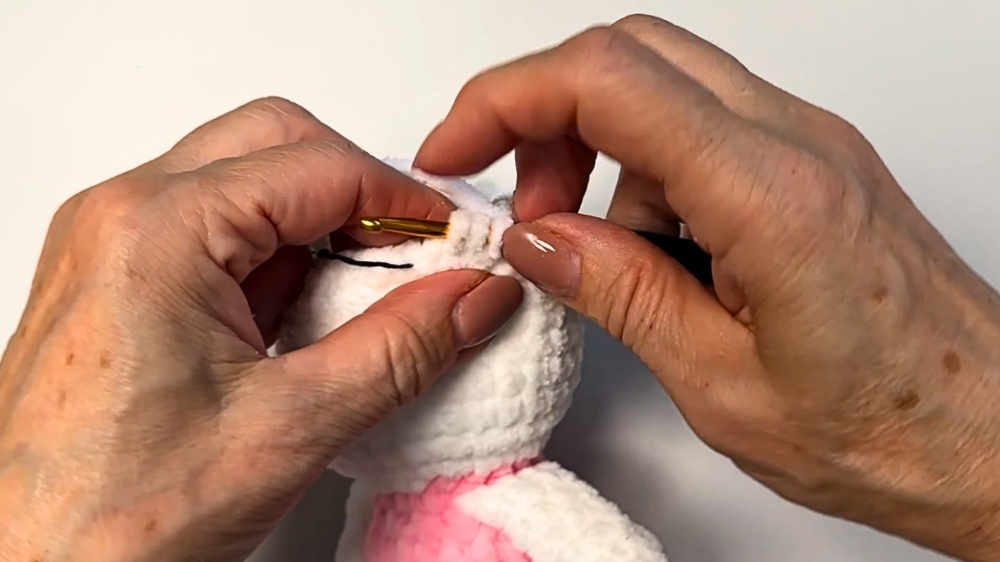
Symmetry: Pin all limbs and ears in place before sewing. Ensure the ears are aligned with the eyes to maintain the character's proportions.
Whisker Embroidery: Use black yarn or embroidery floss. Ensure the three whiskers on each side are parallel and angled slightly upward.
Important Remarks
This pattern emphasizes the "continuous round" method. It is vital to use a stitch marker, as missing a single increase in the head can result in a lopsided face. When sewing the head to the body, ensure the neck is stuffed very firmly to prevent "floppy head syndrome."
Conclusion
In conclusion, this Hello Kitty amigurumi is an excellent introductory project for those looking to move beyond flat crochet into 3D toy making. Its simple shapes and minimal color changes allow for a stress-free crafting experience that results in a professional-looking plush.
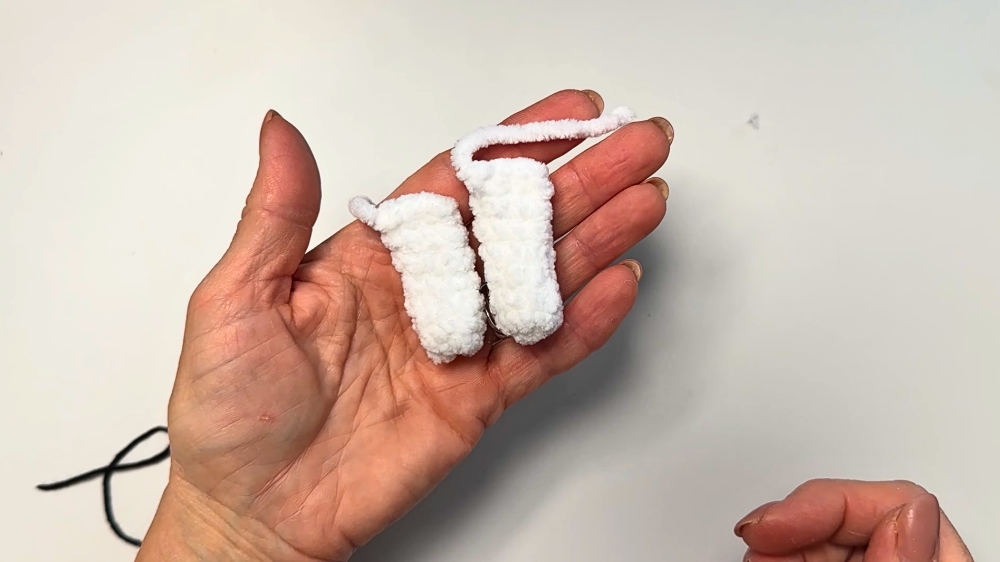
Pattern Instructions
This guide details the construction of an amigurumi Hello Kitty plush, based on the tutorial by CrochetGrams. This pattern is structured for beginners and results in a classic, seated character.