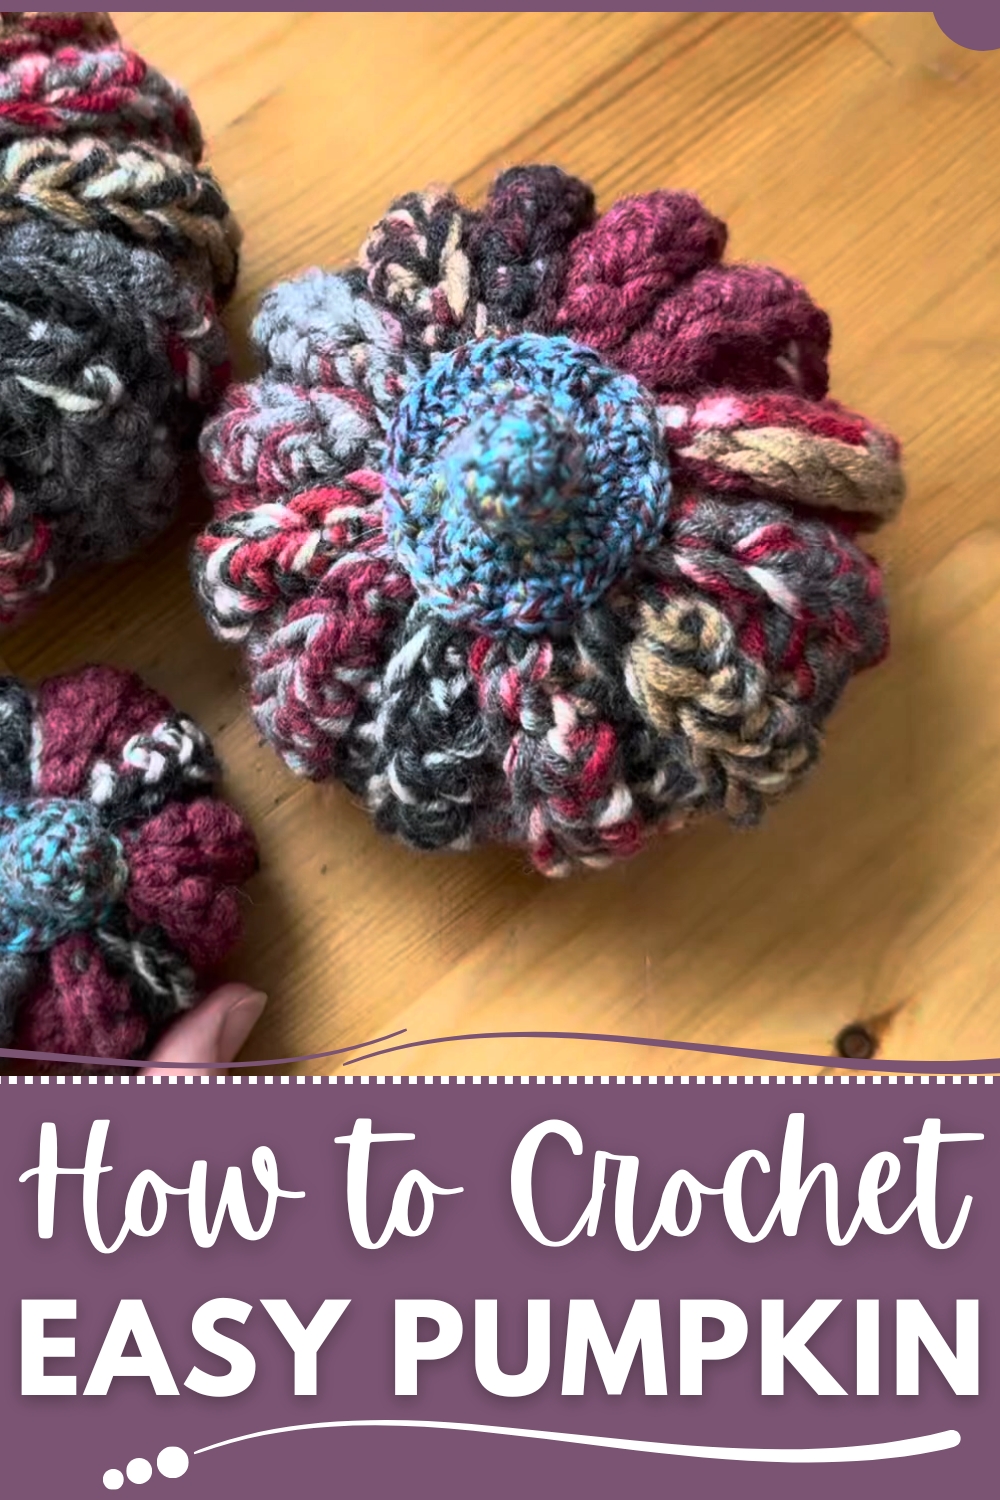
Bring autumn charm to any space with this Free Crochet Pumpkin Pattern, making cozy, pumpkins perfect for decor, gifts, and seasonal flair.
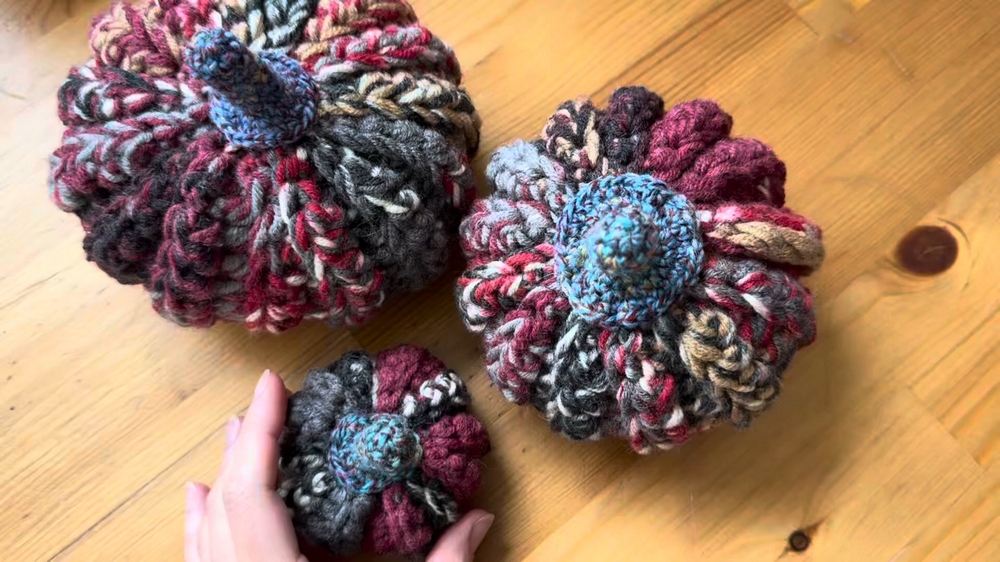
Autumn always brings a cozy charm to homes, with the warm glow of candlelight reflecting off soft textures and seasonal decorations. Among these, pumpkins have a timeless appeal, instantly adding a touch of comfort and festivity. Using yarn to make miniature or decorative pumpkins not only brings a personal, handmade touch to your space but also offers a satisfying, mindful activity. The Free Crochet Pumpkin Pattern provides an approachable way to produce charming pieces that can serve multiple purposes, from seasonal table centerpieces and mantel accents to whimsical additions for gifts or party favors.
Free Crochet Pumpkin Pattern Everyone Will Notice
Its tactile nature encourages relaxation and focus, making it ideal for quiet afternoons or social crocheting sessions. Beyond aesthetics, these pumpkin creations can be customized in size, color, and embellishment to suit any decor style, allowing for versatility and personal expression. They also make thoughtful handmade gifts that carry warmth and intention, far more meaningful than store-bought alternatives.
For those seeking small projects that combine practicality with charm, this pattern offers a simple yet rewarding experience. Each completed pumpkin brings a sense of accomplishment while brightening the atmosphere, turning everyday spaces into inviting, cozy havens that celebrate the spirit of the season.
Step-by-Step Guide
Materials Needed
- Yarn: Recycled yarn (specific type isn’t mentioned, but use any medium-weight yarn for beginner-friendly results).
- Crochet Hook: A 4 mm crochet hook.
- Stuffing Material: Fiberfill or leftover scraps of yarn to stuff the pumpkin.
- Scissors
- Needle: For sewing and attaching the stem.
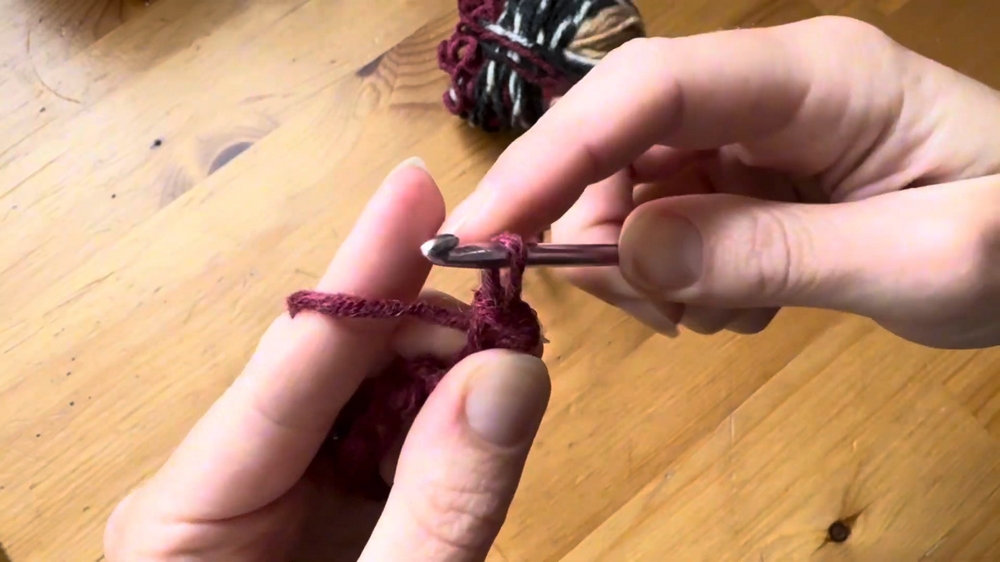
Step 1: Start with a Foundation Chain
- Begin by making a slip knot and a chain of 14 stitches.
- Note: Adjust the chain length depending on the size of your pumpkin. Add more chains for a larger pumpkin or fewer chains for a smaller one.
- Turn the chain around and work into the tiny bumps at the back of the chain rather than the loops on the top.
Step 2: First Row
- Insert your hook into the first bump:
- Slip Stitch into the first bump.
- Single Crochet into the second bump.
- Half Double Crochet into the remaining bumps.
- Finish the row with Single Crochet, followed by a Slip Stitch.
Step 3: Continue the Back Loop Technique
- Turn your work and make one chain.
- Only crochet into the back loops of the stitches:
- Start with a slip stitch.
- Make a single crochet in the next stitch.
- Crochet 10 half-double crochets.
- End the row with another single crochet and slip stitch.
- Repeat this pattern for each row.

Step 4: Calculate and Complete Rows
- To determine the total number of rows:
- Multiply the original number of chain stitches by 2. For example, with a foundation chain of 14 stitches, you’ll need 28 rows.
- Work steadily until your rows are complete. As you add more rows, finding the correct stitches becomes easier.
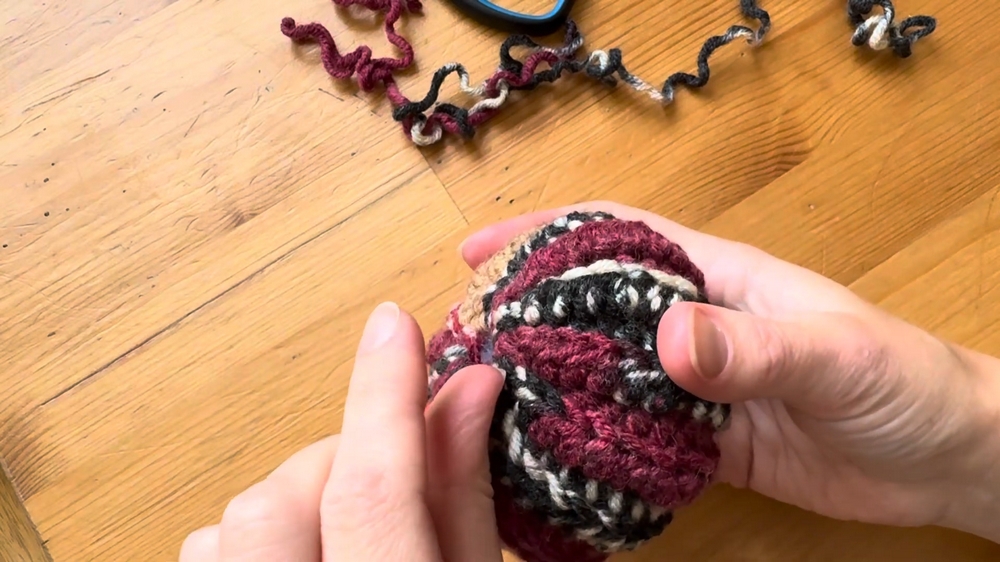
Step 5: Close the Pumpkin Shape
- After completing the rows, do not join the work into a circle yet.
- Insert your hook into the first stitch on one side, and into the corresponding stitch on the opposite side, pulling the yarn through both.
- Work this technique across the row until the pumpkin is closed on one side. Avoid pulling too tightly—this ensures the closure remains smooth and even.
Step 6: Stuff and Sew the Pumpkin
- Once the closure is complete, stuff the pumpkin with fiberfill or other soft materials.
- Use a needle with yarn to sew and close the gap on the other side. Secure the yarn inside the pumpkin to keep the stuffing intact.
Step 7: Make the Stem
- Create a magic ring and crochet 6 single stitches into the ring. Pull the ring tight.
- Work the following rounds:
- Rounds 2–7: Crochet one single stitch in each stitch (no increases or decreases).
- Round 8: Make increases (2 single crochets per stitch) until there are 12 stitches.
- Round 9: Alternate between one single crochet and one increase (total: 18 stitches).
- Finish with an invisible connection for a polished look.
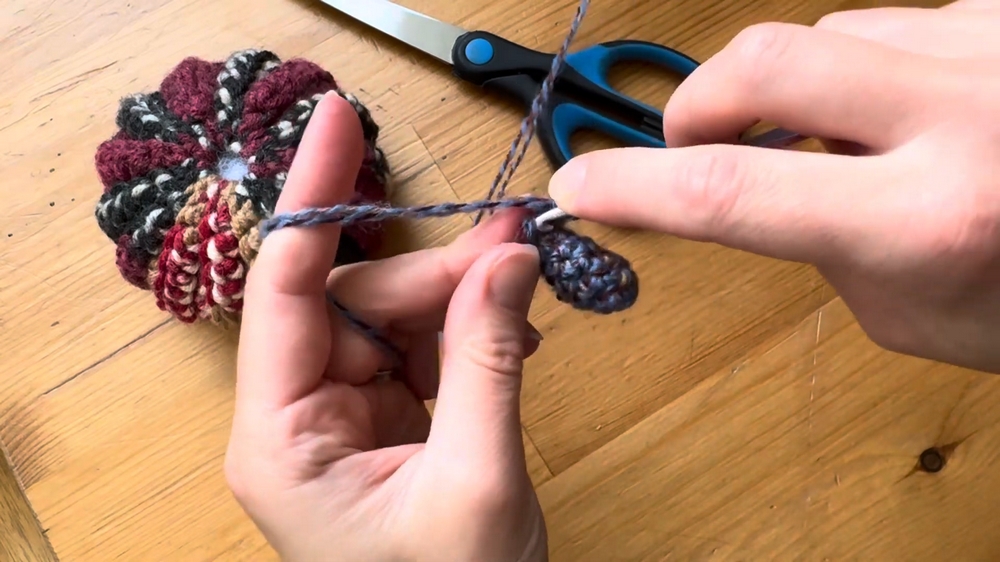
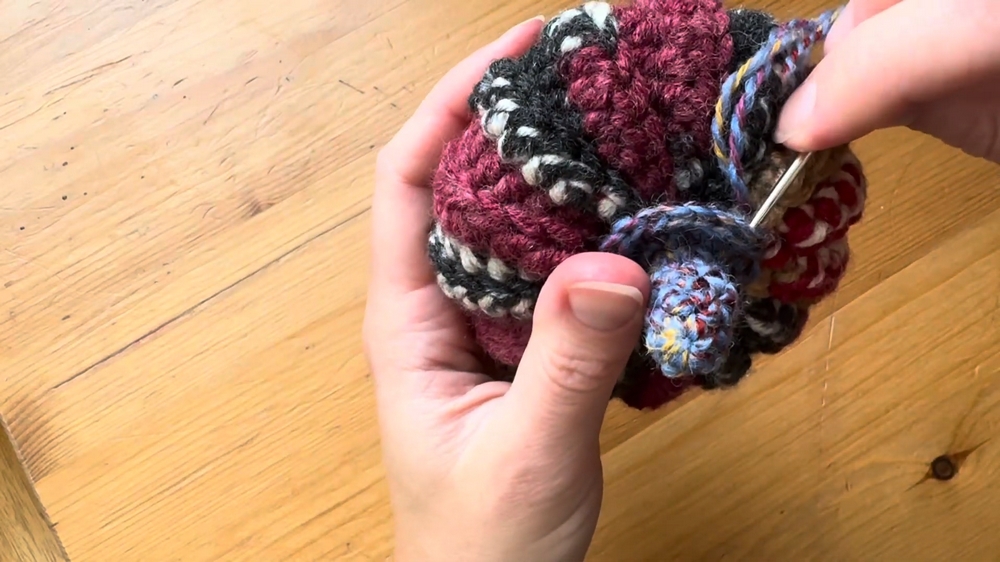
Step 8: Attach the Stem to the Pumpkin
- Use the long tail of yarn to sew the stem to the top of the pumpkin.
- Pick up stitches from the pumpkin and pass the needle through the base of the stem until it’s securely attached.
- Hide any loose yarn ends inside the pumpkin for a clean finish.
Special Features
- Customizable Sizes: Easily adjust the chain length to create pumpkins of different sizes.
- Efficient Stitch Repetition: The consistent stitch pattern makes this project suitable for beginners.
- Recycle Yarn: The tutor emphasizes the use of leftover or recycled yarn, making the project eco-friendly.
- Neat Finish: The invisible technique used to attach the stem ensures the pumpkin looks professional and polished.
Level of Difficulty
Beginner: The repetitive stitch pattern, clear instructions, and simple combination of techniques make this project ideal for crocheters who are just learning or refining their skills.
Tutor’s Suggestions
- The tutor highlights the importance of working into the back loops to create texture and flexibility in the pumpkin.
- Take care not to make stitches or closures too tight, as it may affect the appearance and shape of the pumpkin.
- For easier stitching in the initial rows, use your fingers or nails to help guide the hook through the bumps.
Uses
- Seasonal décor for autumn or Halloween.
- Gifts for friends and family.
- Home decorations (e.g., centerpieces, mantel décor).
- Great for craft fairs or DIY activities.
Tip: Keep Your Tension Consistent
Maintaining even tension throughout the rows is key to ensuring the pumpkin’s final shape is symmetrical. Pulling too tightly may make it difficult to crochet, especially when closing the ends.
Conclusion
Crocheting a pumpkin is a fun and relaxing project that allows you to personalize your décor or gifts. With simple steps, beginner-friendly techniques, and clear guidance, this project is accessible to crocheters of all levels. From its customizable sizing to its eco-friendly use of recycled yarn, this pumpkin is a testament to how creativity and practicality can combine.