Hang a cheerful yarn ornament with the Crochet Christmas Tree Free Pattern, a sweet addition to your holiday gifts and winter home decor.
As the holiday season approaches, many seek charming decorations that add a cozy atmosphere. A Crochet Christmas Tree design by AmiaMikancl Crochet is a delightful way to do just that. This small tree is formed by looping yarn with a crochet hook, resulting in a soft and tactile ornament that stands out from usual holiday décor.
Lovely Crochet Christmas Tree Free Pattern To Decorate Your Home
One of the main features of this tree is its versatility in colors. It can be crocheted in deep greens, snowy whites, bright reds, or even multicolored yarns. Size also varies widely—from tiny desk ornaments to larger pieces for shelves or mantels—allowing customization to suit any space.
The single crochet stitch plays a vital role in building the tree’s structure. This stitch provides firmness, helping the tree maintain its shape without collapsing. Adding tiny accessories like buttons, beads, or small stars enhances the festive look and adds personality to each piece.
Unlike traditional trees, the soft yarn offers a gentle feel, making the decoration especially suitable for children’s rooms or areas where safety is a concern. This combination of softness, bright colors, and stable structure creates a charming object that reflects the season’s warmth.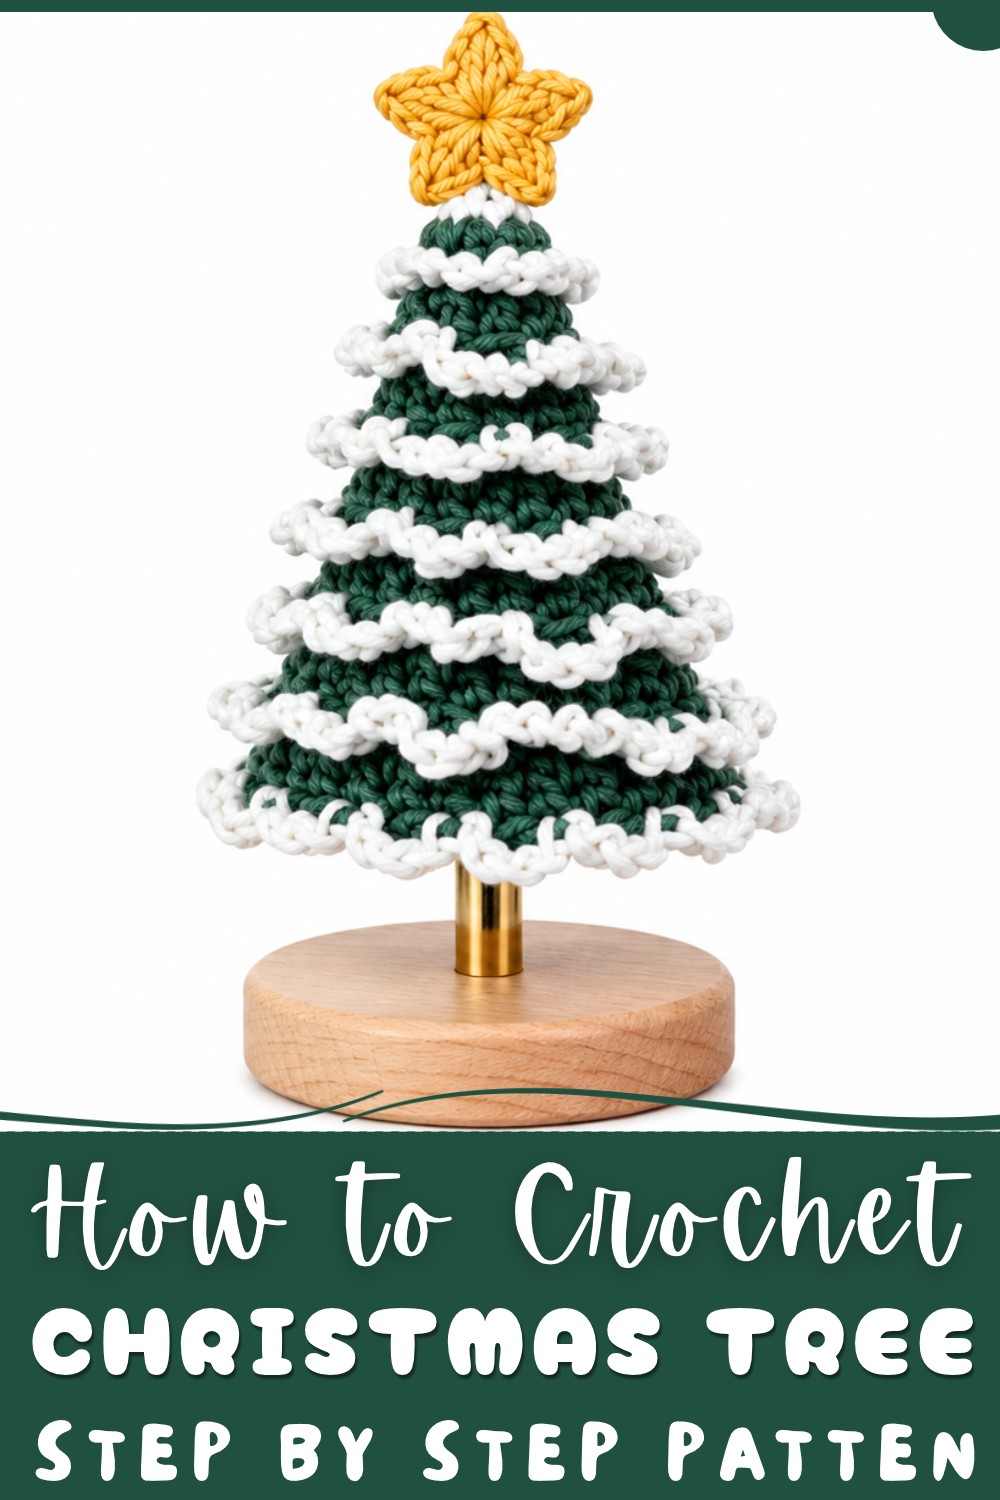
In summary, a Crochet Christmas Tree is a unique and adaptable decoration that adds color, texture, and holiday spirit in a simple, handmade form.
About the Pattern
A snow-covered Christmas tree brings a touch of handmade charm to festive décor. This project uses continuous rounds and textured stitches to create a tree topped with snowy layers and dimensional branches. Crocheted in two harmonious yarn shades, the finished piece stands out in displays, table settings, or as a thoughtful, seasonal gift.

Pattern at a Glance
- Construction: Crocheted in seamless, continuous rounds from the tip of the tree downward.
- Yarns: Uses contrasting "Ice Mint" (snow) and "Cotton Khaki" (tree branches) colors.
- Textures: Back loop stitches form ridged layers for a realistic tree shape, while chain loops in white yarn represent delicate snow drifts.
- Finishing: Tree is completed with decorative snowy effects and neatly woven ends.
Important Notes
- The project is worked in continuous (spiral) rounds; place a stitch marker at the start of each round to keep track.
- All color changes are completed during the final yarn-over of the last stitch before the new color begins.
- Some rounds are worked in the back loops only to create realistic branch texture.
- Always check stitch counts after each round to maintain the intended shape.
Difficulty Level
Advanced Beginner to Intermediate:
Requires knowledge of basic crochet stitches, back loop techniques, color changes, and working in continuous rounds. Pattern includes special texture stitches and looped chains for snow effects.
Supplies Needed
- Yarn:
- Ice Mint (white or icy pastel for snow layer) – small amount
- Cotton Khaki (muted green for tree body) – one small skein
- Hook: 3.5mm crochet hook (US size E)
- Notions:
- Yarn needle for finishing
- Scissors
- Stitch marker
- Optional: Polyester stuffing for structure, depending on desired firmness
Size & Measurements
- Finished Height: Approximately 4 to 6 inches, depending on yarn and gauge
- Base Diameter: Roughly 2 to 3 inches
Gauge & Stitch Details
- Gauge: 10 stitches and 12 rows = 2 inches in single crochet
Gauge is not critical for this project; consistency is more important for shaping. - Stitches Used:
- Single Crochet (SC)
- Half-Double Crochet (HDC)
- Double Crochet (DC)
- Slip Stitch (SL ST)
- Chain (CH)
- Magic Ring
- Special Techniques:
- Color change during the final pull-through of a stitch
- Back loop only (BLO) crocheting for textured rounds
- Snowy chain loops worked around the edge
Crochet Abbreviations
| Abbreviation | Stitch Name |
|---|---|
| MR | Magic Ring |
| SC | Single Crochet |
| HDC | Half Double Crochet |
| DC | Double Crochet |
| INC | Increase (2 stitches in same st) |
| BLO | Back Loop Only |
| SL ST | Slip Stitch |
| CH | Chain |
Special Stitch Guide
- Magic Ring (MR): Form a small loop, work stitches into it, then pull tight to close.
- Back Loop Only (BLO): Insert hook under back loop only when making stitch, leaving front loop visible for texture.
- Snow Loop: Chain 3 (or 4), skip 1 stitch, then slip stitch into next BLO to create raised snowy effect.
Complete Crochet Pattern
Tree Top (Snow Layer) and Round 1
- Using Ice Mint, make a Magic Ring (MR).
- Work 6 SC into the MR, pulling tight to close.

2 Round (Green Tree Body)
- On the 6th SC, change to Cotton Khaki by completing the stitch with green.
- With green, SC in each stitch around (6 SC total), working over yarn tails for a neater finish and to secure the color change.
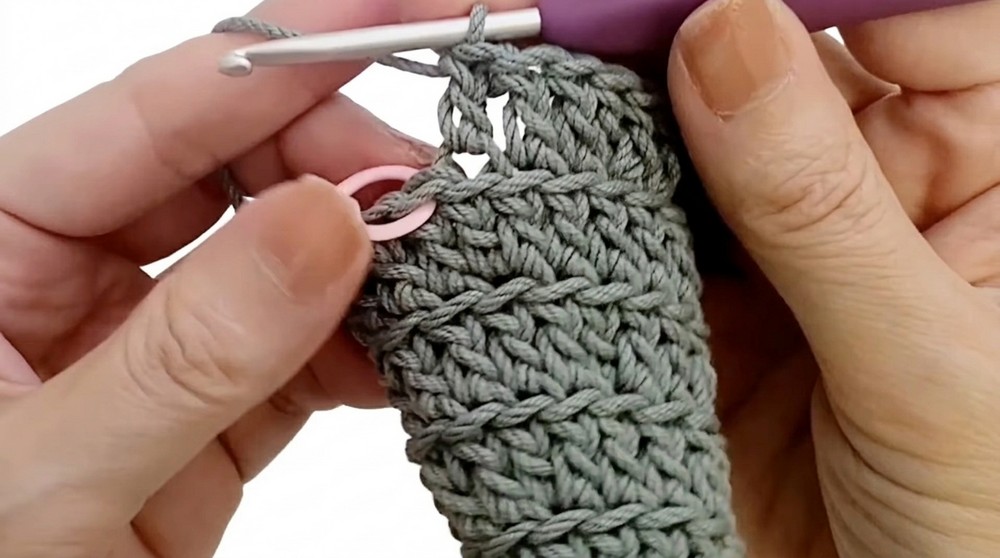
3 Round (BLO Texture Begins):
- All stitches in this round are worked in Back Loops Only.
- [1 SC] in first st,
- [1 HDC + 1 DC] in next st,
- 1 DC in next,
- [2 DC] (INC) in next,
- Repeat sequence as patterned until end of round.
- (Count remains as patterned; check video/transcription for repeat completion.)

4 Round (BLO):
- 1 DC in first st,
- 2 DC in next (INC),
- 1 DC,
- Repeat this sequence around, working all stitches in Back Loops Only.
5 Round :
- [3 DC, then INC]:
- 1 DC in each of next 3 sts, 2 DC in next (increase),
- Repeat around for dimensional tree shaping.
6 Round :
- [2 DC, then INC]:
- 1 DC in next 2 sts, 2 DC in next (increase),
- Repeat to end of round, keeping in back loop if desired.
7 Round :
- [5 DC, then INC]:
- 1 DC in next 5 sts, 2 DC in next,
- Repeat around for wider tree layers.
8 Round :
- [3 DC, then INC]:
- 1 DC in each of next 3 sts, 2 DC in next,
- Continue repeating this sequence for the round.
9 Round :
- [6 DC, then INC]:
- 1 DC in next 6 sts, 2 DC in next,
- Repeat until round finishes for continued expansion.
10 Round :
- [4 DC, then INC]:
- 1 DC in next 4 sts, 2 DC in next,
- Repeat to complete round, finalizing the main shaping of the tree body.
Finishing and Snow Texture
Transition to Snow:
- Work 1 HDC and 1 SC to transition height smoothly, then join Ice Mint with a slip stitch to begin the snow edge.

First Snow Loop Round:
- [CH 3, skip 1 stitch, SL ST in next BLO]:
- With Ice Mint, chain 3, skip one stitch, slip stitch in the following back loop.
- Repeat around until full round is complete, forming the first tier of snow.
Second Snow Loop Tier (Final Texture):
- [CH 4, skip 1 stitch, SL ST in next BLO]:
- Chain 4, skip one stitch, slip stitch in the next back loop, and repeat this longer loop sequence up the tree.
- Continue working upward in a spiral until reaching the top point.
Finishing:
- After the last snow loop is formed at the crown, gently reshape the loops and adjust the snowy texture as desired.
- Fasten off your yarn and use a tapestry needle to weave in any remaining yarn ends, securing neatly on the inside of the piece.
Assembly & Finished Size
No additional assembly required. The tree holds its form due to the density of stitches. If added firmness is desired, very lightly stuff the base before closing. Finished size will be approximately 4–6 inches tall, depending on individual gauge and yarn choice.

Conclusion
Creating a snow-covered Christmas tree from yarn combines textured stitchwork and thoughtful placement of color for a whimsical, seasonal decoration. The interplay of back-loop double crochets and airy chain snow layers captures the spirit of winter in miniature. Careful attention to continuous rounds, secure color transitions, and deliberate finishing ensures a crisp, beautifully shaped result. This handcrafted piece adds charm to festive themes, gift-wrapped arrangements, or cozy settings, embodying the enduring warmth and creativity of fiber art.