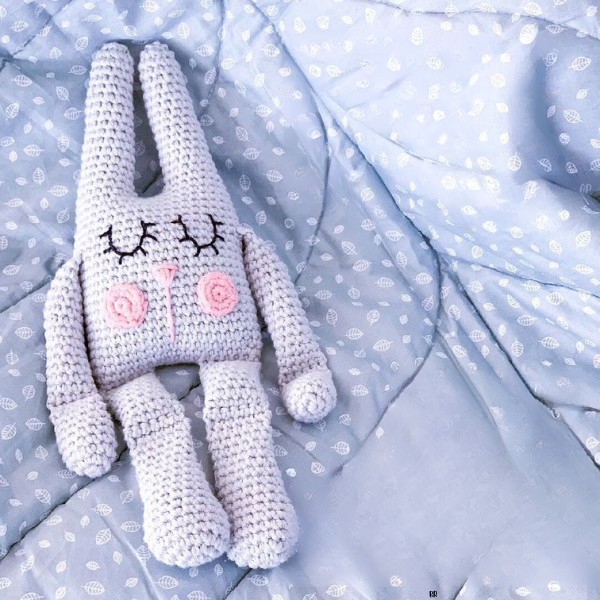
Are you ready to make an adorable little bunny with your own hands? I've got a super easy crochet pattern for Beba Bunny that's perfect for beginners. You'll learn to make a cute, soft bunny that everyone will love. Grab your favorite yarn and a crochet hook, and we'll make this cuddly buddy together. Follow our simple instructions, and before you know it, you'll have a Beba Bunny to show off and snuggle with.
Crochet Beba Bunny Pattern
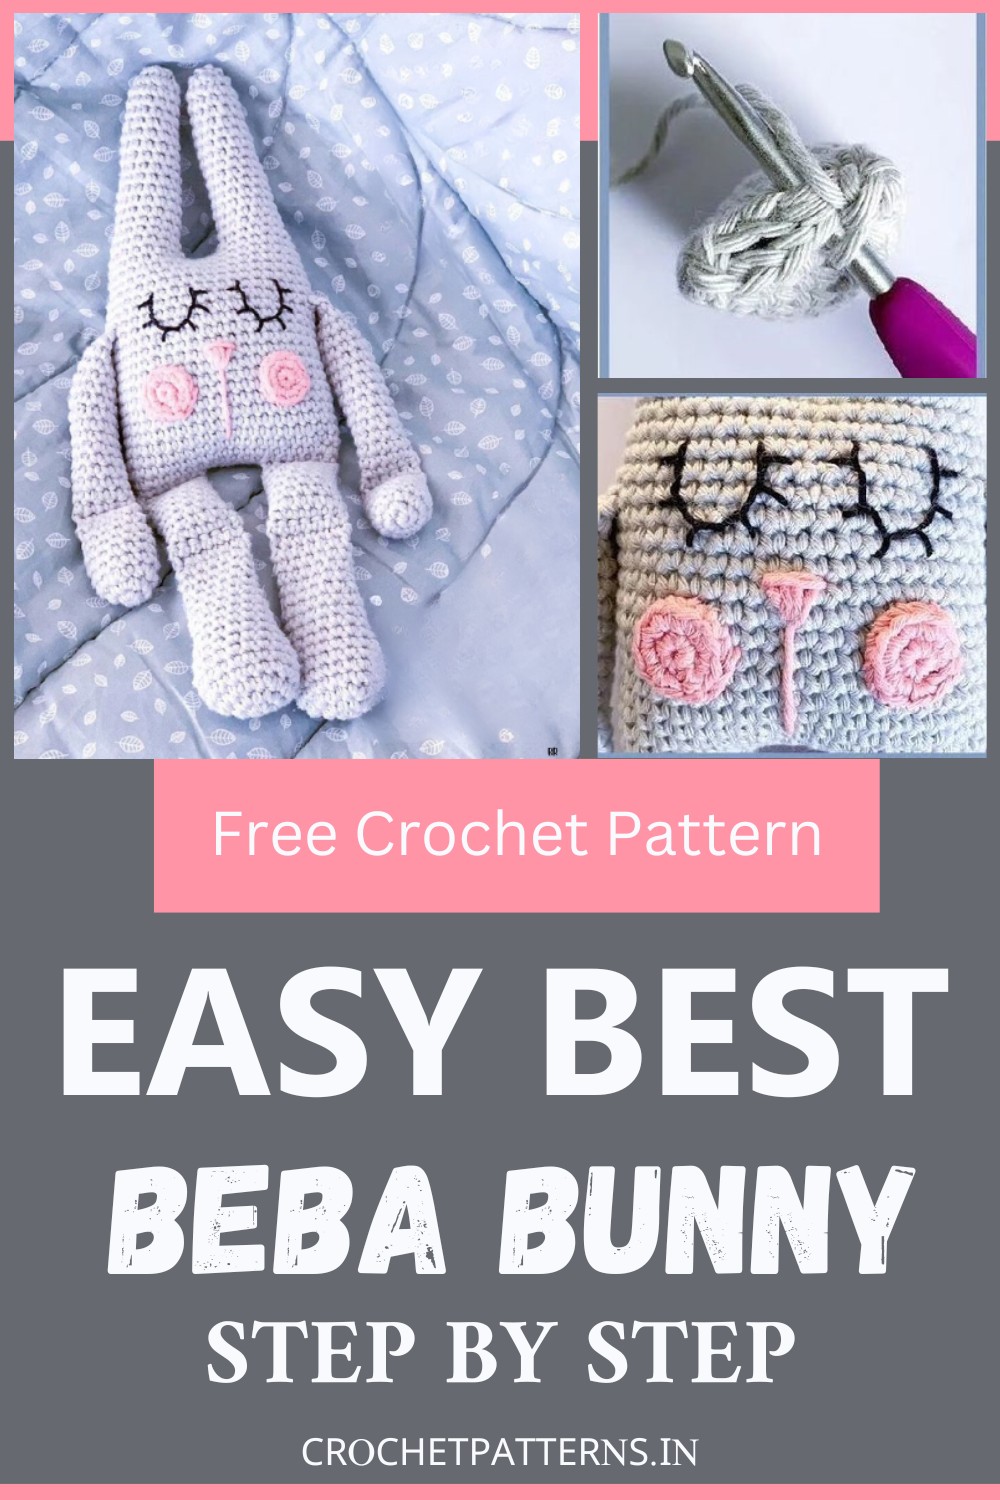
Free crochet pattern by @handmade_by_halime
Abbreviations
- slst = slip stitch
- ch = chain/s
- SC = single crochet
- inc = increase; crochet 2 sc in the same stitch
- dec = decrease; crochet 2 sc together
- st = stitch(es)
- rnd = round(s)
- [...] X X = repeat instructions in brackets X times
- (..) = total number of stitches in the round or row (chains not counted)
Materials required:
- Yarn 2 balls of main colour. Scrap yarn for cheeks and embroidery. I used Yarn And Colors Epic Silver - it's recommended to use 100% cotton yarn if you will give the toy to a child. Other yarns that can be used are Scheepjes Cahlista and Hobbii Rainbow 8/8. - Crochet hook 4.0 mm
- Fiberfill / toy stuffing
- Stitch markers, scissors and embroidery needle
Optional: rattle ball or squeezy ball
- Size: 32 cm tall (appr. 12,5 inches)
Cheek
- Make 2.
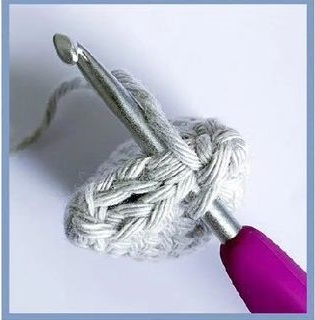
- Rnd 1: 6 sc in a magic ring (6)
- Rnd 2: [inc] x 6 (12)
- Slst in next st. Cut the yarn and leave a long tail for sewing the cheeks to the body.
Tip! Leave a long tail on one of the cheeks to embroider the nose.
Arm
- Make 2.
- Rnd 1: 5 sc in a magic ring (5)
- Rnd 2: [inc] x 5 (10)
- Rnd 3: [inc, 4 sc] x 2 (12)
- Rnd 4-7: 12 sc - 4 rounds (12)
- Rnd 8: [dec, 4 sc] x 2 (10)
Stuff lightly with filling.
- Rnd 9: Now you will put the stitches together and crochet 5 sc see picture above.
- Rnd 10: 1 ch, turn, 5 sc
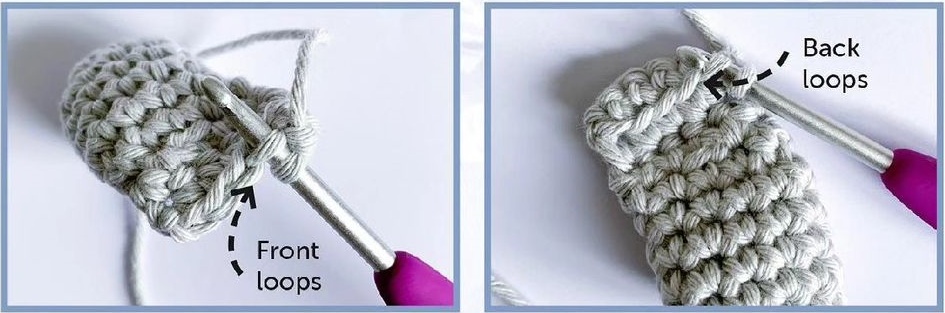
Back loops
Front loops
- Rnd 11: 1 ch, turn, 5 sc in the front loops, turn and crochet 5 sc on the same stitches from rnd 10 but now only on back loops (10). See the picture above.
- Rnd 12-25: 10 sc - 14 rounds (10)
- Stuff lightly with filling.
- Rnd 26: 1 sc. Skip the rest of the round put the stitches together, and crochet 5 sc. The closing will be on the other side compared to further down.
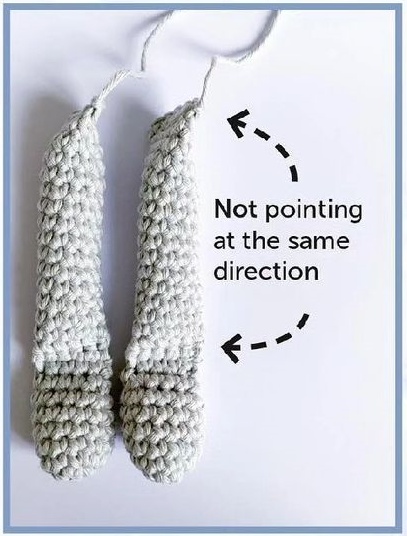
See the picture to the right.
- Fasten off and cut the yarn.
- Not pointing
- In the same direction
Leg
Make 2
- Rnd 1: 6 sc in a magic ring (6)
- Rnd 2: [inc] x 6 (12)
- Rnd 3: [1 sc, inc] x 6 (18)
- Rnd 4-6: 18 sc 3 rounds (18)
- Rnd 7: [dec, 7 sc] x 2 (16)
- Rnd 8: [dec, 6 sc] x 2 (14)
- Rnd 9-11: 14 sc 3 rounds (14)
- Rnd 12: [dec, 5 sc] x 2 (12)
- Rnd 13-16: 12 sc 4 rounds (12)
Stuff half of the leg lightly with filling.
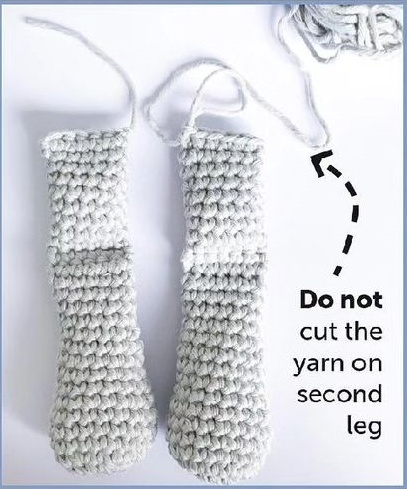
Do not cut the yarn on the second leg.
- Rnd 17: 2 sc. Skip rest of the round and put the stitches together, and crochet 6 sc.
- Rnd 18: 1 ch, turn, 6 sc (6)
- Rnd 19: 1 ch, turn, 6 sc in the front loops, turn and crochet now 6 sc on the same stitches from rnd 18 but now only on back loops (12)
- Rnd 20-26: 12 sc - 7 rounds (12)
Stuff lightly with filling.
- Rnd 27: 2 sc. Skip the rest of the round and put the stitches together, and crochet 6 sc.
First leg: Fasten off and cut the yarn.
Second leg: Do not cut the yarn. Continue with the body.
Body & Ears
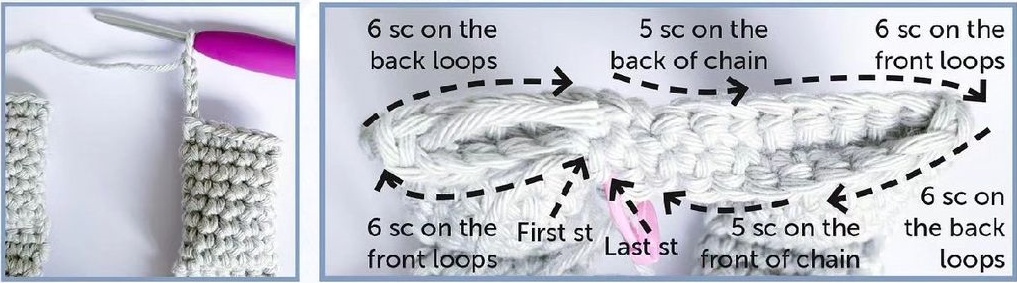
Continue from the second leg and make 5 ch.
- 6 sc on the back loops.
- 5 sc on the back of chain.
- 6 sc on the front loops.
- 6 sc on the First st front loops.
Last st 5 sc on the front of chain 6 sc on the back loops.
- Rnd 28: Attach the chain with 1 sc on the first front loops on the first leg. Continue and make 5 sc on front loops. Turn the first leg and continue crochet 6 sc on the back loops. Continue crochet 5 sc on the back of the chain. Now, you are back to the second leg. Crochet 6 sc on the front loops, turn the leg and continue crochet 6 sc on the back loops. Continue crochet 5 sc on the front of the chain. (34)
- Rnd 29:4 sc, inc, 1 sc, [inc, 4 sc] x 3, inc, 1 sc, [inc, 4 sc] x 2, inc (42)
- Rnd 30-42:42 sc - 13 rounds (42)
Now, you will attach the arms.
- Rnd 43: 7 sc, now take one of the arms and stitch it together with the body with 5 sc, 16 sc, take the other arms and stitch it together with the body with 5 sc, 9 sc (42)
- Rnd 44: 42 sc (42)
- Rnd 45: 9 sc, dec, 19 st, dec, 10 sc (40)
- Rnd 46: 40 sc (40)
- Rnd 47: 9 sc, dec, 18 sc, dec, 9 sc (38)
- Rnd 48: 38 sc (38)
- Rnd 49:9 sc, dec, 17 sc, dec, 8 sc (36)
Do not cut the yarn. You will now continue with the ears.
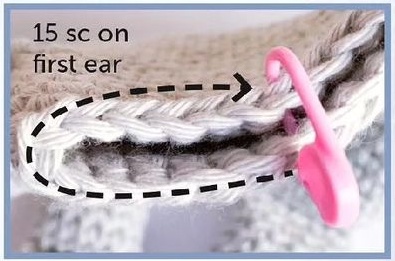
- Rnd 50: 2 sc. Attach a stitch marker on the next stitch. This will be your new beginning. Crochet 15 sc. The next round will start on the stitch where you attached the stitch marker. (15)
- Rnd 51: 7 sc, dec, 6 sc (14)
- Rnd 52: 14 sc (14)
- Rnd 53: 6 sc, dec, 6 sc (13)
- Rnd 54-56:13 sc - 3 rounds (13)
- Rnd 57: 7 sc, dec, 4 sc (12)
- Rnd 58-60: 12 sc - 3 rounds (12) Rnd 61: 7 sc, dec, 3 sc (11)
- Rnd 62: 11 sc - 3 rounds (11)15 sc on first ear
Stuff the body lightly with filling and place a rattle or squeezy ball (optional) inside. Stuff the ear firmly with filling.
- Rnd 63: 8 sc, dec, 1 sc (10)
- Rnd 64: [dec] x 5 (5) Slst in next st.
Fasten off and leave a yarn tail. Weave the yarn tail through the front loops of each stitch and pull it tight to close. Weave in the yarn end.
Second ear
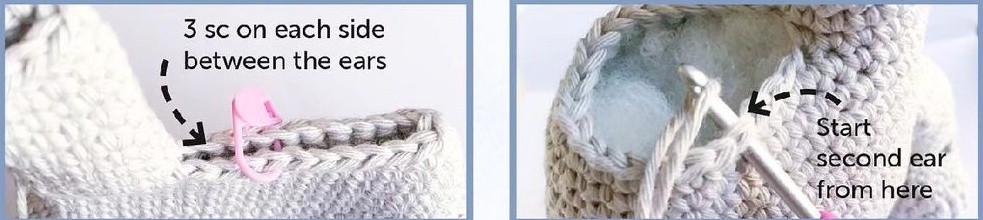
There will be 3 stitches between the ears on each side. Count 3 sc from the first ear and attach the yarn with a slip knot on the 4th stitch. Leave a long tail before you attach it - you will use this yarn tail to sew the hole between the ears.
- 3 sc on each side between the ears
Start the second ear from here
- Rnd 50: 15 sc (15)
- Rnd 51-64: Same pattern as the first ear. Slst in next st. Fasten off and leave a yarn tail. Weave the yarn tail through the front loops of each stitch and pull it tight to close. Then, weave in the yarn end.
Assembly
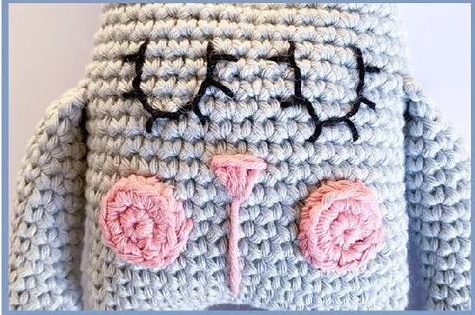
Sew the hole between the ears with the yarn tail. Weave in the yarn end. Embroider the face with black and pink yarn. Sew the cheeks between rounds 33 and 37.