Create standout charm with this Free Crochet Tapestry Into Bag Pattern that turn simple stitches into a functional and colorful everyday bag.
What if your favorite tapestry could transform into something functional, stylish, and handmade? That’s exactly what happens in this fun project where a crochet tapestry becomes a gorgeous, custom bag. Perfect for everyday use or as a unique gift, this bag combines beauty with utility, adding a personal touch to your wardrobe.
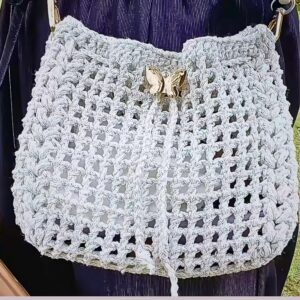
Elegant Crochet Tapestry Into Bag that Matches Any Style
The finished product is sturdy, trendy, and versatile, making it suitable for carrying essentials, showing off your creativity, or even gifting to a loved one.
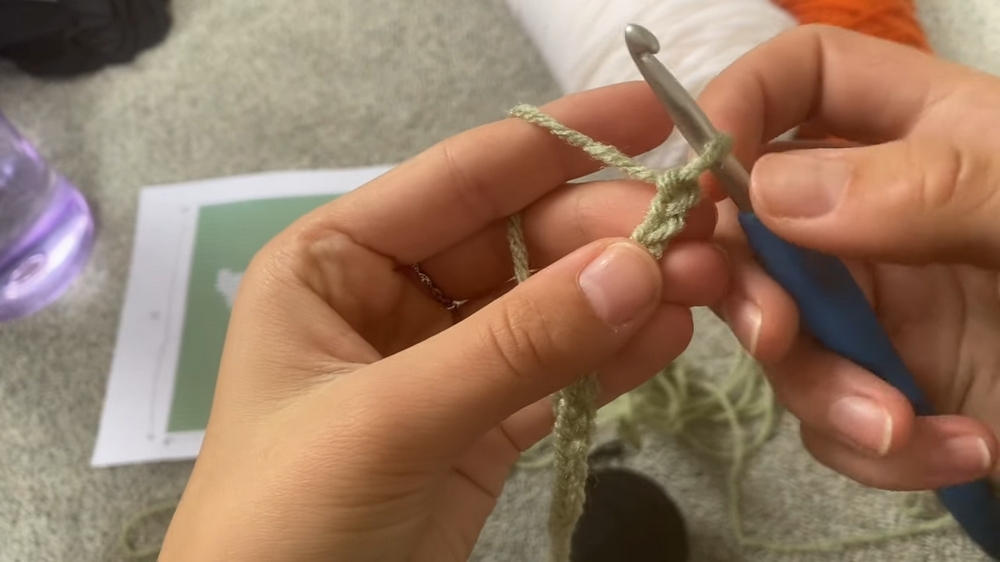
The process begins with outlining the bag’s front panel by crocheting single stitches around the edges of your tapestry. The corners are reinforced with extra stitches, ensuring a clean shape.
The second panel, made from rows of clean single crochets, mirrors the first but features a plain color background, offering a minimalist contrast. Both panels are joined by sewing them together with a tapestry needle, giving it a neat and seamless look.
The next step involves crafting the strap, which begins with stitch placement on either side of the bag. After customizing the strap’s length using single crochets, it is attached and bordered for added strength.
For those who want a more polished appearance or extra durability, a fabric lining is sewn in, ensuring the bag is as functional as it is beautiful.
Part 1:
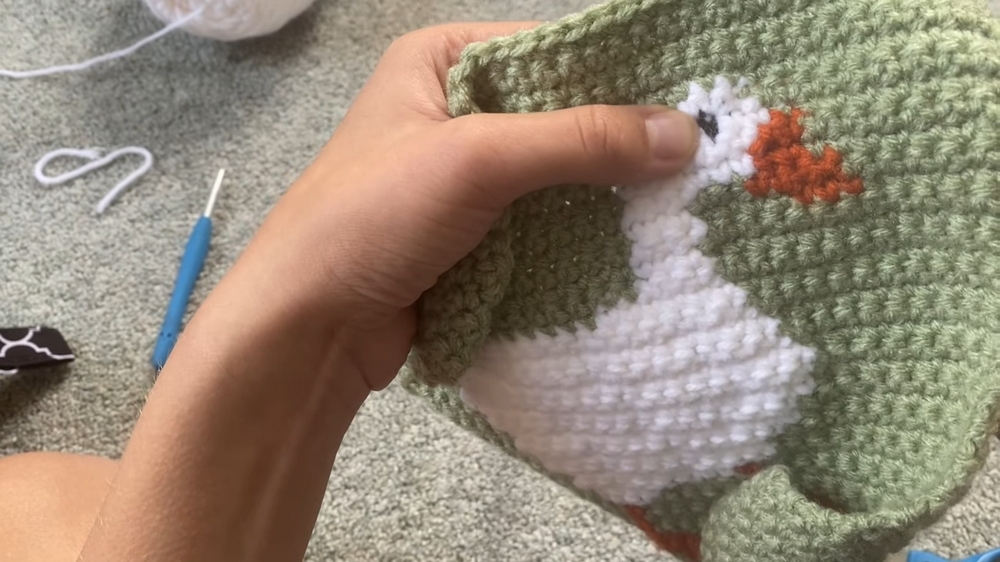
Special Feature: Achieves a highly detailed, graphic look similar to cross-stitch, using only the single crochet (SC) stitch. It employs a special technique for straight edges by not chaining one to turn.
Level of Difficulty: Beginner Friendly (The pattern uses only SC). The challenge level is in managing color changes and multiple strands of yarn. The tutor notes that the duck pattern is easy as it has a maximum of two colors changing per row.
Materials: 5 mm crochet hook, yarn in all pattern colors (e.g., green, orange, white, black), tapestry needle.
Part 2:
Special Feature: Adds structure and longevity with a fully sewn fabric lining and a seamless-looking strap attachment.
Uses: A durable, lined shoulder or crossbody bag.
Materials: Tapestry panel from Part 1, a matching plain back panel, tapestry needle, fabric for lining, sewing machine (or needle and thread), and pins.
Step-by-Step Details: Creating the Panel
This comprehensive tutorial have two parts( part 1 and part 2 )the process of converting a simple grid pattern into a vibrant, functional messenger-style bag. It thoroughly covers the challenging aspects of tapestry crochet, focusing on clean color changes and yarn management, and concludes with instructions for shaping the bag, adding a strap, and sewing in a durable lining.
Final Tip
To ensure your handmade items are durable and maintain their shape, a practice called blocking is essential. After finishing any crocheted panel, wet the piece thoroughly, gently shape it to the precise size and shape you need, and pin it flat to a mat to dry. This sets the stitches and yarn fiber, making the finished panels perfectly uniform and professional for assembly.