
Imagine a little coffee cup that's not for drinking but admiring how adorable it is! We've got this super fun crochet pattern to share with you. It's a guide to help you make your own "Crochet Mr Coffee cup ". This isn't a real cup, but a cute crocheted one you can make with yarn and a crochet hook. It's really fun to create, and once you're done, you'll have a sweet little crochet coffee cup to show off. Let's dive into the steps together and make this cutie come to life!
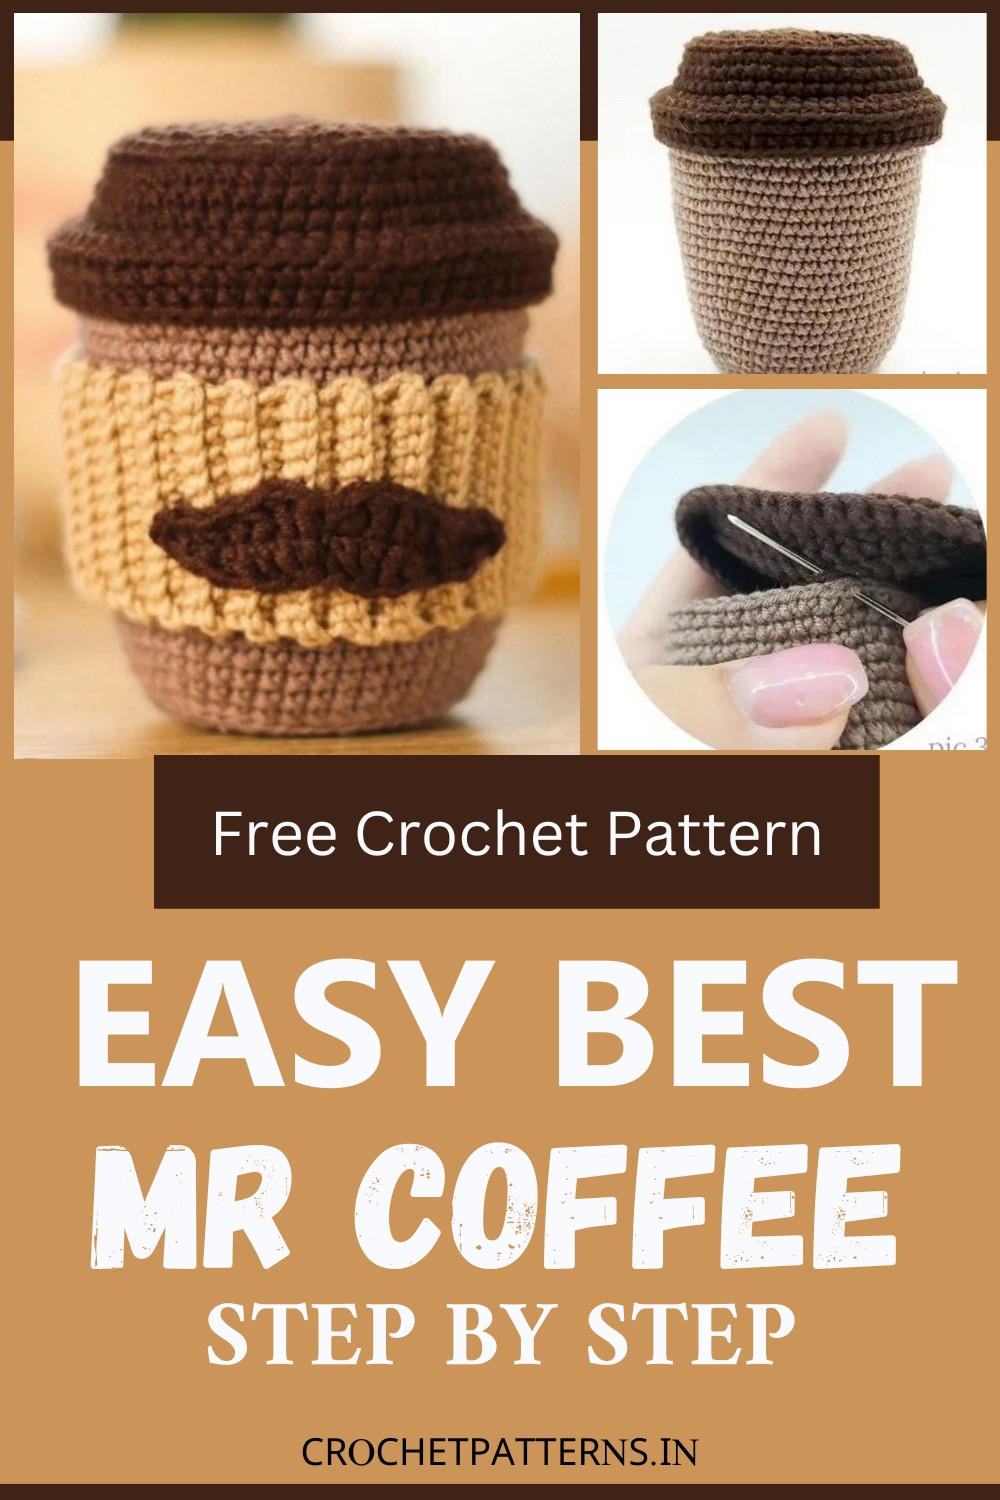
Crochet Mr Coffee Pattern
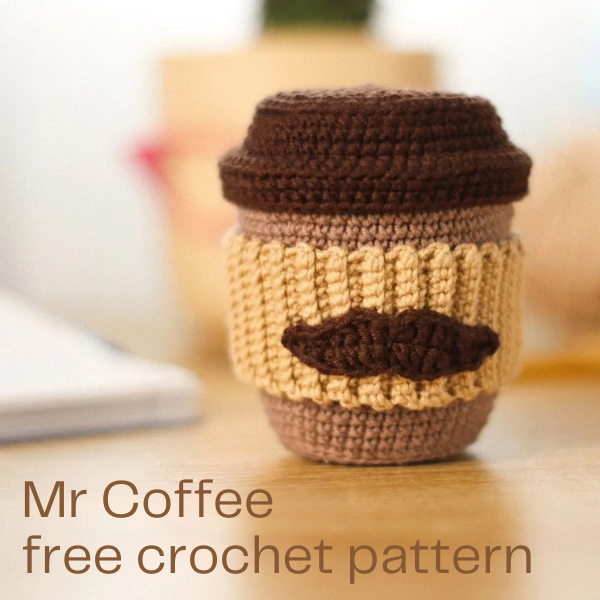
Design and pattern by @studio.wow_toys
Abbreviation
- MR Magic Ring
- SC single crochet
- INC increase
- DEC decrease
- DC double crochet
- HDC-hald double crochet
- CH-chain stitch
- BLO - back loops only
- FLO-front loops only SS-slip stitch
- Rnd - round
Materials
- Yarn (cotton+acrylic):
- Brown, light brown, beige
- Hook 2.00 mm
- Stuffing
- Cardboard
- Needle
- Light brown yarn
Cup
- Rnd 1.6 SC in MR
- Rnd 2. 6 INC (12)
- Rnd 3. *1 SC, 1 INC* repeat 6 times (18)
- Rnd 4. *1 SC, 1 INC, 1 SC* repeat 6 times (24)
- Rnd 5. *3 SC, 1 INC* repeat 6 times (30)
- Rnd 6. *2 SC, 1 INC, 2 SC* repeat 6 times (36)
- Rnd 7. *5 SC, 1 INC* repeat 6 times (42)
- Rnd 8. BLO 42 SC
- Rnd 9. *13 SC, 1 INC* repeat 3 times (45)
- Rnds 10-12. 45 SC
- Rnd 13. *14 SC, 1 INC* repeat 3 times (48)
- Rnds 14-16. 48 SC
- Rnd 17. *15 SC, 1 INC* repeat 3 times (51)
- Rnds 18-20. 51 SC
- Rnd 21. *16 SC, 1 INC* repeat 3 times (54)
- Rnds 22-24. 54 SC
- Rnd 25. *17 SC, 1 INC* repeat 3 times (57)
- Rnds 26-28. 57 SC
Cut the yarn and leave a long end for sewing.
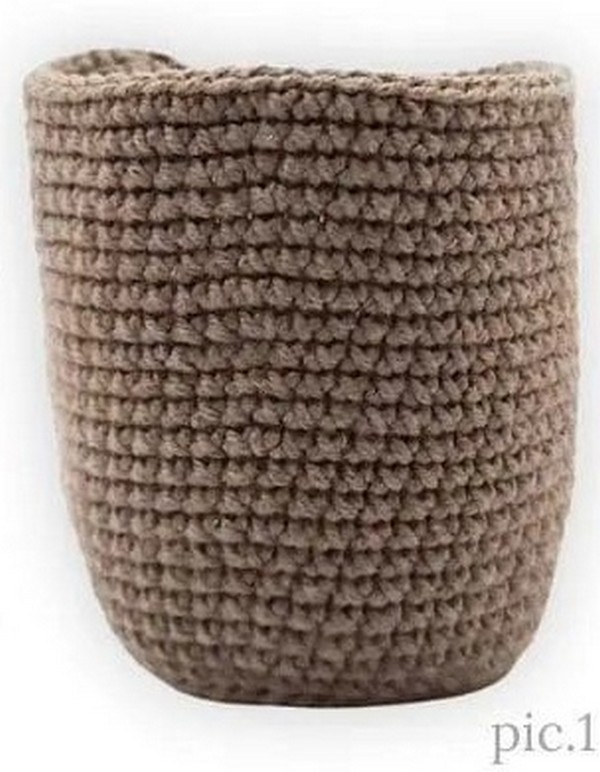
Take some cardboard and cut out a circle that fits the size of the bottom of the cup. Place the cardboard in the cup (pic.1)
Lid
Brown yarn
- Rnd 1. 6 SC in MR
- Rnd 2. 6 INC (12)
- Rnd 3. *1 SC, 1 INC* repeat 6 times (18)
- Rnd 4. *1 SC, 1 INC, 1 SC* repeat 6 times (24)
- Rnd 5. *3 SC, 1 INC* repeat 6 times (30)
- Rnd 6. *2 SC, 1 INC, 2 SC* repeat 6 times (36)
- Rnd 7. *5 SC, 1 INC* repeat 6 times (42)
- Rnd 8. *3 SC, 1 INC, 3 SC* repeat 6 times (48)
- Rnd 9. BLO all round *15 SC, 1 INC* repeat 3 times (51)
- Rnd 10. *8 SC, 1 INC, 8 SC* repeat 3 times (54)
- Rnd 10. *17 SC, 1 INC* repeat 3 times (57)
- Rnd 11. FLO all round *9 SC, 1INC, 9 SC* repeat 3 times (60)
- Rnd 12. *9 SC, 1 INC* repeat 6 times (66)
- Rnd 13. BLO 66 SC
- Rnd 14. 66 SC
Fasten off in an invisible way.
How To Make Invisible Finish
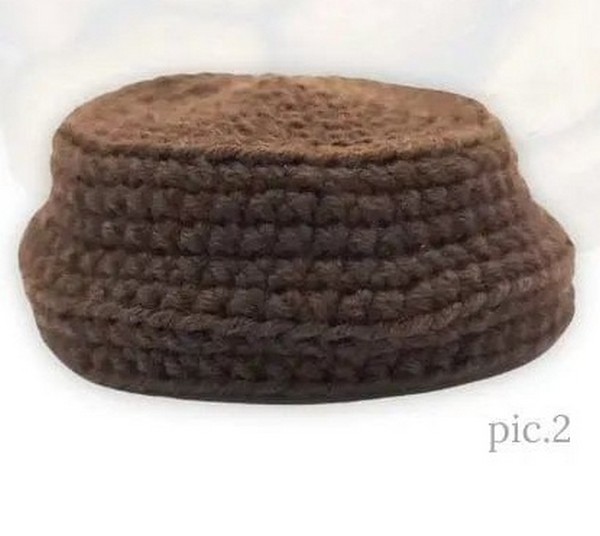
- Take some cardboard and cut out a circle that fits the size of the top of the lid. Place the cardboard in the lid.
- To stuff the cup. Take a needle and sew the lid onto the back loops of the 11th round to the last round of the cup
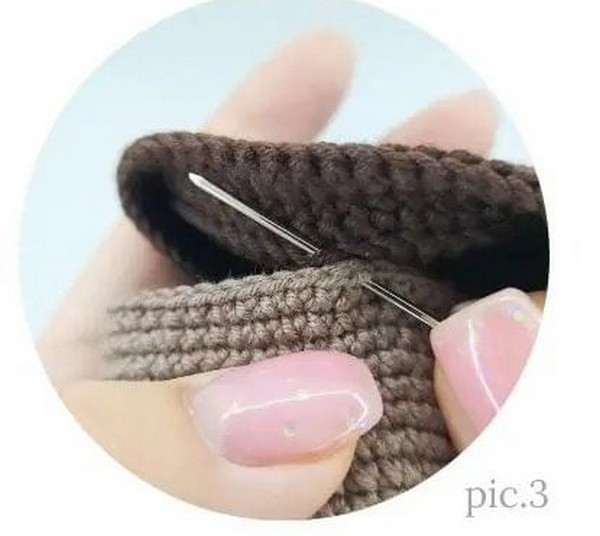
Stuff the cup as you sew.

Hodler
Beige yarn
- Make a chain of 13 chain stitches. Start in 2nd loop from the hook
- Back-and-forth rows
- Row 1. 12 SC, 1 CH
- Rows 2-55. /54 rows/ BLO 12 SC, 1 CH
Cut the yarn, and leave the end for sewing.

Mustache
Brown yarn
- Make a chain of 18 chain stitches.
- Start in 2nd loop from the hook
- 1 SS, 1 SC, 1 DEC, 1 HDC, 2 DC, 1 HDC, 1 SS, 1 HDC, 2 DC, 1 HDC, 1 DEC, 1 SC, 1 SS, 2 CH, on the other side of foundation chain 3 SC, 1 HDC, 1 DC, 1 DEC DC, 1 SS, 1 DEC DC, 1 DC, 1 HDC, 3 SC, 1 SS
- Cut the yarn and leave the end for sewing.


