
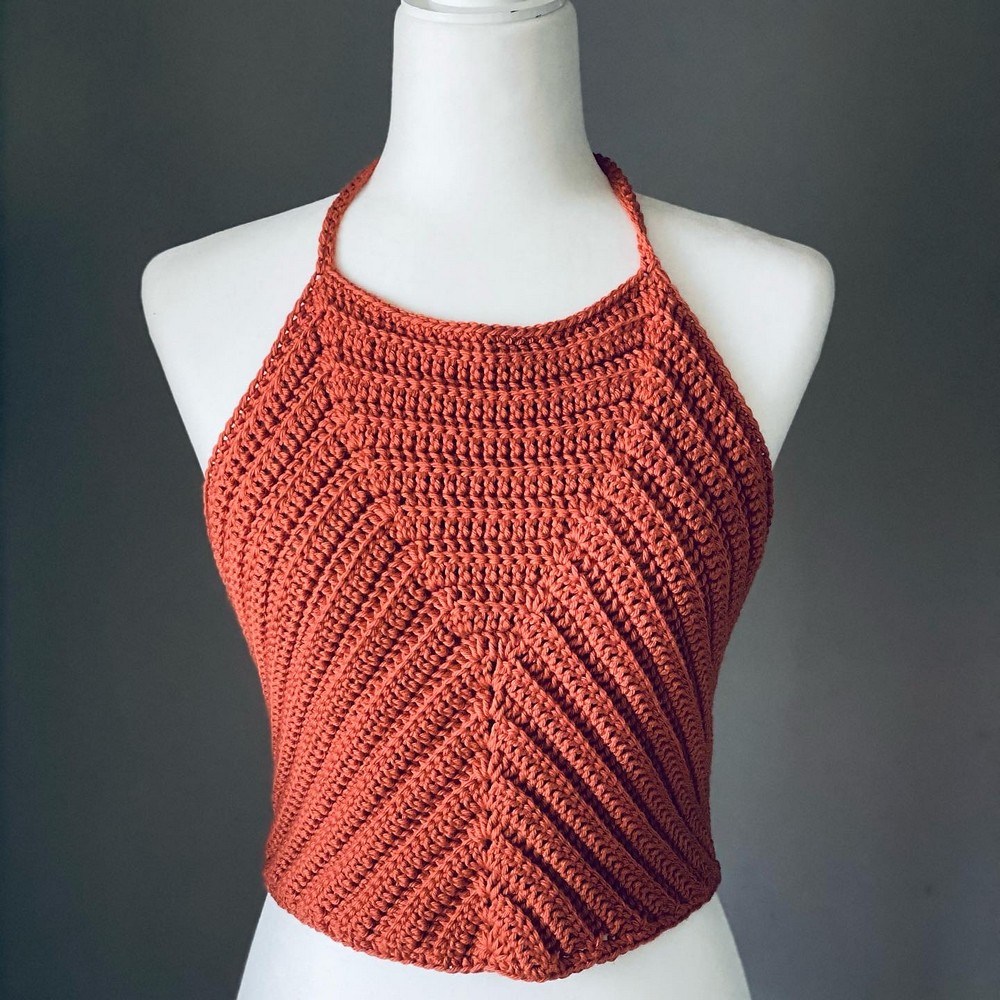
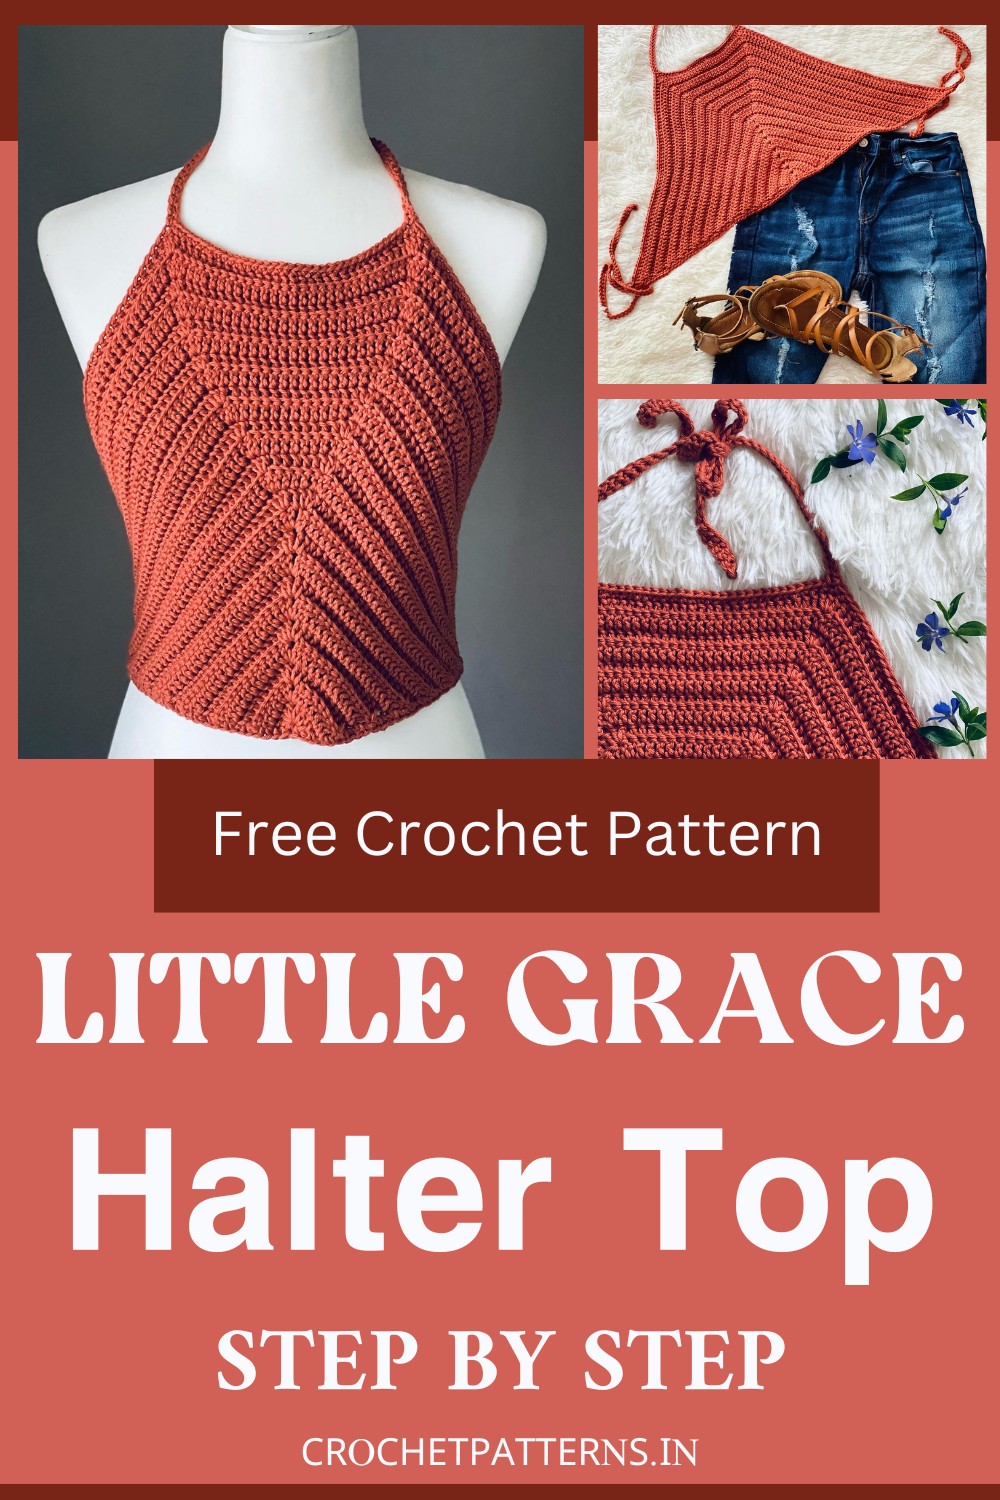
The Little Grace Halter Top Crochet Pattern is an absolute delight to work on. The design manages to blend simplicity and elegance in an exceptional way, resulting in a chic, boho-inspired summer essential perfect for every wardrobe. What is extravagantly admirable about this pattern is the artful combination of form and function, offering a perfect fit while maintaining an astoundingly stylized appeal. The floral and leaf motifs provide a sense of charm and romance, turning this crochet piece into an effective statement of impeccable craftsmanship. Every stitch and row unfolds into an artwork that brings immense satisfaction and pride.
Crochet Little Grace Halter Top Pattern
Supplies:
- Yarn: medium/4/worsted weight cotton: I recommend "I Love This Cotton” by Hobby Lobby.
- XS- 110g//198yds
- S- 120g//215yds
- M- 145g//261yds
- L- 160g//288yds
- XL-185g//333yds
- 5 mm (H) crochet hook
- Yarn needle
- Scissors
- Stitch Markers
Gauge:
Check the gauge after row 5. Each working edge should be 4” to center point.
Pattern:
SECTION A
Start with a magic ring or:
- CH 4, join to first CH with SL ST.
- Working into the center of the ring and over the starting tail.
Row 1
- CH 3 (counts as a DC)
- DC 4
- CH 1
- DC 5
- Pull the starting tail to cinch closed [11]
Row 2
- CH 3 (counts as a DC here and throughout), turn
- DC in the same ST
- DC BLO until CH SP
- [2DC, CH 1, 2DC] in CH SP
- DC BLO in next ST and each across
- 2DC in turning CH [17]
For Row 3-8
Repeat row 2.
SECTION B
All sizes:
Row 1
- CH 3 (counts as a DC here and throughout), turn
- DC in the same ST
- DC BLO in each ST until 1 remains before CH SP
- 3DC in next ST
- Mark 2nd ST just made
- DC in CH SP
- 3DC in next ST
- Mark 2nd ST just made
- DC BLO in the next ST and each ST across
- 2DC in turning CH
Row 2
- CH 3 (counts as a DC here and throughout), turn
- DC in the same ST
- DC BLO in each ST until marked ST
- 3DC in marked ST
- Mark 2nd ST just made
- DC BLO in next ST and each until marked ST
- 3DC in marked ST
- DC BLO in next ST and each across
- 2DC in turning CH
For Row 3-13
Repeat row 2
STRAPS
Working with the same yarn still attached:
- CH 76
- SC in 2nd CH from hook and each across
- The first waist strap was just made
- Working across the bottom edge:
- 2 SC on the edge of each row
- SC in the starting ring
- 2 SC on the edge of each row across
- CH 76
- SC in 2nd CH from hook and each across
- The second waist strap made
- Working along the side:
- SC in each ST until marked ST
- SC in marked ST
- CH 56
- SC in 2nd CH from hook and each across
- First neck strap made
- Working along the top:
- SC in next ST and each across until marked ST
- DO NOT SC in marked ST
- CH 56
- SC in 2nd CH from hook and each across
- Working along the final side:
- SC in marked ST and each across until 2 remain
- SL ST in the remaining 2
- SL ST in 1st CH of the waist strap
- Fasten off.
- Weave in ends.


