
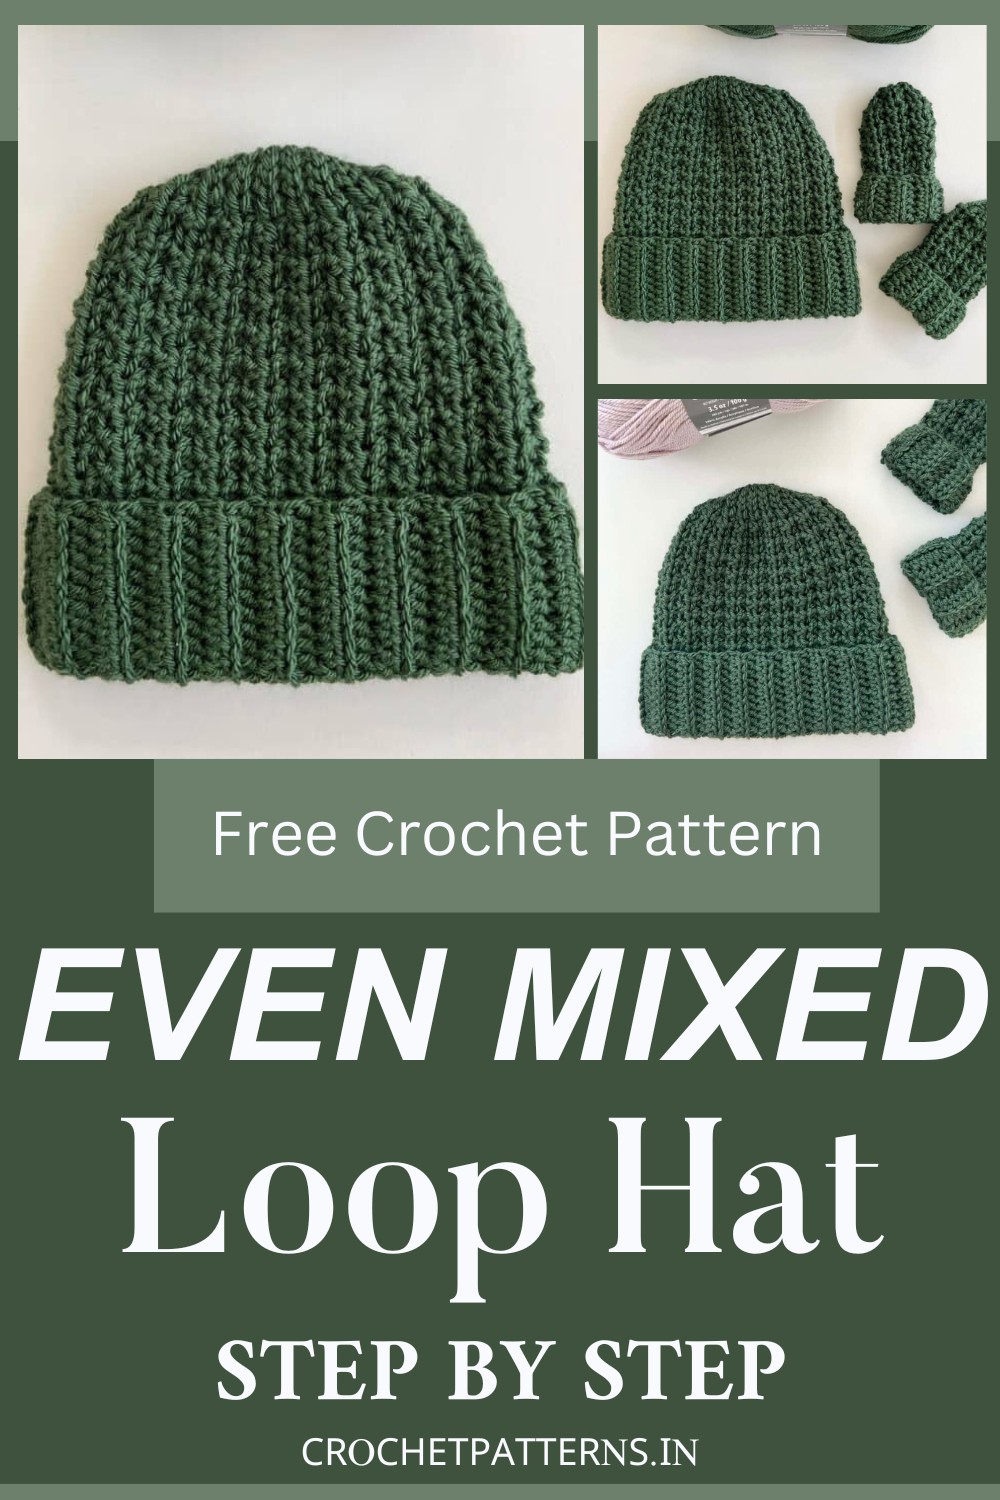
This crochet Even Mixed Loop Hat pattern is a cool and useful design that pops because it is creative and practical. The pattern's use of different crochet stitches to form textures makes it look great and feels nice to touch. The hat you end up with doesn't just look good, but it's also super warm, perfect for winter. Plus, the pattern is designed so you can also make a matching set of mitts, which is nice. This pattern clearly shows how clever and creative crochet knitting can be.
Crochet Even Mixed Loop Hat
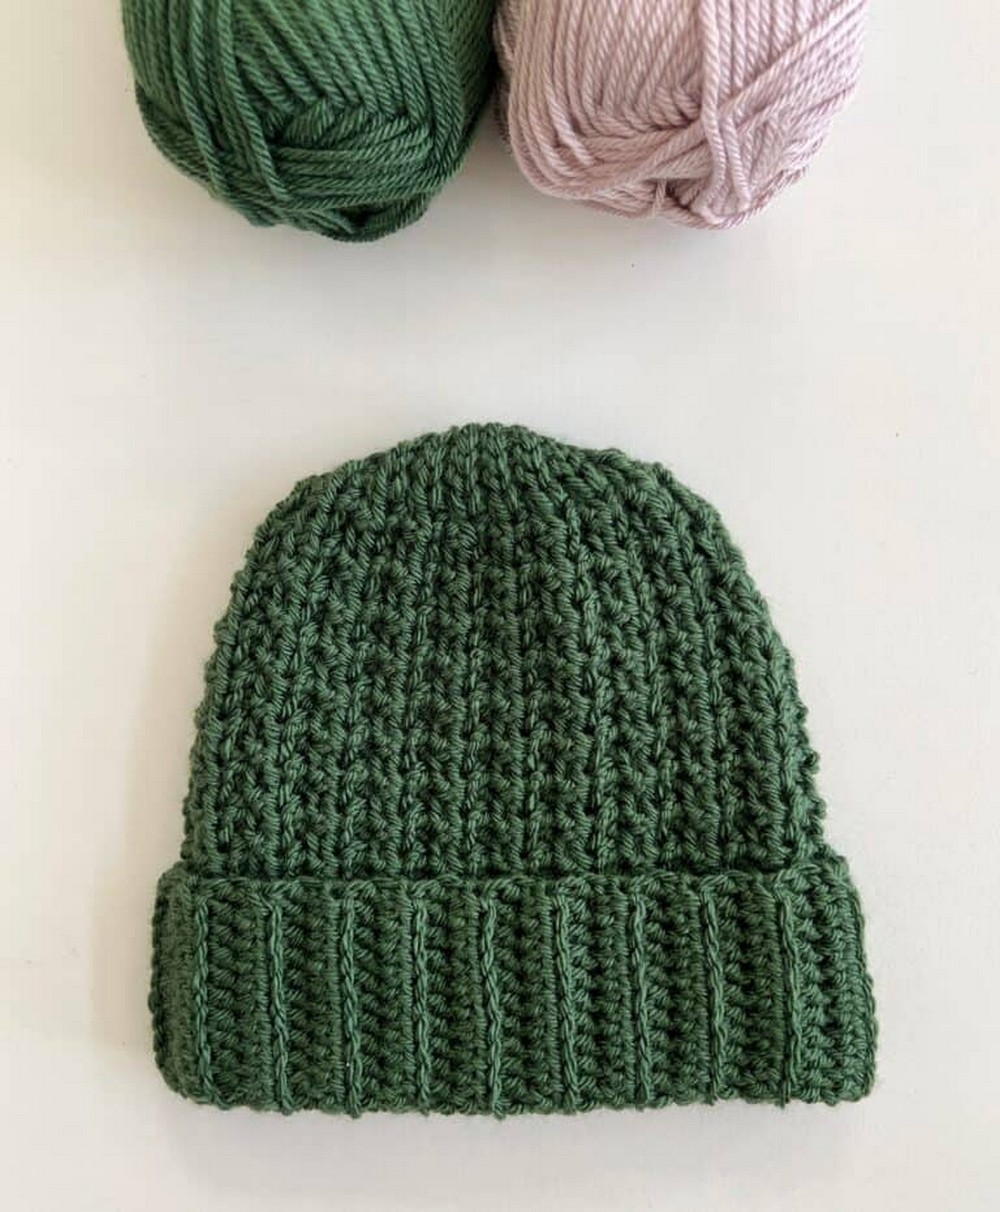
Materials needed:
- Patons Canadiana (100% acrylic, 100 g / 3.5 oz, 187 m / 205 yds)
- 1 skein for children’s sizes, 2 skeins for adults
- Size H 5 mm hook
- Tapestry needle
- Stitch markers
- Scissors
- Tape measure
Stitches used:
- Slip Stitch (SL ST): Insert hook, YO, pull back through and through loop on hook.
- Half-double crochet (HDC): YO, insert hook, YO, pull loop through, YO, pull through all loops on hook.
Pattern:
Gauge
4 inches = 15 sts and 12 rows of back loop HDC taken from the brim.
Hat Pattern
- Starting Chain: Chain 45 for the child's height of 10 inches. (Adjust chain length as needed based on size chart)
- Row 1: SL ST into the second chain from the hook and into the next 4 chains. HDC into each remaining chain. CH 1 and turn.
- Row 2:
- HDC into the first St.
- Work Back Loop: HDC into each of the next 14 sts (mark the 15th st).
- Repeat Pattern: Work 1 Front Loop HDC into the next st, 1 Back Loop HDC into the next st. Repeat this pattern in each HDC.
- Work Back Loop SL ST into each of the remaining 5 sts. CH 1 and turn.
- Tip: Mark the last Back Loop HDC (15th st) to distinguish between the brim and the mixed loop section.
- Row 3:
- Back Loop SL ST into each of the first 5 sts.
- Work 1 Front Loop HDC into the next st, 1 Back Loop HDC into the next st. Repeat from * to the marked st.
- Back Loop HDC into each of the remaining sts. CH 1 and turn.
- Repeat rows 2 and 3 until 41 rows or the piece measures 3 inches less than the required head circumference.
- Closing: For the last row, end at the brim. Tie off with a long tail for sewing. Fold the hat, aligning the starting chain row with the final row. Use the tapestry needle to sew by going under loops of HDC and loops of starting chain. At the top, weave the needle through the top loops of the slip stitches several times to cinch it in. Secure the weave and fold up the brim.
Adjustments for Size
For sizes smaller than 6 months, adjust the slip stitches to 3 and the brim to 3 inches.
Bonus: Mitts Pattern (for up to 18 months)
- Starting Chain: Chain 25.
- Row 1: SL ST into the second chain from the hook and into each of the next 2 chains. HDC into each remaining chain. CH 1 and turn.
- Row 2:
- HDC into the first st.
- Back Loop HDC: into each of the next 8 sts. (mark the 9th st)
- Repeat Pattern: Work 1 Front Loop HDC into the next st, 1 Back Loop HDC into the next st. Repeat from * in each HDC.
- Work Back Loop SL ST into each of the remaining 3 sts. CH 1 and turn.
- Tip: For clarity, mark the last Back Loop HDC (9th st).
- Row 3:
- Back Loop SL ST into each of the first 3 sts.
- Work 1 Front Loop HDC into the next st, 1 Back Loop HDC into the next st. Repeat from * to the marked st.
- Back Loop HDC into each of the remaining sts. CH 1 and turn.
- Repeat rows 2 and 3 for 13 rows.
- Finish by sewing the mitts together following the method described for the hat.


