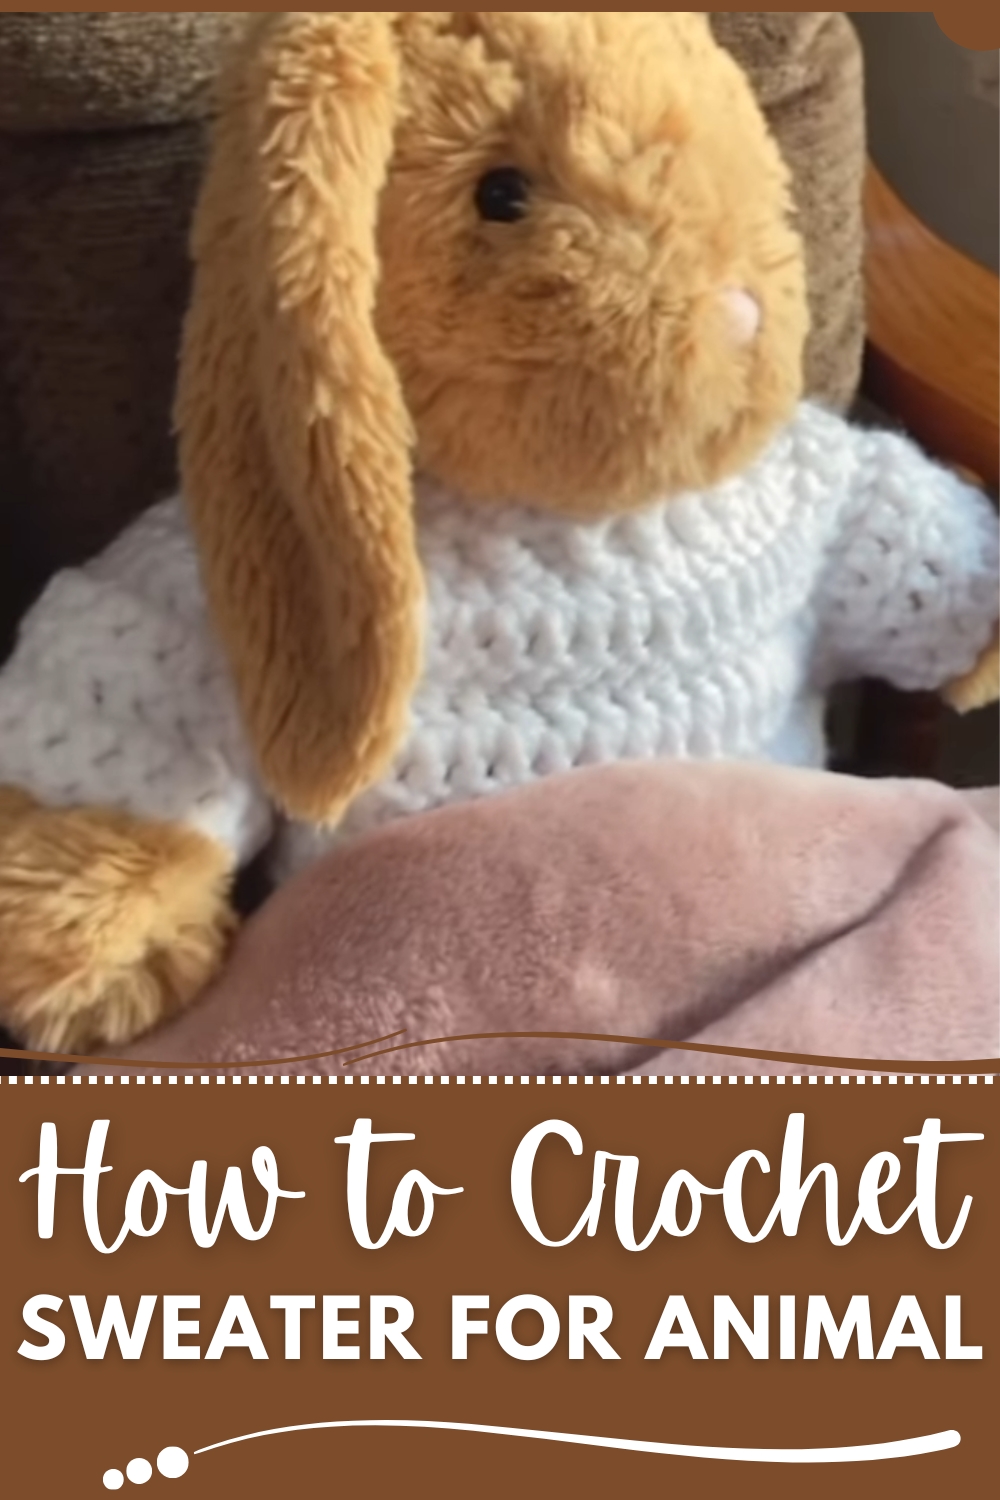
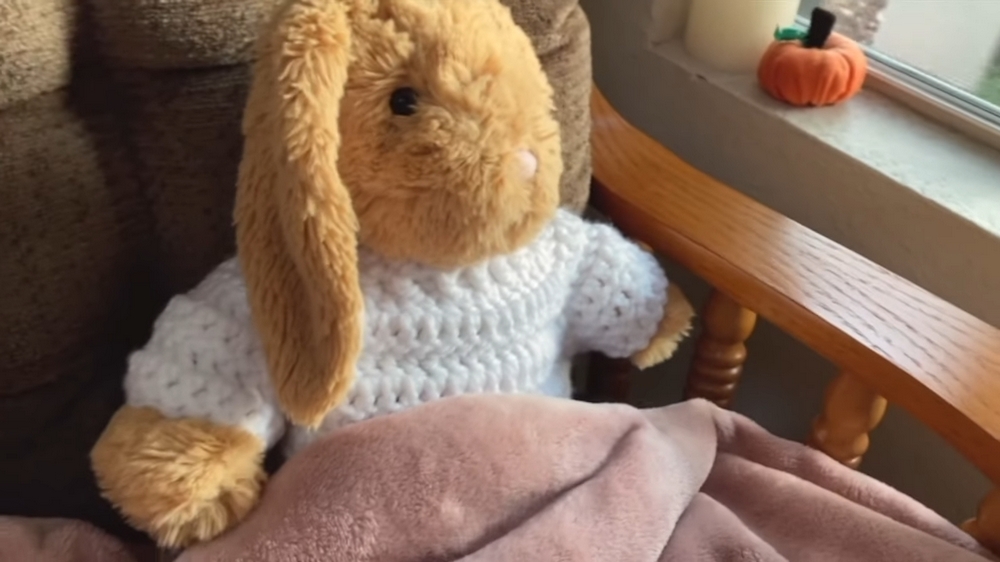
Warm furry friends with this Crochet Sweater for Animal Pattern, a delightful piece that adds comfort, charm, and style to beloved pets.
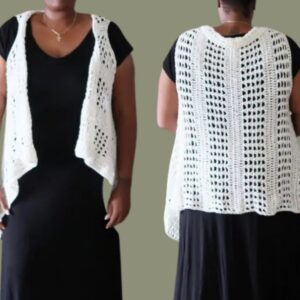
A playful pet bounding through the garden or resting quietly indoors looks even more endearing when wrapped in something soft and thoughtfully made. A crochet sweater for animals provides warmth while still allowing complete freedom of movement, making it both practical and charming. Its gentle texture feels comfortable against the fur, offering a cozy shield during crisp mornings, breezy evenings, or cooler walks outdoors. Unlike ordinary garments, it reflects attention to detail and affection, turning everyday wear into a meaningful expression of care.
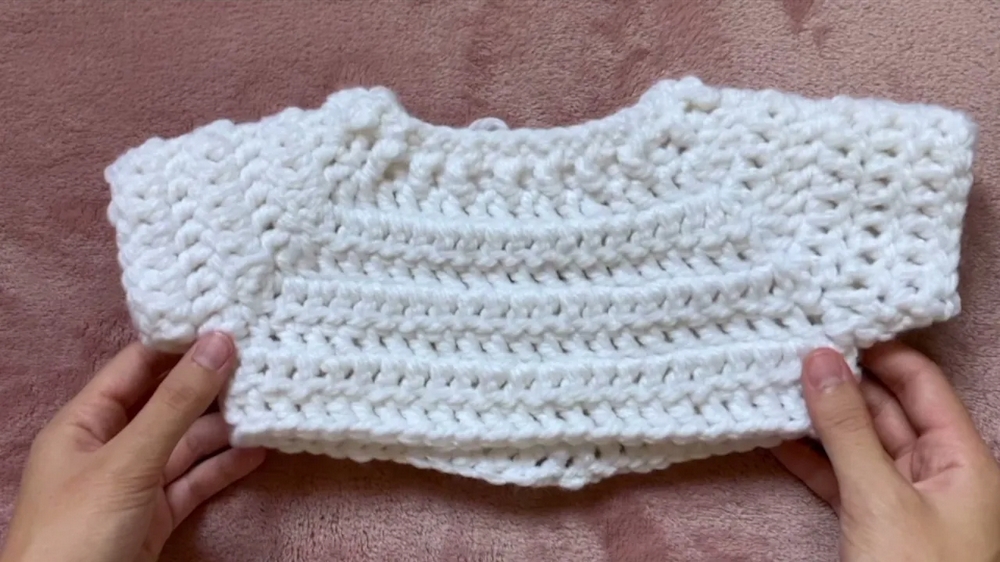
Whimsical Crochet Sweater for Animal for Special Moments
This type of sweater is not only about warmth but also about style and personality. Whether chosen in bright tones to match a lively spirit or in neutral shades for a subtle touch, it brings a distinctive charm that makes pets stand out. For smaller companions, it ensures they stay snug, while larger pets gain an added layer of elegance and comfort. Easy to slip on and wear, it keeps practicality in balance with beauty.
As a thoughtful gift, it carries sentimental value, showing the depth of love between owner and pet. A crochet sweater for animals is more than clothing—it is comfort, warmth, and joy expressed through a timeless piece of wearable care.
Materials Needed
- Yarn:
- Super chunky (thick) yarn; white was used in the video.
- Crochet Hook:
- 6.5 mm crochet hook (a slightly larger hook can be used for a looser texture).
- Safety Pins or Stitch Markers:
- For marking specific stitches during rounds (e.g., for the double crochet increases).
- Scissors:
- For trimming yarn ends.
- Tapestry Needle:
- (Optional) For weaving in yarn ends.
Special Features
- Chunky Yarn:
- The project uses super chunky yarn for a thick and cozy texture, which is ideal for fall or winter and adds a warm and snug look to the sweater.
- Beginner-Friendly Adaptation:
- The pattern is simplified to suit beginners while still introducing some intermediate stitches, making it a great way to learn more about crocheting garments.
- Custom Fitting:
- The creator encourages testing the fit on your stuffed animal during the process, ensuring the final sweater is snug yet wearable.
- Alternating Stitch Technique:
- Features a mix of front and back post double crochet stitches for texture, giving the sweater a unique ribbed look.
- Functional Sleeves and Armholes:
- Includes detailed instructions for creating realistic armholes and long sleeves for a more polished, garment-like finish.
Step-by-Step Instructions
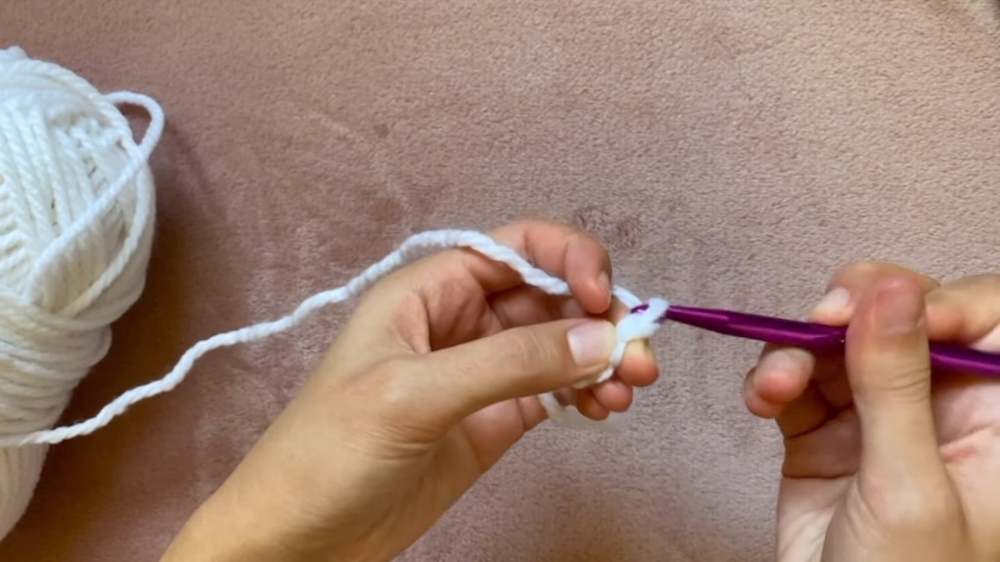
1. Creating the Foundation Chain
- Slip Knot:
- Create a slip knot by twisting a yarn loop and pulling one side through. Insert the crochet hook and pull the knot tight around the hook.
- Chain Stitch (42 Chains):
- Yarn over the hook and pull through the loop to create chains. Keep the loops loose while chaining. Repeat until you have 42 chains.
- Check Size:
- Wrap the chain around the stuffed animal’s neck to ensure it will fit over the head.
- Join into a Circle:
- Insert the hook into the first chain you created, yarn over, and pull through both loops to form a circle using a slip stitch.
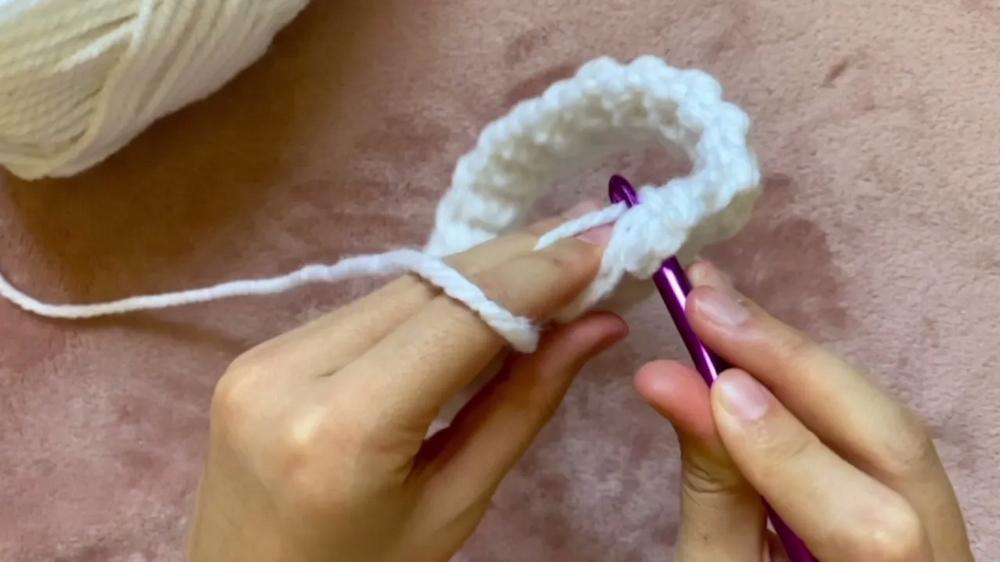
2. Round 1: Single Crochet
- Chain 1:
- Chain one stitch to start the round.
- Single Crochet Each Stitch:
- Insert the hook into the next chain, yarn over and pull through (two loops on the hook), then yarn over again and pull through both loops. Repeat this in each stitch around the circle (total: 42 stitches).
- Close with a Slip Stitch:
- Insert the hook into the first single crochet stitch, yarn over, and pull through both loops to close the round.
3. Round 2: Alternating Front and Back Post Double Crochets
- Chain 3:
- Begin the round by chaining three stitches (this counts as the first double crochet).
- Front Post Double Crochet (FPDC):
- Yarn over, insert the hook from front to back of the post below, yarn over, and pull through the loop. This creates three loops on the hook. Yarn over, pull through the first two loops, and then yarn over again to pull through the last two loops.
- Back Post Double Crochet (BPDC):
- Yarn over, but this time insert the hook from the back to the front of the post below. Complete the stitch as you would the FPDC.
- Repeat Around:
- Alternate between FPDC and BPDC for the entire round. Close the round with a slip stitch.
4. Round 3: Double Crochet with Increases
- Chain 3:
- Start the round with three chain stitches.
- Double Crochet (DC):
- Yarn over, insert the hook into the next stitch, yarn over and pull through (3 loops on the hook), yarn over and pull through the first 2 loops, then yarn over again and pull through the last 2 loops.
- Create Increases:
- After six double crochets, make three double crochets in the same stitch (this creates increases). Use stitch markers to mark the center of the increases.
- Continue:
- Alternate between 13 double crochets and three in the same stitch to complete the round.
5. Additional Rounds with Increases
- Continue working additional rounds of double crochet with increases at the marked stitches to form the sweater shape. Use safety pins to keep track of increase points.
- Repeat this process for at least 2-3 more rounds, flipping the work after each round for better stitching.
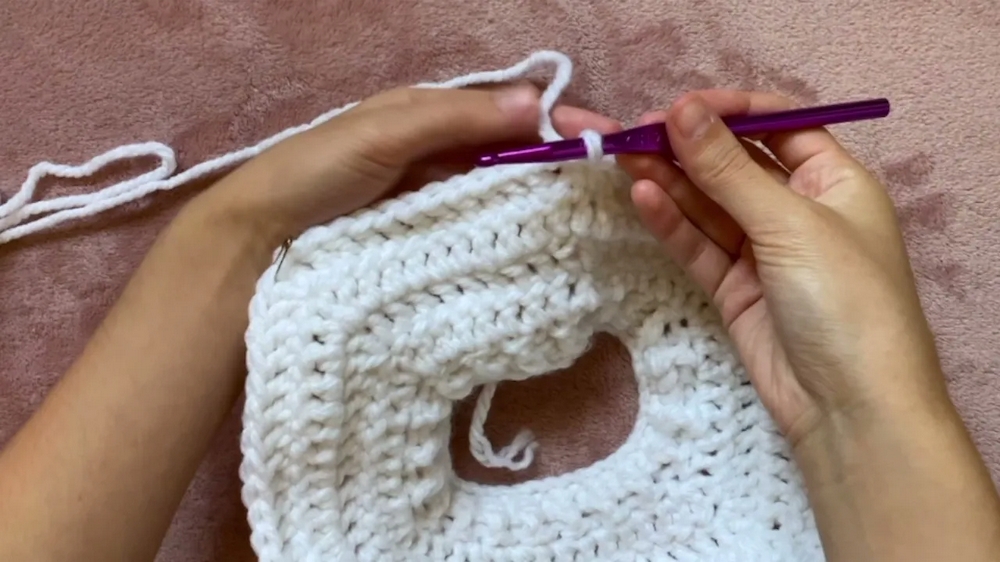
6. Creating Armholes
- Crochet Halfway:
- Work double crochets until you reach the first marked stitch.
- Fold the Piece:
- Fold the piece in half to align the increase points.
- Join for Armholes:
- Work a double crochet through the marked stitch and the stitch directly beneath it to create the armhole. Repeat on the other side.
- Continue Body:
- Complete the round with double crochet, proceeding in one continuous circle with the armholes now formed.
7. Finishing the Body
- Work 2-3 additional rounds of double crochet to add length to the sweater.
- Test the fit on your stuffed animal to adjust length.
8. Add Sleeves
- Attach Yarn to Sleeve Area:
- Add yarn to the sleeve base and chain 3 to begin.
- Work the Sleeve Rounds:
- Double crochet around the armhole, decreasing (double crocheting two together) at the base to taper the sleeve.
- Adjust Length:
- Add rounds of double crochet for the desired sleeve length.
- Finish Off:
- Slip stitch to close, cut the yarn, and weave in the ends.
Level of Difficulty
Beginner-Friendly
- The pattern uses simple stitches like single crochet, double crochet, and slip stitches, with clear explanations for slightly advanced techniques (e.g., front/back post stitches and increases).
- Some areas may require practice, but overall, it’s accessible for beginners.
Tutor’s Suggestions
- Use a Looser Chain:
- Avoid making your foundation chain too tight, as this will affect stitching flexibility later.
- Check Fit Regularly:
- Wrap the sweater around the stuffed animal at different intervals to ensure it’s on track.
- Be Patient with Stitches:
- Front and back post stitches take time to learn — replay the tutorial as needed.
- Test for Length and Size:
- Use fewer rounds for smaller animals or add length for larger ones.
Uses
- Toy Clothing:
- Dress up stuffed animals for seasonal or decorative purposes.
- Fun Beginner Project:
- Ideal for practice and as a first garment-making experience.
- Seasonal Display:
- Perfect for fall or winter-themed displays or gifts for children.
Tip
When making the ribbed texture, keep track of the front and back post stitches by observing how each one looks. This helps you avoid mistakes and ensures a consistent pattern.
Conclusion
This cozy stuffed animal sweater is an excellent project for beginners to explore garment crocheting and learn new stitches. The step-by-step instructions make it achievable, while the chunky yarn ensures quick progress and a warm, stylish finish. Whether as a fun project for yourself or as a gift, this adorable project encourages creativity and is sure to bring a smile to anyone’s face.